Migrate from Home Assistant legacy Z-Wave to Z-Wave JS
As of version 2021.2, there is a new Z-Wave integration in Home Assistant based on Z-Wave JS, a modern Z-Wave driver built using JS, which is much more accessible for collaboration than the old one using OpenZWave.
This guide intends to help migration from the legacy Z-Wave integration to Z-Wave JS.
Background
My personal setup uses Home Assistant OS (or HassOS, formerly “HassIO”) on a Raspberry Pi 3B+. This guide will focus on that scenario, so some steps may differ for other installation methods.
Before we begin, we should also understand the difference between an “add-on” and an “integration” in Home Assistant. An “add-on” is something specific to HassOS and those with other installation methods will not have this. An “integration” provides a specific functionality in Home Assistant across all installation types.
Architecture
The fundamental architecture of the Z-Wave JS functionality in Home Assistant has two parts.
The first part is the Z-Wave JS server. This is what directly talks to your Z-Wave stick. For HassOS, this part will be provided by an add-on. For other installation methods, you will need to run the server yourself.
The second part is the Z-Wave JS integration in Home Assistant, used for all installation methods. This integration talks to the Z-Wave JS server to send commands to and receive information from your Z-Wave devices.
This split decouples Home Assistant from the Z-Wave controller, providing lots of flexibility in configuration and allowing the Home Assistant server to restart without restarting your Z-Wave network for instance.
Preparation
Take a system backup
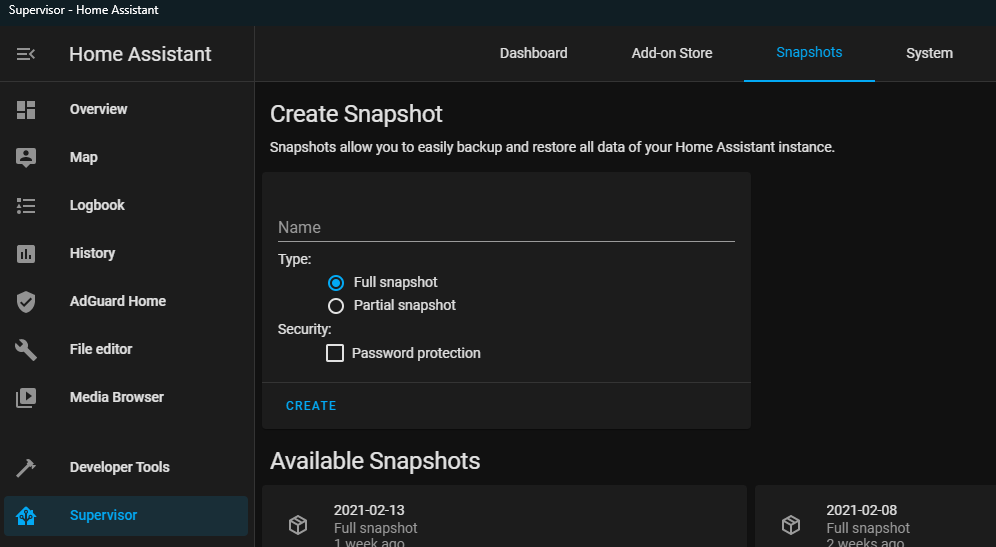
First things first, backup your system. For those of you using HassOS, take a full snapshot and once it completes download the snapshot somewhere safe like OneDrive.
Copy current entity data
After migration, you’ll need to set up all your devices and entities again. To help with this, you should copy the current entity data, specifically which entity id and names you used for each Z-Wave node id.
Go to “Developer Tools” and filter the attributes by “node_id”
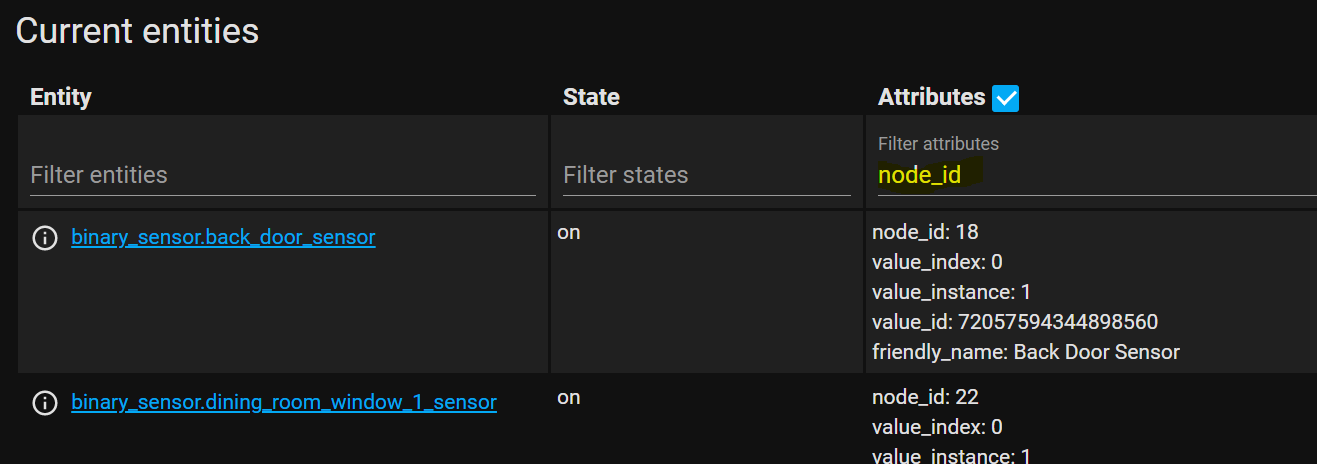
Next you’ll want to copy and and paste into Excel.
An easy way to do this is to:
- Click into the entity table
- Press
ctrl+a - Open a blank workbook in Excel
- Press
ctrl+v - Delete rows 2 and 3, which should be an empty row and filter input row
- Select “Data -> Filter”
- Sort the attributes. Note that the sorting is lexicographic, so the order will be 1, 10, 11, … 18, 19, 2, 20, 21)
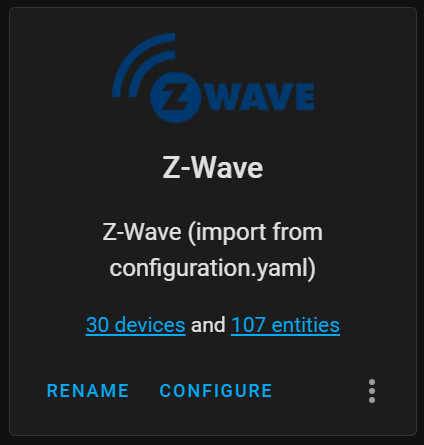
To make sure you got everything, cross check entity count. Mine shows 107 entities in Home Assistant, while Excel shows 108 rows (1 extra for the header).

Save Z-Wave configuration
Take note of your device id your Z-Wave stick uses and the network key you use. The latter is especially important or you’ll need to completely set up your Z-Wave network, re-including all devices, from scratch.
If you’ve used yaml to configure this, you can simply comment it out for now so that it’s still available to you later.
zwave:
  usb_path: /dev/ttyACM0
  network_key: !secret zwave_network_key
Migration
Uninstall legacy Z-Wave integration
From the integration page, simply delete the Z-Wave integration. As mentioned during preparation, you’ll also want to delete or comment out the zwave configuration entry if you haven’t already.
Then restart Home Assistant to ensure the legacy Z-Wave inregration is completely gone.
Install Z-Wave JS add-on
As mentioned earlier, for installation types besides HassOS, you’ll need to get the Z-Wave JS server running yourself.
For HassOS users, simply go to the Add-on Store and find the Z-Wave JS add-on.

Installation may take a couple minutes, or at least it did for me, so be patient.
After the installation finishes, go to the Configuration for the add-on and add the device USB path and network key you found earlier. Remember to paste the actual network key, not the secret name.
Note that the dropdown did not show my device, so I had to click the 3 dots and “Edit in YAML”.
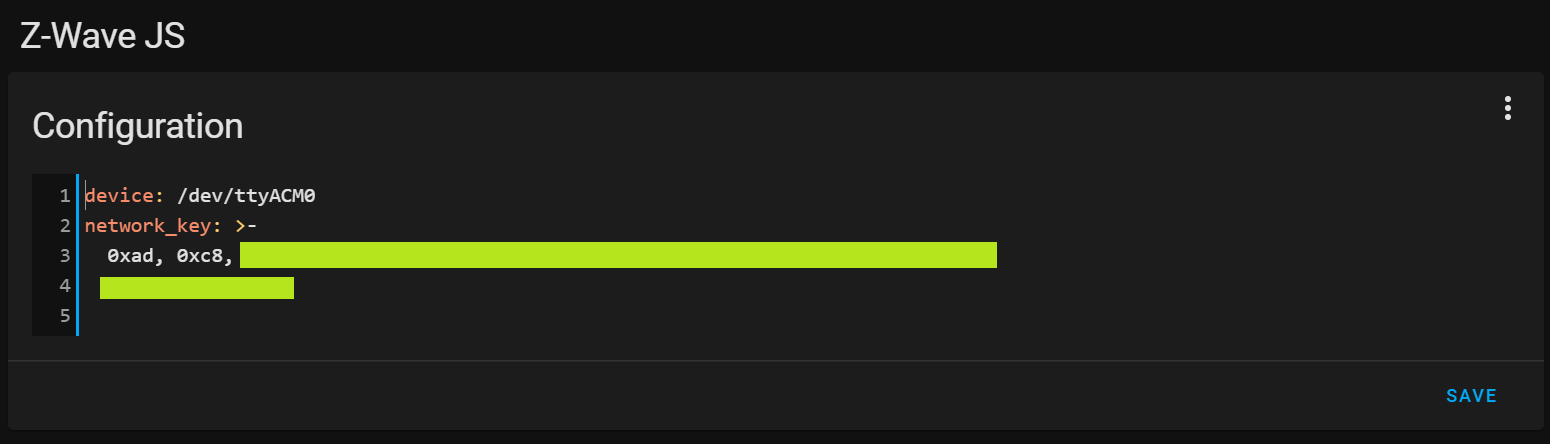
Pasting in the network key auto-formatted it for me, and my understanding is that both the “0x…” format as well as the “one hex string” formats are supported. Personally, I was using the “0x…” format before, so I just stuck with it.
Save the configuration and start the add-on. I suggest enabling the watchdog as well so that it restarts in case it crashes. You can also choose whether you want to enable auto-updates for the add-on.
Add Z-Wave JS Integration
Now that the Z-Wave JS server is now up and running, so the next step is to tell Home Assistant itself about it by adding the Z-Wave JS integration.
Go to the integrations page and add the Z-Wave integration. When asked to configur it, ensure the “Use Z-Wave JS Supervisor add-on” is checked if you’re using HassOS and the add-on. Other Home Assistant installation methods will not check that box and instead configure the integration to point to their manually configured Z-Wave JS server.
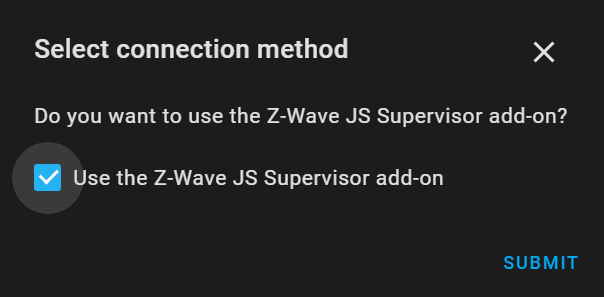
Submit and click through to finish. We’ll configure and rename each device later.
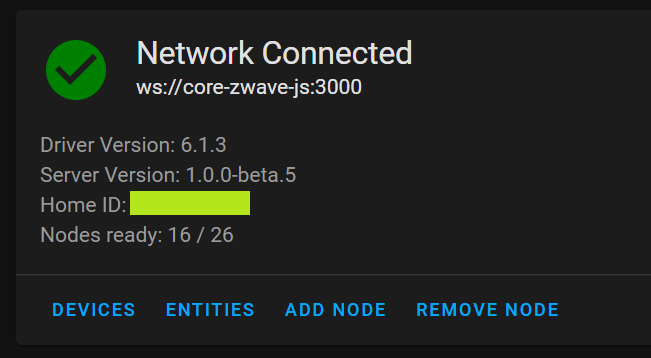
The integration should now be added!
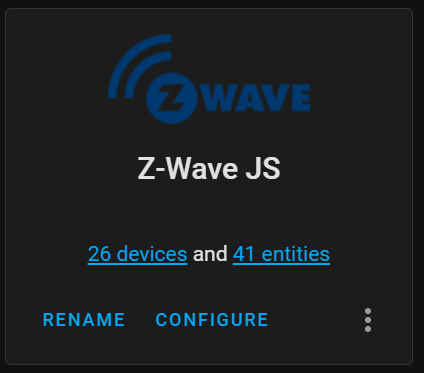
You may notice that in the image above only 26 of the original 30 devices are shown. I found that the device count is more accurate with the new integration, as with the old integration I had several dead nodes which showed up as devices with no entities in Home Assistant.
You may also notice that battery-powered Z-Wave devices may not initially be properly recognized or populated with entities until they “wake up” and check in with the controller (your Z-Wave stick).
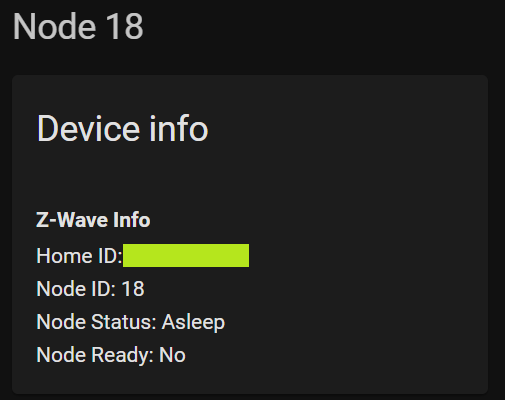
Most devices will wake up on some time interval, or you can look up how to manually wake up a device by reading the manual for that specific device, which usually involves pressing a physical button on the device.
You can check the overall status of the Z-Wave network, including how many nodes are ready, by clicking on “Configure” for the integration.
Entity migration
Because the integration uses a completely different back-end, entities may be different too. All the old zwave.* entities are gone, and there are some added but disabled entities. For example all my light switches now have an entity ending in _basic. Beyond some additions and substrations, some entities will just be different.
Configuring devices and entities
Unfortunately this part is tedious, especially if you have a large number of devices.
When clicking on a specific device you can see its node id, which you’ll then cross-reference with your entity data pasted into Excel to figure out which device it’s referring to.
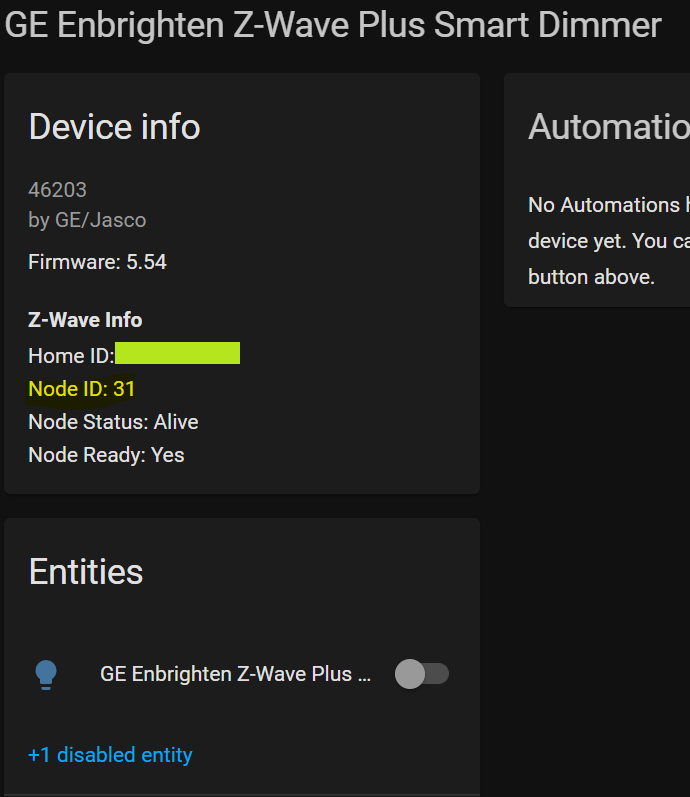
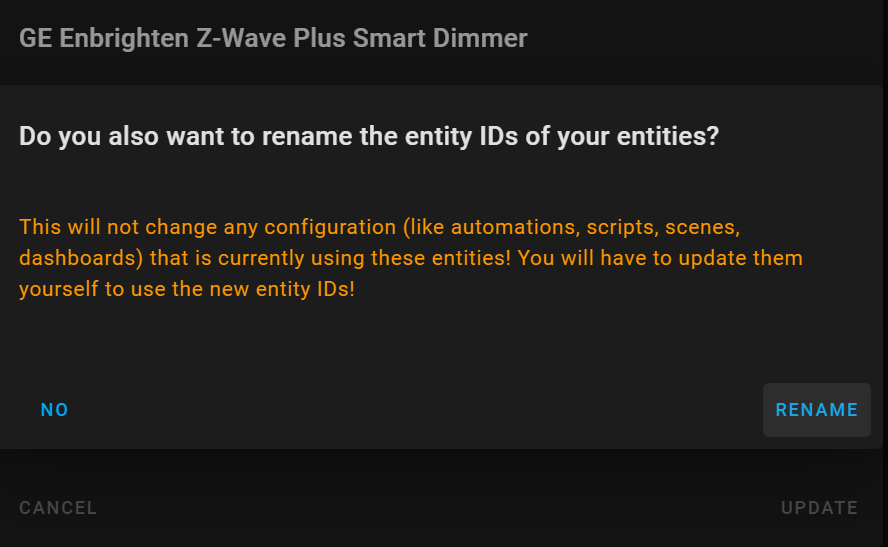
I would recommend renaming the device first before its entities, because once you rename a device Home Assistant should, for the most part, rename the entities accordingly and sometimes it’ll just happen to match what you had before.
Issues
Now despite the Z-Wave JS integration being the “new thing” and the legacy Z-Wave integration being officially deprecated (but still existing), the new integration definitely has some major flaws and feature gaps. A list of known limitations is even listed on the docs. Some people I’ve seen even go as far to say that the new integration probably should have remained in beta for some time until it fills some of these gaps and has a better migration story.
Node configuration
One feature gap in particular is that a Node Configuration UI is not yet available. According to the docs:
Configuration of Z-Wave nodes and/or configuration with the Home Assistant UI is currently not yet implemented.
Based on forum posts however, this is only missing because it didn’t make it for the 2021.2 release. That will come in some future release, and supposedly soon.
Device interview failures
One particularly disappointing aspect of the migration for me was that I was never able to get my door/windows sensors to work. I have several Aeotec door/window sensor gen 5 (ZW120-A) devices, and even after trying various restarts, pushing the hardware button on the sensors to force wake-ups, and giving it 4+ hours to stabilize, these devices consistently failed to inverview according to the Z-Wave JS logs.
Update Mar 3, 2021: As of the 2021.3 release, the door/window sensors work. I still had to wake up some of them a couple times, but that may have been because the first round I attempted the wake-ups during the initial surge of interviews, including the ones for wired devices, and the sensors only stay awake for 10 seconds.
Performance
Z-Wave JS is supposedly “blazing fast”, and others seem to corroborate the statement, however that was not the case for me. For example, I have an automation to turn on my kitchen pendants and under-cabinet lighting when the primary kitchen lights are turned on (via a light switch), and this took several seconds to trigger with the Z-Wave JS solution despite being near-instantaneous with the legacy integration.
I do wonder though whether this is perhaps due to the initial surge of traffic when migrating, including the device interview failures mentioned above, which caused the network as a whole to initially be slow. Maybe if I gave it more time it would have eventually stabilized, although as mentioned above I did give it 4 hours.
Final thoughts
Update Mar 3, 2021: As of the 2021.3 release, the door/window sensors work, so I was successfully able to migrate.
The door/window sensors being unable to successfully interview was a deal breaker for me since these tie into my home’s security system, so I eventually had to go back to the legacy Z-Wave integration via a restore from backup. This is exactly the reason backing up beforehand is so important.
Since this is still very new though, these issues will hopefully be addressed in a future update, perhaps even the 2021.3 release scheduled for this coming week. The Z-Wave JS integration, both on the Z-Wave JS side and the Home Assistant side, seems to have a lot of attention right now and looks like it’ll be actively maintained going forward, so things are likely to get better.
Unfortunately, the question for me is how quickly the new integration can catch up to the legacy one. Personally, I could not wait for fixes and had to roll back, and I suspect many others who attempted migration did the same.
Additionally about a month or so ago, before Z-Wave JS was announced, I attempted to migrate to the OpenZWave beta integration. This was at the time supposedly the new thing, but is now basically abandoned. I also had issues with it (the same door/window sensors in fact…), so even then had to roll back to the legacy integration.
Assuming others are having similar experiences as me, I can’t blame anyone for feeling burned by the Home Assistant team and being pessimistic about the new Z-Wave JS integration. There’s certainly some trust lost in how Z-Wave has been handled, and the Home Assistant devs will need to work hard to build back some of that trust with users. I worry some users may even jump to another platform since trust is just such an important thing when it comes to people’s home.
Personally, I am hopeful about the future of the integration and have faith that it will (eventually) be great. I will certainly be trying to migrate again after the 2021.3 release, and I’m optimistic that it will have addressed the larger issues surrounding the integration.