Creating a blog using GitHub Pages
Many software engineers have blogs, whether it’s to write about a particularly sticky problem they ran into, express their opinion about a given technology, evangelize their own projects, or to create a tutorial for a common task. This article falls into the latter category, as I felt like there are so many options with varying levels of barrier to entry, but there’s a really simple solution.
This blog was originally hosted on a WordPress site which shared an Azure App Service with some other websites I have and it’s own MySql database. Now not only did that cost money (or would have if it wasn’t sharing existing resources), but it was just way overkill for what I was doing, and even for all that it was just plain slow. Furthermore, and this is possibly just personal preference, I really just wanted to write Markdown and not have to deal with a fancy text editor or raw HTML. WordPress may be OK for people who don’t want to deal with any sort of programming or configuration but I, and I suspect most programmers, are more comfortable working with some sort of markup language like Markdown.
After looking around, I ended up landing on GitHub Pages. In essence, GitHub Pages allows you to host static web content for free. They also provide integration with Jekyll, a static content generator, which gives a little bit more flexibility. For those not familiar with static content generation, it’s basically just a tool which transforms some content and configuration into a full website. This allows you to create templates, shared includes, and variables to avoid having to write and update full HTML pages. GitHub Pages is also really easy to set up as it’s just a special GitHub repo, and it’s blazingly fast since your content is extremely cacheable so is generally served from CDN.
Assuming I’ve sold you on GitHub Pages, let’s see how easy it is to set up. There is documentation for both GitHub pages and Jekyll, but in my opinion the docs can be a bit hard to navigate since it’s split across the two sites and many of Jekyll’s features are not available on GitHub pages, which is unclear from the docs. This guide intends to explain the basics, as well as some of the more advanced topics I found useful. You can also see this blog’s repo for reference when configuring your own blog.
Repository Creation
GitHub Pages allows a user, organization, or even a project to have its own site. For user sites, it’s in is own repo. The GitHub Pages website gives step-by-step instructions, but really all you have to do is create a repo named <username>.github.io.
After the repo is created, clone it locally and clear out the initial boilerplate GitHub gives you.
Setting up WSL
(Users not using Windows can skip this section)
Unfortunately, Windows is not officially supported by Jekyll. They provide some workarounds, but personally it seemed more trouble than it’s worth. Because of this, I recommend using the Windows Subsystem for Linux, or WSL.
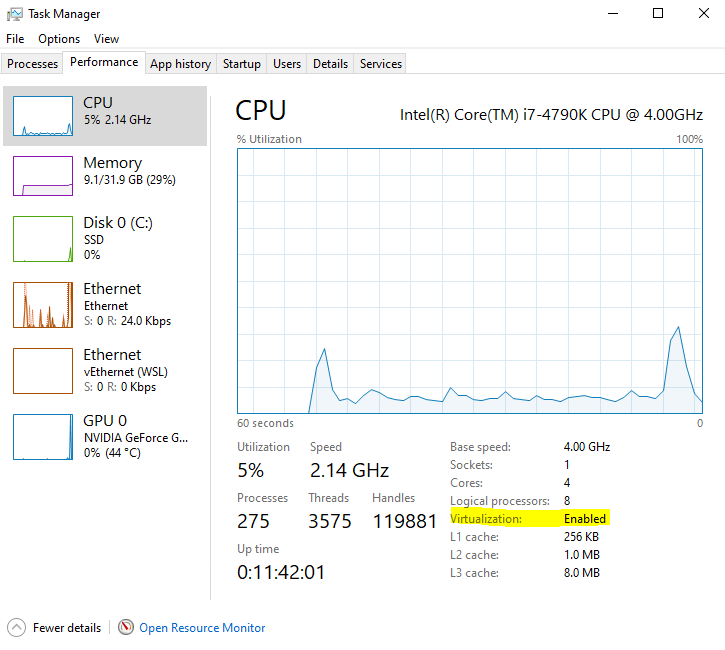
First, ensure CPU Virtualization is enabled in the BIOS. The process for enabling it varies by manufacturer, but you can check whether it’s enabled in the Task Manager under the performance tab.
Next, you’ll need to actually install WSL 2. Follow the official instructions for a step-by-step guide. Personally, I ended up using the Ubuntu 20.04 distro, but you should be able to use whichever you prefer.
Installing Jekyll
Jekyll requires Ruby, so you’ll first need to install it. On Ubuntu, just run:
# Install Ruby
sudo apt-get install ruby-full build-essential zlib1g-dev

# Ensure RubyGems packages are installed under the user account instead of root.
echo '# Install Ruby Gems to ~/gems' >> ~/.bashrc
echo 'export GEM_HOME="$HOME/gems"' >> ~/.bashrc
echo 'export PATH="$HOME/gems/bin:$PATH"' >> ~/.bashrc
source ~/.bashrc

# Install Jekyll and Bundler:
gem install jekyll bundler
Site Creation
From your Linux shell, navigate to your GitHub repository created earlier and run:
jekyll new .
Note that for Windows users, your Windows drives like C: are mounted in WSL, so you can get to a path like C:\Users\David\Code\dfederm.github.io via /mnt/c/Users/David/Code/dfederm.github.io.
The new Jekyll template is a good starting point, but you’ll want to make a few changes to work properly with GitHub Pages.
From here on you can edit the files in your favorite editor, eg. Visual Studio Code. You only need to use your Linux shell to run ruby, bundle, and Jekyll commands.
First, replace the Gemfile contents with the following:
source "https://rubygems.org"

# To update to the latest github dependencies run: `bundle update`
# To list current versions: `bundle exec github-pages versions`
# Check github versions: https://pages.github.com/versions/
gem "github-pages", group: :jekyll_plugins

group :jekyll_plugins do
  gem 'jekyll-feed'
  gem 'jekyll-paginate'
  gem 'jekyll-seo-tag'
  gem 'jekyll-sitemap'
end

# Windows and JRuby does not include zoneinfo files, so bundle the tzinfo-data gem
# and associated library.
install_if -> { RUBY_PLATFORM =~ %r!mingw|mswin|java! } do
  gem "tzinfo", "~> 1.2"
  gem "tzinfo-data"
end

# Performance-booster for watching directories on Windows
gem "wdm", "~> 0.1.1", :install_if => Gem.win_platform?
You’ll notice that the github-pages gem is there, which ensures what you’re using locally matches what GitHub Pages uses. Notably GitHub pages does not support arbitrary Jekyll plugins, so you generally shouldn’t deviate from this Gemfile too much. The list of Jekyll plugins and other Ruby Gems GitHub pages supports can be found on their website.
After updating the Gemfile, you’ll want to bundle update to install everything.
To build the site and serve it locally, run:
bundle exec jekyll serve --drafts --livereload
For those running Windows, I recommend adding --force_polling. Otherwise, saving your content sometimes does not auto-regenerate the site.
Your site should now be running at http://localhost:4000!
For the curious, you can see the entire generated website under the _site folder.
Once you commit and push your changes, GitHub will automatically build your website and deploy it within minutes. Your website will be at <username>.github.io. You’re up and running!
Jekyll is quite powerful and the docs go into details about every feature. Below I’ll describe the major ones which will get you up and running.
Configuring the site
_config.yml is the primary configuration for the site as a whole. It describes how to build the site, site-wide configuration, and custom site-wide variables you may want to define.
The new site template hits a few of the major configurations, however I’d recommend adding a few more:
# Site settings
permalink: /:title/
markdown: kramdown
paginate: 5
paginate_path: "/:num/"
date_format: "%b %-d, %Y"
To describe these settings:
permalinkis the url format for your permalinks. I like the url to just be the post title.markdownis the markdown formatter.paginateis the number of posts per page if using pagination. (requires thejekyll-paginateplugin)paginate_pathis the url format for pages. I like a simple/1,/2, etc. (requires thejekyll-paginateplugin)date_formatis the default date format the site uses.
GitHub Pages also forces some configuration which you cannot change. Be sure to avoid changing these or you’ll only see the behavior locally and they’ll be lost when deployed.
This is also where you configure your plugins, for example:
plugins:
  - jekyll-feed
  - jekyll-paginate
  - jekyll-seo-tag
  - jekyll-sitemap
To describe these plugins:
jekyll-feedcreates an Atom feed for your site at/feed.xml.jekyll-paginateenables paginationjekyll-seo-tagadds search engine metadata to the site.jekyll-sitemapcreates a site map for your site at/sitemap.xml.
You can also add any other custom various in this file as well. Simply add them to the _config.yml file, for example:
google_analytics: <your-ga-id>
These custom variables can be used in your content like {{ site.google_analytics }}.
Pages
These are for standalone content for your site, like the home page, about page, contact page, etc. These can be either .html or .md files, based on whichever is better for writing your content.
By default, the url for pages follows the folder structure you use, so documentation\doc1.md would become /documentation/doc1.html, but this can be overridden.
Front Matter, Layouts, and Includes
Jekyll is a templating engine, which helps avoid duplication and enable you to express what you want to happen rather than having to type it up by hand.
“Front Matter” is a term for a file that contains a YAML block at the top of the file and is processed by Jekyll. The YAML must be set between triple-dashed lines and is where you define the file-specific variables. For example, you can specify the layout for Jekyll to use, the title, and custom variables to use within the page.
An example from my About page:
---
layout: page
title: About
order: 2
---
Layouts are basically the template for the content. There are some default layouts, but you’ll likely want to customize your own. Layouts reside under the _layouts folder and the layout name is just the file name without extension. In the example above for my about page, I have the layout at _layouts\page.html.
A layout may inherit other layouts (and in fact, my page layout inherits my default layout), and specifies where to put the file’s content with {{ content }}.
Finally, includes can be used to insert files into the current file without having to repeat it. It can also help organize your content and layouts by extracting logical blocks into separate files.
To put it all together, for my site I have something like the following files (simplified for brevity, and omitted some files):
about.md:
---
layout: page
title: About
order: 2
---

## Subtitle 1
Some Content

## Subtitle 2
Some Content
_layouts\page.html:
---
layout: default
---
<article class="post">
    <header class="post-header">
        <h1 class="post-title">{{ page.title | escape }}</h1>
    </header>
    <div class="post-content">
        {{ content }}
    </div>
</article>
_layouts\default.html:
<!DOCTYPE html>
<html lang="en">
{%- include head.html -%}
<body>
    {%- include header.html -%}
    <main class="page-content"
          aria-label="Content">
        <div class="wrapper">
            {{ content }}
        </div>
    </main>
    {%- include footer.html -%}
</body>
</html>
_includes\head.html:
<head>
      <meta charset="utf-8">
      <meta http-equiv="X-UA-Compatible" content="IE=edge">
      <meta name="viewport" content="width=device-width, initial-scale=1">
      {%- include favicons.html -%}
      {%- seo -%}
      <link rel="stylesheet" href="{{ "/assets/css/style.css" | relative_url }}">
      {%- feed_meta -%}
      {%- if jekyll.environment == 'production' and site.google_analytics -%}
      {%- include google-analytics.html -%}
      {%- endif -%}
</head>
_includes\header.html:
<script async src="https://www.googletagmanager.com/gtag/js?id={{ site.google_analytics }}"></script>
<script>
    window.dataLayer = window.dataLayer || [];
    function gtag() { dataLayer.push(arguments); }
    gtag('js', new Date());

    gtag('config', '{{ site.google_analytics }}');
</script>
Posts
Posts are what blogs are all about. Posts go in the _posts folder and should be named YEAR-MONTH-DAY-title.md, so for example this post is in _posts/2021-01-18-creating-a-blog-using-github-pages.md.
Posts also are required to have front matter, which you’ll typically use to specify the layout and title of the post.
An example post file is as simple as:
---
layout: post
title: My first post!
categories: [blogging]
---

## Hello!
My first blog post
You can also create drafts when you’re not read to post something quite yet. Just put the file in the _drafts folder and don’t have a date in the file name. Drafts are only included in the site when using the --drafts command-line parameter, so they won’t be included on your production site. This allows you to push your unfinished changes instead of having to create topic branches in git like you would with code.
Static files, Assets and Themes
Static files like images are pretty simple. You can just reference them as a relative url using standard markdown. Personally, I used the “assets” folder for static content, although “assets” mean something slight different in Jekyll.
---
layout: post
title: My first post!
categories: [blogging]
---
## Image example

“Assets” in Jekyll refers to the built-in support for Sass. Put your main SCSS or Sass files where you want them, like assets/css/style.scss, and be sure to make them proper “front matter”, with the two lines of triple dashes. The _sass directory is the base directory for your imported SCSS/Sass files.
Personally, I recommend your assets/css/style.scss file simply importing a root-level SCSS file, and having all your actual styles under the _sass directory.
For example:
assets/css/style.scss:
---
# Only the main Sass file needs front matter (the dashes are enough)
---

@import "site";
_sass\site.scss:
@charset "utf-8";

/* All your actual variables and styles */
_includes\head.html (or wherever your <head> tag is):
<link rel="stylesheet" href="/assets/css/style.css">
Jekyll also has support for themes, however, GitHub pages only supports a small set of them. A theme may help you get off the ground quickly, but I recommend just customizing to make your blog your own. Personally, I started with the minima theme as a base (ie. I just copied the scss files), and then just customized those files as desired.
Custom domain
GitHub pages supports custom domains, for example this blog is hosted on dfederm.com instead of dfederm.github.io.
GitHub pages supports both apex domains (eg mysite.com) and subdomains (eg blog.mysite.com). They’re slightly different, but both are pretty easy to set up.
In either case, the first step is to configure the GitHub side. Navigate to the repository settings and under the “Custom domain” option provide your custom domain. This will commit a CNAME file at the root of the repo pointing to the custom domain. It’s also strongly recommended to check the “Enforce HTTPS button” setting just below.
Next, you’ll need to configure things with your DNS provider. The specific details for making this configuration varies by DNS provider, but is generally straightforward.
If you’re configuring an apex domain, you’ll need to create an A record to the following IP addresses:
185.199.108.153
185.199.109.153
185.199.110.153
185.199.111.153
Note that if you’re configuring an apex domain, it’s also recommended to configure the www subdomain.
If you’re configuring a subdomain (www or otherwise), you’ll need to create a CNAME record for the subdomain to the alias <username>.github.io.
Note that DNS changes may take up to 24 hours to propagate.
Categories
As you add more content over time, you will likely want a categories page as a quick way for users to find related content.
This can be implemented by a Page using some site variables, specifically site.categories.
This site.categories variable contains a list of all the categories your posts have. A post can list its categories in the front matter section:
---
layout: post
title: Some post
categories: [Some Category, Some Other Category]
comments: true
---

...Post content...
The site.categories variable’s contents are a little awkward in my opinion, as each item in the list is itself a list containing exactly 2 elements: the category name and the posts in the category. It’s unclear to me why it’s not a more structured object.
Here’s an example of what my categories page categories.html looks like, which lists every category as headings in alphabetical order and a link to each post within that category in a bulleted list under it:
---
layout: page
title: Categories
order: 1
---

{%- assign categories = site.categories | sort -%}
{%- for category in categories -%}

{%- assign categoryName = category[0] -%}
{%- assign categoryNumPosts = category[1] | size -%}
<h2 id="{{categoryName | uri_escape | downcase }}">{{ categoryName }} ({{ categoryNumPosts }})</h2>

<ul>
    {% assign sorted_posts = category[1] | reversed %}
    {% for post in sorted_posts %}
    <li>
        <a href="{{ post.url }}"></a> -
        <time datetime="{{ post.date | date_to_xmlschema }}"
              itemprop="datePublished">{{ post.date | date: "%b %-d, %Y" }}</time>
    </li>
    {% endfor %}
</ul>

{%- endfor -%}
As content grows, it may even eventually be a good idea to add an index at the top of the categories page to quickly anchor to each category.