First, why build a NAS rather than buy a prebuilt one like the Synology DS1522+? There are pros and cons to each approach, but the DIY was attractive to me due to the better expansion, cost effectiveness, and subjectively I just have fun building PCs.
As this is a long post, here is a table of contents if you’d like to skip to a specific section:
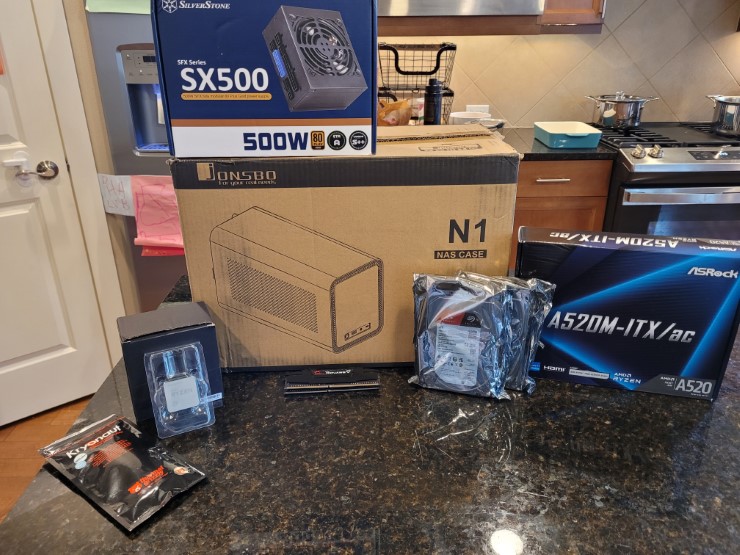
The first part of building your own NAS is purchace the various components needed to build it. This is very similar to building any other PC, and this guide assumes you’re reasonably comfortable with building a PC. If this is your first time building a PC, I highly recommend checking out Linus Tech Tip’s How to build a PC, the last guide you’ll ever need!.
Note that I built my NAS is just over $400, although I did not include the price of tax since that very much depends on your location, nor did I include the cost of storage since that depends on your specific needs. However, that still is leaps and bounds better more economical than the prebuilt I mentioned above which at the time of writing is $700, not to mention much more powerful and flexible.
As prices and availability are always fluxuating, obviously any prices you see here may be different than what I saw, so feel free to change things up.
When selecting parts, I strongly recommend using PCPartPicker as it will help identify compatibility issues as well as help filter out incompatible parts based on what you’ve already chosen which massively helps with the tremendous amount of options out there.
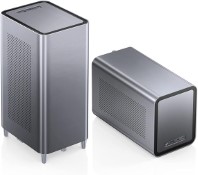
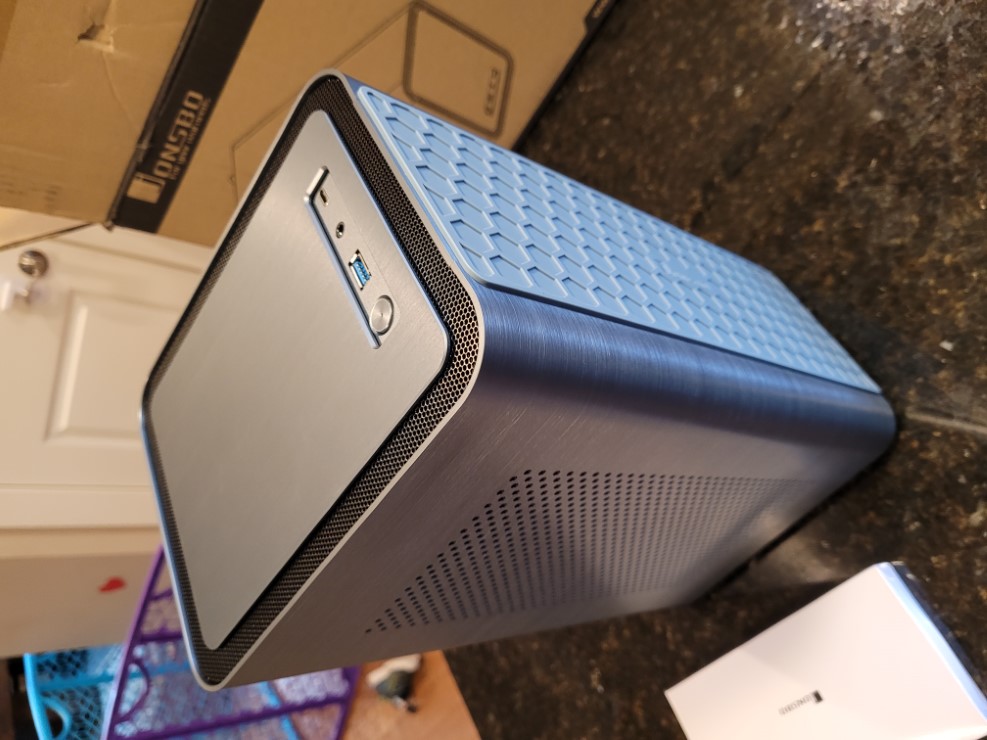
At risk of copying every other NAS build guide out there, I recommend the JONSBO N1. It’s specifically designed for NAS machines, so it’s pretty small. It requires a Mini-ITX motherboard, an SFX power supply, and has room for five 3.5” HDDs and well as one 2.5” drive.
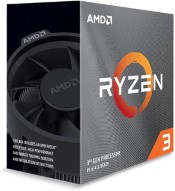
A NAS doesn’t need to be that powerful, even one which doubles as a media server, so I opted to go for something a few years older. I went with an AMD Ryzen 3 3100 which I found used on eBay. Because it’s fairly low-end, it’s also pretty power-efficient, which is great for a NAS which is intended to be powered 24/7. Do make sure that if you buy it used, it comes with the stock cooler so that you don’t have to buy one separately.
One thing to note is that this CPU does not have integrated graphics. This causes a bit of pain during the build, at least for me, but it’s something that can be easily worked past. If you want a smoother experience though, go with something with integrated graphics.
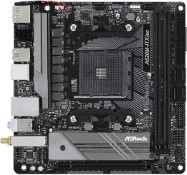
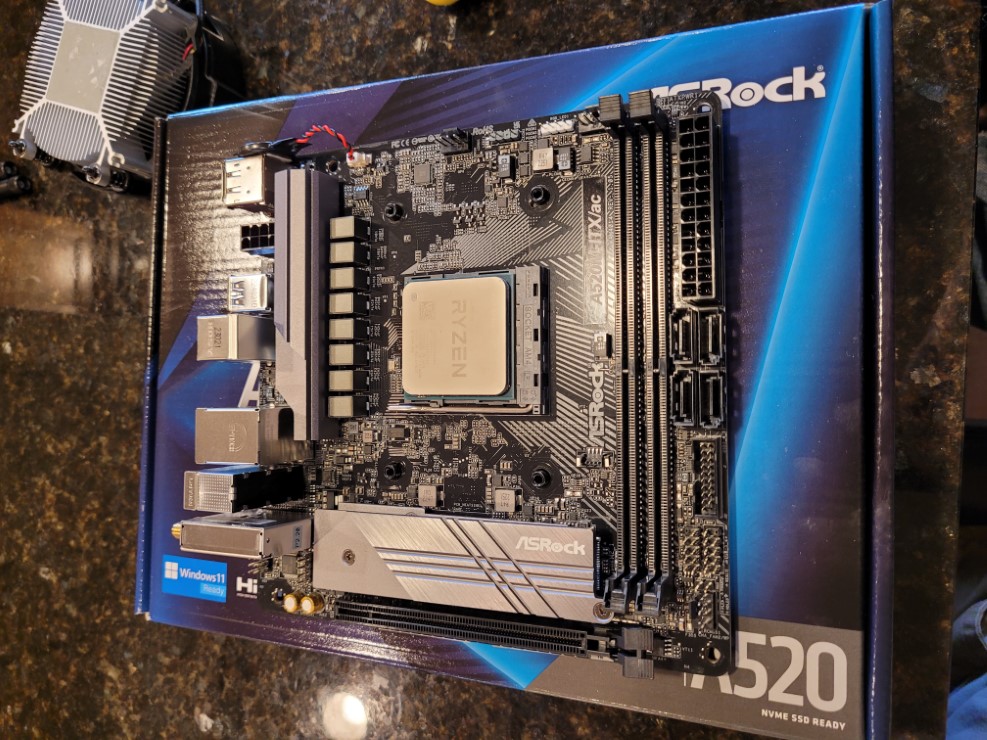
With the Mini-ITX form factor and AM4 CPU slot selected, there wasn’t really a ton of options for the motherboard. I ended up going with the ASRock A520M-ITX/AC because well, it was cheap and compatible. It also has 4 SATA ports, which at the moment is good enough for me and eventually I can just buy a cheap HBA for future expansion. The AM4 slot also should allow an upgrade to a better CPU in the future as well, if that becomes necessary.
The only downside is that it “only” has gigabit ethernet and not the faster 2.5 gigabit, but honestly plain old gigabit is good enough for me. If you need 2.5 gigabit since a NAS is a network attached storage and thus needs only the finest of network connectivity, you can spend a bit more for something like a GIGABYTE B550I AORUS PRO AX or an ASRock B550 Phantom Gaming-ITX/ax.
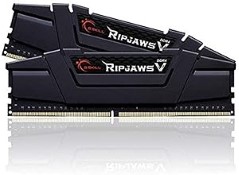
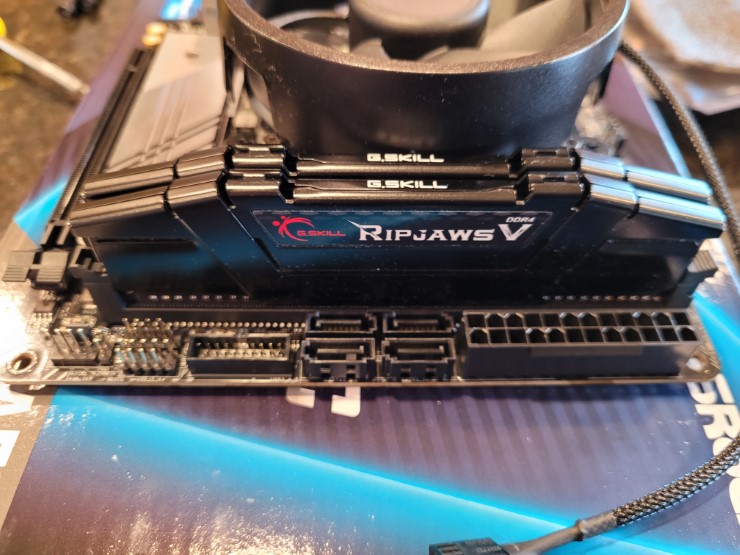
For RAM I went with G.SKILL Ripjaws V 16GB (2x8 GB). I basically just wanted something cheap and DDR4. I was debating going up to 32GB of RAM, but I found a good deal on eBay and so just went with 16 GB for now. In practice that’s more than enough for my usage at least.
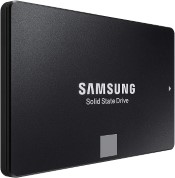
I was lucky enough to have a Samsung 860 EVO 500GB laying around from when I used to used it in my desktop several years ago. If I were to have bought something though, I would have just gone with the cheapest SSD I could have, like this TEAMGROUP 256GB NVMe or if you want to save the NVMe slot for an HBA, perhaps this Crucial BX500 240GB SATA SSD
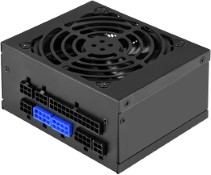
The NAS is pretty low power, so nothing super special is needed here. Personally though I wanted a fully modular power supply for the ease of use, and the 80+ Gold rating for the efficiency, so that combined with the need for the SFX form factor and I was basically just left with the Silverstone SX500-G. It’s a bit overkill as PCPartPicker estimates that the system only needs ~149W, but this should give plenty of headroom for future expansion. Plus, as I mentioned with all the requirements above I didn’t really have much of an option.
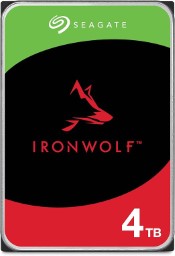
This will very much be dependent on your needs. I don’t have a massive amount of data to store (yet!) but I did want some resiliency, so I put a pair of Seagate IronWolf 4 TB drives in. This should give me plenty of room to drop in a few more drives in the future as my storage needs increase.
To summarize my parts list and the prices I was able to get, here’s my build on PCPartPicker as well as a cost breakdown.
Part | Name | Price |
---|---|---|
Case | JONSBO N1 | $120 ($130 with $10 promotional gift card w/ purchase) |
CPU | AMD Ryzen 3 3100 | $45.15 (used) |
Motherboard | ASRock A520M-ITX/AC | $104.99 |
RAM | G.SKILL Ripjaws V 16GB (2x8 GB) | $33 (used) |
Boot Drive | Samsung 860 EVO 500GB | $0 (already owned) |
PSU | Silverstone SX500-G | $101.99 |
Total (without storage) | $405.13 | |
Storage | 2 x Seagate IronWolf 4 TB | 2 x $93.99 = $187.98 |
Total (including storage) | $593.11 |
Now it’s time to build! As mentioned earlier, this won’t be super detailed, but I will go through most the steps and point out specific pain points I ran into with the specific parts I used.
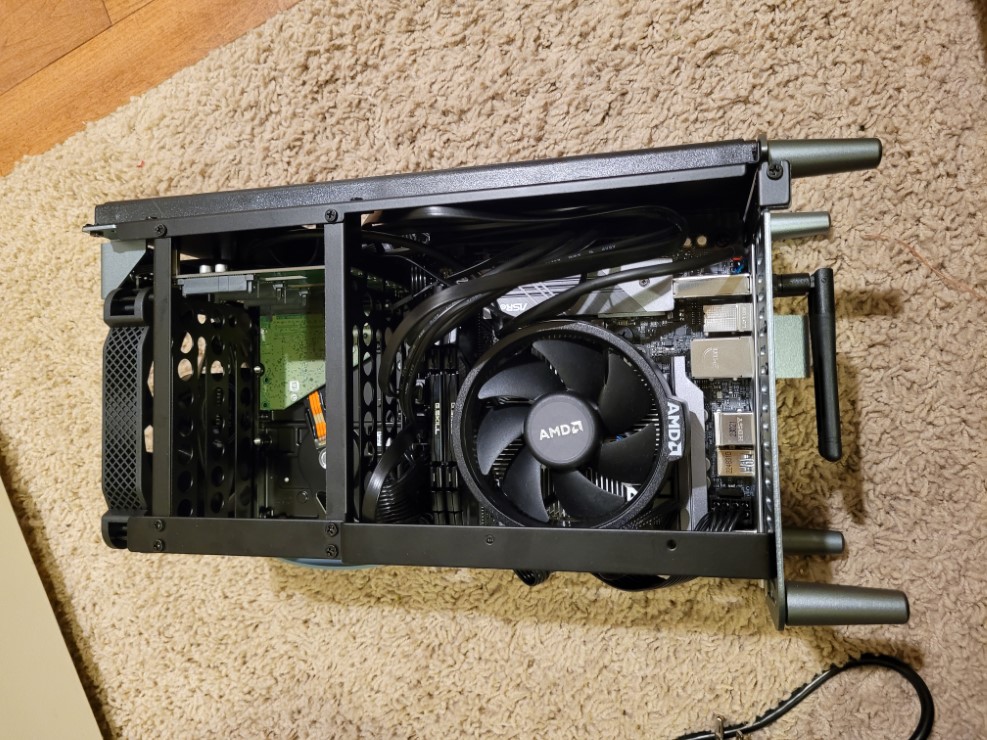
The first thing to do is take the motherboard out and place it onto the box it came in. Socketing the CPU is pretty straightforward; you just undo the latch, line up the triangle on the socket and the CPU, gently drop it in, and reengage the latch.
Next, put a pea-sized blob of thermal paste on and install the cooler. I had some Thermal Grizzly Kryonaut Thermal Paste left over from when I built my desktop, so I just used that, but I imagine anything will do.
A tip when installing the cooler, or really anything with 4 or more screws, is to use a star pattern when tightening. Also tighten in two passes such that the first pass is a gentle tightening and the second pass is where you tighten to the final torque. That way any alignment issues can still be corrected before the screws are too tight.
Install the RAM next, which is as simple as just aligning the sticks the right way since they’re keyed and firmly pressing them in until you hear the click.
Looking back, you should actually wait to install the RAM until you mount the motherboard in the case and connect the power switch and reset switch wires. I found it extremely difficult to do so while the RAM was installed, but perhaps I just don’t have the nimblest fingers.
Next bring out the case and take off the outer shell. I had never worked with the Mini-ITX form factor previously, so I don’t have much reference to go on, but I found that the JONSBO N1 was relatively easy to work in. Don’t get me wrong, Mini-ITX was certainly challenging, but I feel like the case wasn’t the problem.
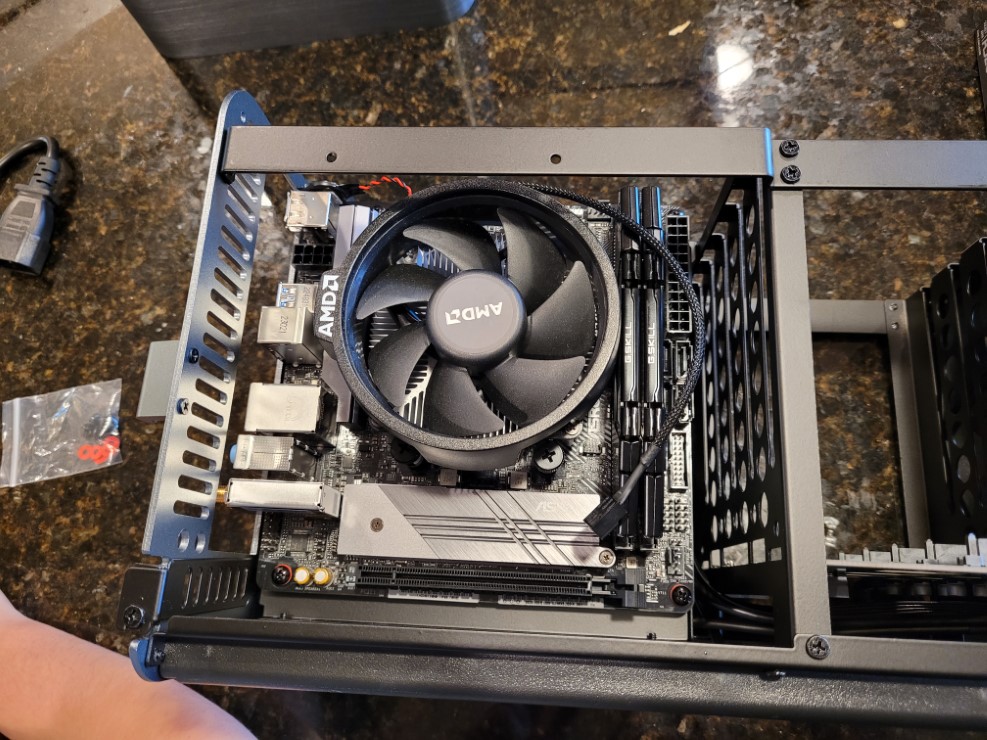
Mount the motherboard on the preinstalled standoffs using the same two-pass star pattern described earlier. I forgot the I/O shield as you’ll notice from the picture below and had to correct my mistake later. I noticed with the I/O shield in place though that the motherboard was a bit difficult to get perfectly aligned on the standoffs, so using the screw-tightening strategy described really helped ensure things went smoothly anyway.
Next install the power supply. This, and when you start plugging in cables (which I held off on a little later), is where the benefits of a fully modular power supply becomes apparent. I have to imagine a non-modular would be extremely challenging to work with in a Mini-ITX form factor.
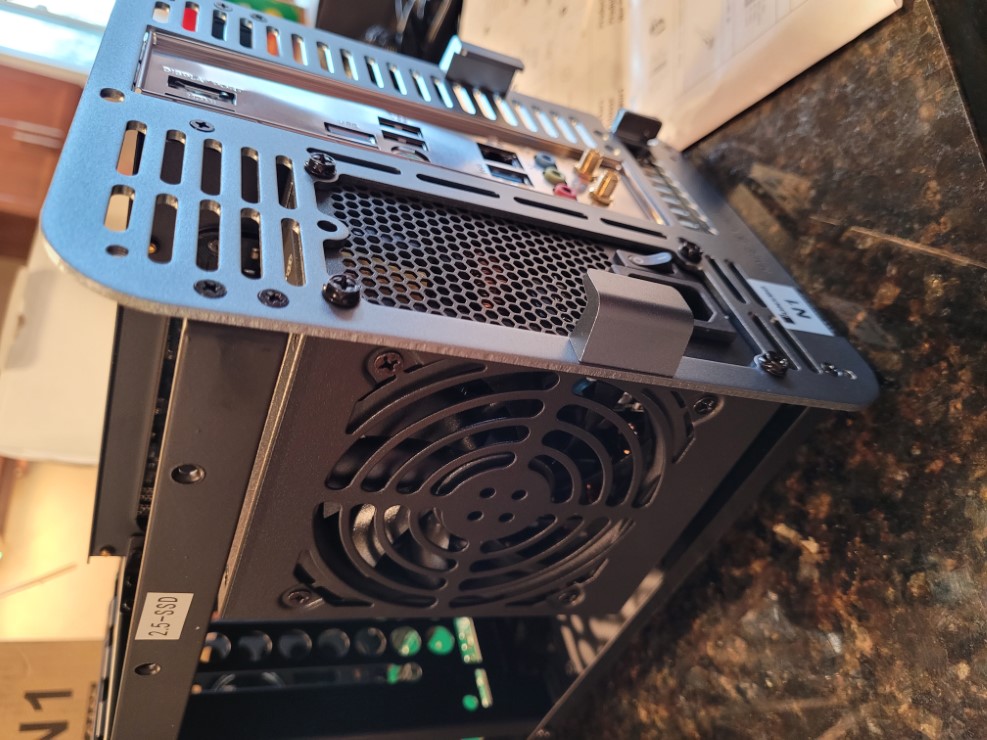
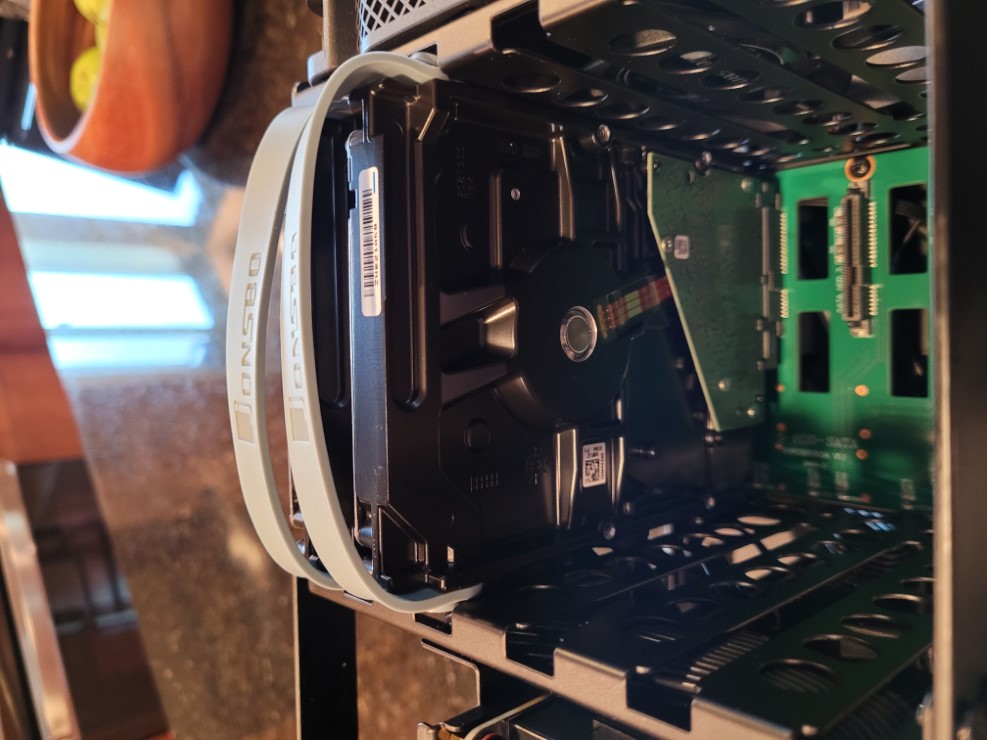
Installing the HDDs is an interesting part of working in the JONSBO N1. It has a host-swappable backplane for the SATA drives which is pretty neat. It was certainly a bit nerve-wracking to shove the drives into the bays and hope the connectors aligned properly, but after installing them, it seemed like a really elegant mechanism I ended up liking a lot.
If you’re using a SATA SSD for your boot drive, you’ll want to install that now as well, which is next to the power supply. I found the mounting solution there to be a bit sketchy, but as it’s an SSD and has no moving parts, it doesn’t really matter.
Now to start the messy work of plugging in cables. This is my least favorite part as I can never seem to have the patience (or skill?) to manage the cables properly and so it ends up being just a rat nest. Luckily the case ends up hiding the mess in the end, so just don’t let anyone go opening up the machine and discovering your dirty secret.
An important note is that you will want to route all cables through the middle of the chassis rather than try and go around the outside. I made that mistake with the CPU power cable and the outer shell of the case ended up not sliding on later. Don’t make my mistakes. Route it through the case the long way, the proper way.
Ok, all the cables are shoved in there now I guess. Time to put the shell of the case back on and try things out!
I decided to use TrueNAS Scale as the NAS OS and Jellyfin for the media server. Both are fully open source and well supported, so great options for the build.
To get started with TrueNAS Scale, first you must download the iso from their website and flash it to a USB drive using something like balenaEtcher.
Because I didn’t choose a CPU with integrated graphics, I decided to put the boot SSD into my desktop computer and use the newly flashed USB install media there. Just be very careful you install TrueNAS to the correct drive or you may accidentally wipe the wrong one.
After installing the OS and putting the boot SSD back into the NAS machine, I tried booting and… nothing happened. Well, the power turned on and the fan was blowing, but without a display it wasn’t clear what was happening.
I had expected this, but as TrueNAS Scale is supposed to connect to the network via DHCP and be configurable via a web portal, I expected it to show up in my router, but it didn’t.
This is where it would benefit having a CPU with integrated graphics or a cheap spare GPU to temporarily slot in while you do the initial configuration. I had neither so I ended up doing some mad science…
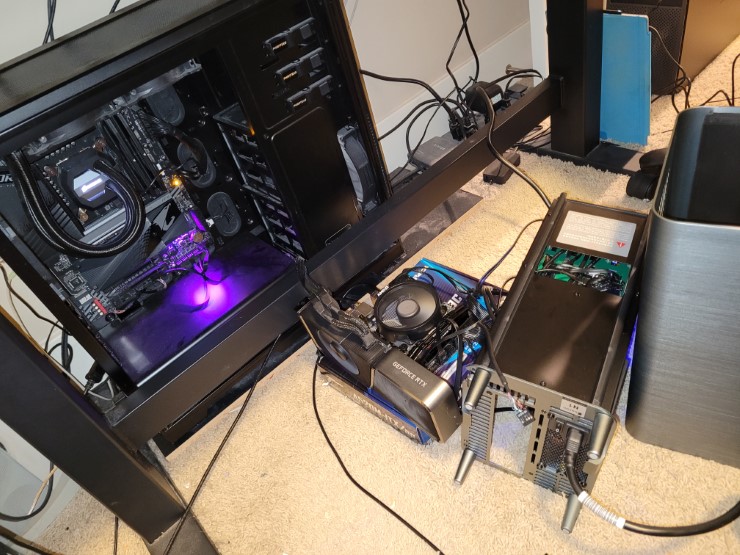
Yea, wow. So I took the graphs card out of my desktop, leaving the power cables though since the PSU in the NAS was very tight. But, a 3070 TI obviously won’t fit in the NAS, so I took the motherboard out but left everything I could attached and in the case. Now when turning on both machines (remember, my desktop PSU was powering the graphics card) I was able to see the video output.
Frustratingly, It ended up being one simple keystroke I needed to confirm something about the fTPM and then it booted properly into TrueNAS Scale. At this point I probably should can configured the BIOS as well, but my desktop machine kept turning itself off after some time, probably due to no display device being plugged into the motherboard, and I was just ready to move on.
So I put everything back together, put the NAS in its home, powered it on, and success! I was able to see a new device on my network and was able to hit the web portal for TrueNAS Scale.
I was able to connect to the web portal via http://truenas.local
, but depending on your local network you may need to use the IP address instead, which you can get from your router’s web portal.
Personally I prefer to have my “infrastructure” devices to have static IP addresses, like my Raspberry Pi running Home Assistant, the Pi running my alarm panel and AdGuard Home instance, and yes the NAS. That way if something gets messed up with DNS or DHCP, I should always be able to access those devices.
To do this in TrueNAS Scale you click on the Network tab and in the Interfaces section you can edit the ethernet interface. You just need to uncheck DHCP and under “Aliases” add the IP and subnet you want.
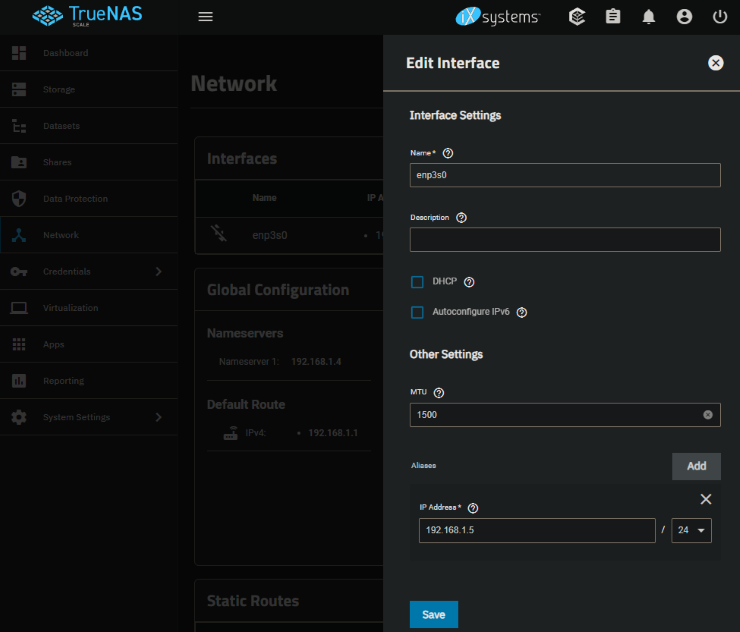
After this you’ll need to “Test Changes”, which is a convenient feature so you don’t misconfigure anything. It will automatically revert the network configuration if you don’t confirm it after some timeout. So after you make the changes, navigate to the new static IP and confirm the changes. At least for me, using the static IP was required as the host name resolution was stale and still pointing to the old DHCP-based IP.
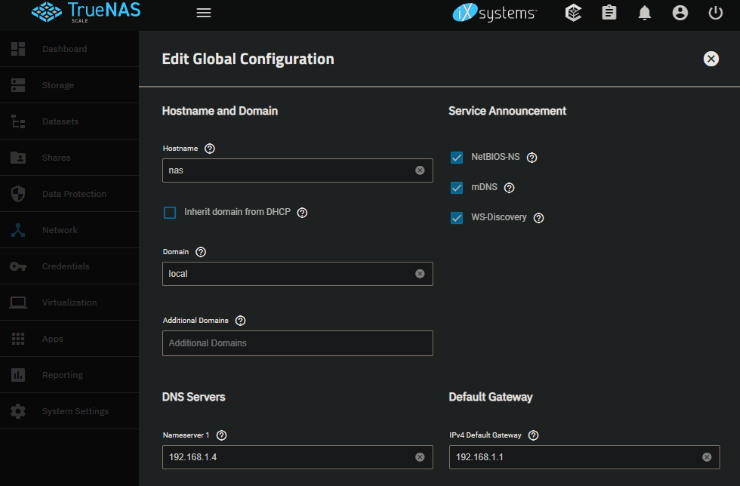
Next I changed the host name since I wanted to use nas.local
instead of truenas.local
(admittedly, very minor). Since the host name resolution was stale anyway, I figured why not. To do this, you go back to the Network tab and edit the Global Configuration with the desired host name. Because I have AdGuard Home, I also added that as the Nameserver.
Now that that’s out of the way, it’s time to actually set up the storage aspect of the NAS.
First a pool needs to be set up. A pool is organizes your physical disks into a virtual device, or VDEV. This is where you configure your desired disk layout, for example your desired RAID settings, or in the case of TrueNas Scale your RAID-Z settings. RAID-Z is a non-standard RAID which uses the ZFS file system. In my case I only have 2 data disks, so I chose to just use a mirror. When I add more disks I’ll end up converting to a RAIDZ1 (one drive can fail without data loss).
Note that Mirroring or RAID/RAID-Z are not proper substitutes for backups! They’re mostly to avoid inconvenience and downtime. You should always still take proper backups of your important data.
If you have an extra NVMe drive to use as a cache, you will also configure that here. Note though that it’s not recommended unless you have over 64GB of RAM, as the RAM cache (called “ARC”) is faster and the overhead to support the SSD Cache (“L2ARC”) requires RAM and thus eats into and reduces the size of the ARC cache. At least for me, the network is the bottleneck anyway, although that’s exacerbated by the fact that I stuck to a 1 gig interface.
Once the pool is configured, you’ll also need to configure a “dataset”, which is a logical folder within the pool, or perhaps it can be though of as a volume on a drive. Permissions are applied at the dataset level though, so if you intend to partition your data, this is where you would do so.
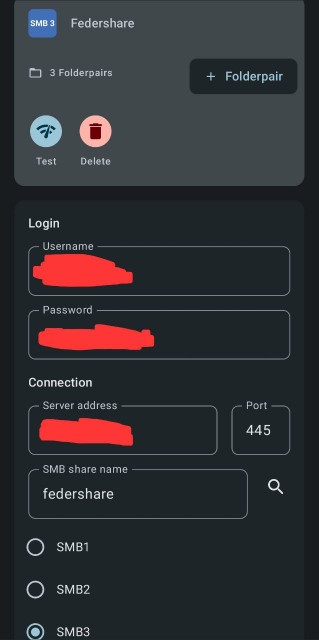
Next you’ll want to set up a share so you can transfer data to and from the NAS. In my case I use Windows for my primary desktop machine, so I set up an SMB share. Once you create the share it’ll prompt you to start the SMB service on the NAS, which is the server process which actually handles SMB traffic.
Finally, you’ll need to set up a user to access the SMB share. Go to the Credentials -> Local Users tab and add a new user. You’ll want to set up additional users for any family members who you want to access the SMB share directly. Note that later when configuring Jellyfin there will be separate user accounts to access the Jellyfin server, so if for example you only want your kids to consume media from the NAS but not directly access the data, you wouldn’t want to set up a user in TrueNAS Scale for them.
Now you should be able to access the share via \\nas.local\<share-name>
from your Windows PC.
I recommend mapping the share as a network drive to avoid needing to re-enter credentials:
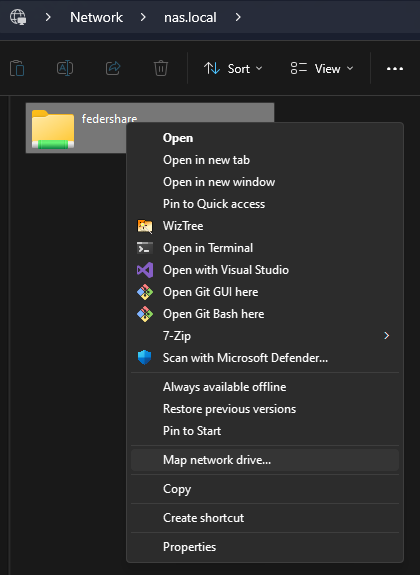
This allows you to see it as if it were a drive on your machine, in my case Z:
.
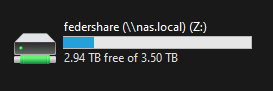
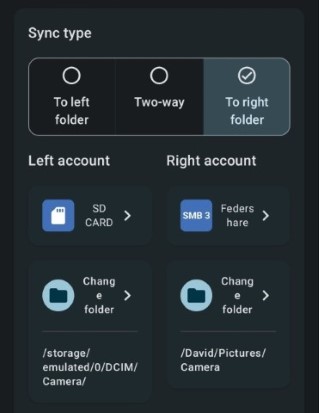
At this point you can copy all your data!
TrueNAS Scale supports installing “Apps”, which are effectively just docker containers. One such supported app is the Jellyfin app, a media server.
First go to the Apps tab and find the Settings drop down to choose a pool to use for the applications. It will create a dataset inside the selected pool called “ix-applications” to store the application data. TrueNAS recommends using an SSD pool if possible, but in my case I only have 1 pool, the HDD pool, so I just used it.
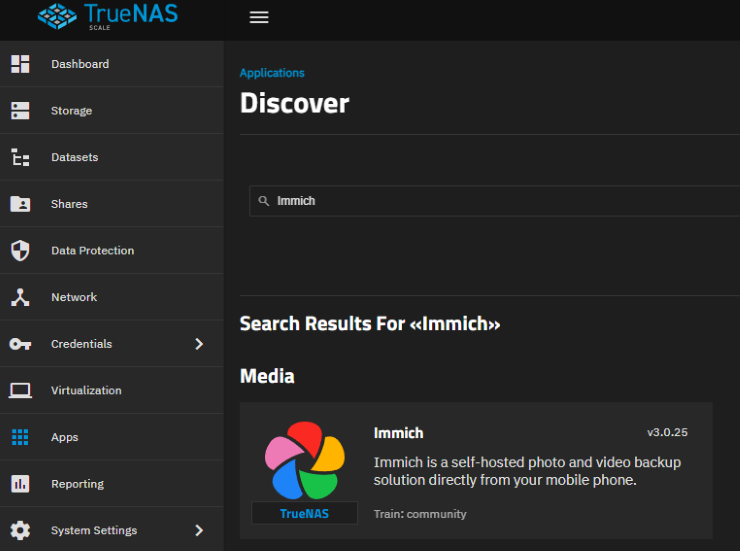
Now that an application pool is selected, you can install the Jellyfin app. Click “Discover Apps” and search for and install Jellyfin.
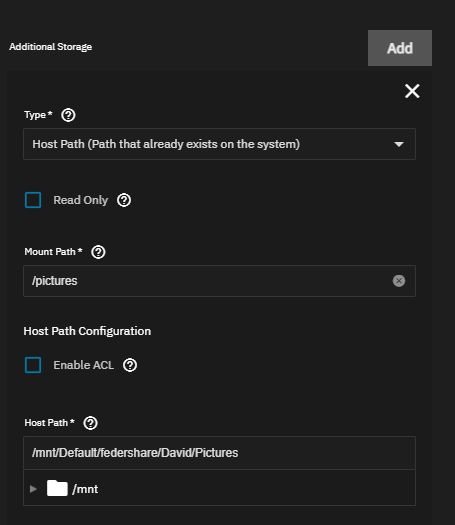
You’ll mostly just use the default settings, but there is one key piece you need to configure. You will need to give the Jellyfin app access to your data.
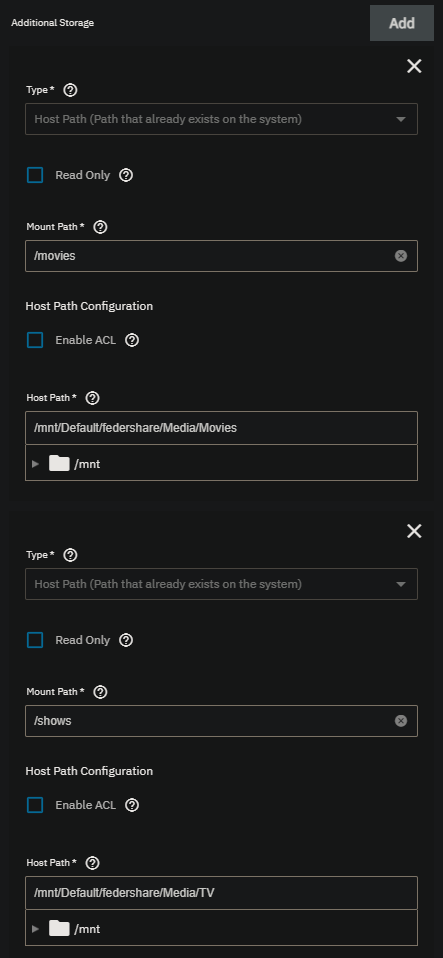
Under the Storage Configuration you should see “Additional Storage”. Click “Add”, and use Type: Host Path. For the Mount Path, use whatever path you want to be visible on the Jellyfin side, eg /movies
. For the Host Path, select the path to the dataset with your movies, eg /mnt/Default/federshare/Media/Movies
. Repeat this process for TV Shows, for example /shows
as the mount path and /mnt/Default/federshare/Media/TV
as the host path.
It’ll take a minute or two for the Jellyfin app to install and start, but once it’s done you can click the “Web Portal” button which will take you to the Jellyfin web portal where you can configure Jellyfin. Here you’ll need to configure Jellyfin user names and libraries.
The users you configure will be how users log into a Jellyfin client application to watch media, so is likely the users you will need to set up for your family members. I set up separate accounts for each of my family members so that I could apply parental controls.
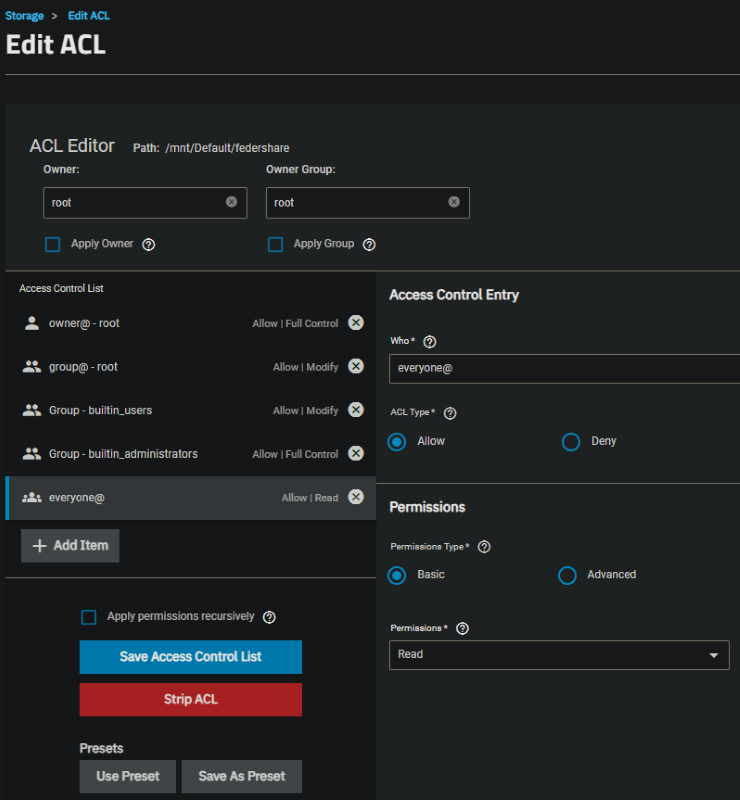
I did run into a permissions quirk where the Jellyfin app didn’t have permissions to the /movies
and /shows
mount paths I configured, possibly because of the SMB share, but I’m not certain of the reason. I ended up needing to go to the dataset and editing the permissions and granting the everyone@
group read permissions.
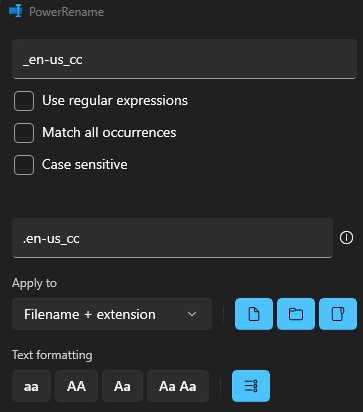
Another quirk I ran into is that my subtitles were not named in a way which Jellyfin was able to automatically pick up. They were named <Movie Title>-en-us_cc.srt
where Jellyfin requires <Movie Title>.en-us_cc.srt
. This was fixed easily enough with PowerRename.
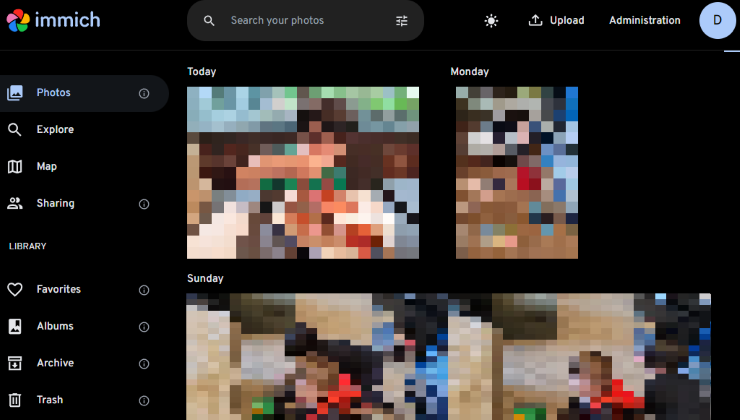
Now you’re ready to install the Jellyfin client on your various devices and enjoy your own personal local media streaming service!
]]>This blog post delves into a crucial strategy to navigate this challenge: the implementation of a limited parallelism work queue. Rather than allowing unchecked parallelism that might overwhelm system resources, employing a limited parallelism work queue offers a systematic approach to manage asynchronous tasks effectively.
The heart of implementing a work queue is the producer/consumer model. This can be well-represented by Channels. If you’re not familiar with channels, Stephen Toub has a great introduction. Essentially a channel stores data from one or more producers to be consumed by one or more consumers.
In our case, the producers will be the components which enqueue work and the consumers will be the workers we spin up to process the work.
If desired, you can skip the explanation and go straight to the Gist.
Let’s start with creating the channel and the worker tasks. For now, we don’t know exactly what kind of data we need to store, so we’re just using object
.
public sealed class WorkQueue
{
private readonly Channel<object> _channel;
private readonly Task[] _workerTasks;
public WorkQueue(int parallelism)
{
_channel = Channel.CreateUnbounded<object>();
// Create a bunch of worker tasks to process the work.
_workerTasks = new Task[parallelism];
for (int i = 0; i < _workerTasks.Length; i++)
{
_workerTasks[i] = Task.Run(
async () =>
{
await foreach (object context in _channel.Reader.ReadAllAsync())
{
// TODO: Process work
}
});
}
}
}
This simply creates the Channel
and creates multiple worker tasks whick simply continuously try reading from the channel. Channel.Reader.ReadAllAsync
will yield until there is data to read, so it’s not blocking any threads.
Now we need the producer side of things. For this initial implementation with Task
and not Task<T>
, so we know the return type for the method needs to be a Task
. The caller needs to provide a factory for actually performaing the work, so the parameter can be a Func<Task>
. This leads us to the following signature:
public async Task EnqueueWorkAsync(Func<Task> taskFunc);
As we want to manage the parallelism of the work, we cannot call the Func<Task>
to get the Task
, as that would start execution of the task. The way to return a Task
when we don’t have one is to use TaskCompletionSource
. This allows us to return a Task
which we can later complete with a result, cancellation, or exception, based on what happens with the provided work.
We also know we need to write something to the channel, but we still don’t know what yet, so let’s continue to use object
.
public async Task EnqueueWorkAsync(Func<Task> taskFunc)
{
TaskCompletionSource taskCompletionSource = new();
object context = new();
await _channel.Writer.WriteAsync(context);
await taskCompletionSource.Task;
}
Now that we have the channel reader and writer usages, we can figure out what we actually need to store in the channel. The caller provided a Func<Task>
to perform the work, and we need to capture the TaskCompletionSource
so we can complete the Task
we returned to the caller. So let’s define the context as a simple record struct with those two members:
private readonly record struct WorkContext(Func<Task> TaskFunc, TaskCompletionSource TaskCompletionSource);
The Channel<object>
should be updated to use WorkContext
instead, as the reader and writer call sites should also be adjusted. We now have the following:
public sealed class WorkQueue
{
private readonly Channel<WorkContext> _channel;
private readonly Task[] _workerTasks;
private readonly record struct WorkContext(Func<Task> TaskFunc, TaskCompletionSource TaskCompletionSource);
public WorkQueue(int parallelism)
{
_channel = Channel.CreateUnbounded<WorkContext>();
// Create a bunch of worker tasks to process the work.
_workerTasks = new Task[parallelism];
for (int i = 0; i < _workerTasks.Length; i++)
{
_workerTasks[i] = Task.Run(
async () =>
{
await foreach (WorkContext context in _channel.Reader.ReadAllAsync())
{
// TODO: Process work
}
});
}
}
public async Task EnqueueWorkAsync(Func<Task> taskFunc)
{
TaskCompletionSource taskCompletionSource = new();
WorkContext context = new(taskFunc, taskCompletionSource);
await _channel.Writer.WriteAsync(context);
await taskCompletionSource.Task;
}
Now we need to actually process the work. This involes executing the provided Func<Task>
and handling the result appropriately. We will simply invoke the Func
and await the resulting Task
. Whether that Task
completed successfully, threw an exception, or was cancelled, we should pass through to the Task
we returned to the caller who queued up the work.
private static async Task ProcessWorkAsync(WorkContext context)
{
try
{
await context.TaskFunc();
context.TaskCompletionSource.TrySetResult();
}
catch (OperationCanceledException ex)
{
context.TaskCompletionSource.TrySetCanceled(ex.CancellationToken);
}
catch (Exception ex)
{
context.TaskCompletionSource.TrySetException(ex);
}
}
Finally, we need to handle shutting down the work queue. This is done by completeing the channel and waiting for the worker tasks to drain. Calling Channel.Writer.Complete
will disallow additional items from being written, and as a side-effect cause Channel.Reader.ReadAllAsync
enumerable to stop awaiting more results and complete. This in turn allows our worker tasks to complete.
For convenience, we will make WorkQueue : IAsyncDisposable
so the WorkQueue
can simply be disposed to shut it down.
public async ValueTask DisposeAsync()
{
_channel.Writer.Complete();
await _channel.Reader.Completion;
await Task.WhenAll(_workerTasks);
}
On thing we’ve left out is cancellation, both for executing work to be cancelled when the work queue is shut down, and for allowing the caller enqueing a work item to cancel that work item.
To address this, a CancellationToken
should be provided by the caller enqueueing a work item. Additionally, the WorkQueue
itself will need to manage a CancellationTokenSource
which it cancels on DisposeAsync
. Finally, when a work item is enqueued, the two cancellation tokens need to be linked and provided to the work item so it can properly cancel when either the caller who enqueued the work item cancels, or if the work queue is being shut down entirely. Putting all that together:
public sealed class WorkQueue : IAsyncDisposable
{
private readonly CancellationTokenSource _cancellationTokenSource;
private readonly Channel<WorkContext> _channel;
private readonly Task[] _workerTasks;
private readonly record struct WorkContext(Func<CancellationToken, Task> TaskFunc, TaskCompletionSource TaskCompletionSource, CancellationToken CancellationToken);
public WorkQueue()
: this (Environment.ProcessorCount)
{
}
public WorkQueue(int parallelism)
{
_cancellationTokenSource = new CancellationTokenSource();
_channel = Channel.CreateUnbounded<WorkContext>();
// Create a bunch of worker tasks to process the work.
_workerTasks = new Task[parallelism];
for (int i = 0; i < _workerTasks.Length; i++)
{
_workerTasks[i] = Task.Run(
async () =>
{
// Not passing using the cancellation token here as we need to drain the entire channel to ensure we don't leave dangling Tasks.
await foreach (WorkContext context in _channel.Reader.ReadAllAsync())
{
await ProcessWorkAsync(context);
}
});
}
}
public async Task EnqueueWorkAsync(Func<CancellationToken, Task> taskFunc, CancellationToken cancellationToken = default)
{
cancellationToken.ThrowIfCancellationRequested();
TaskCompletionSource taskCompletionSource = new();
CancellationToken linkedToken = cancellationToken.CanBeCanceled
? CancellationTokenSource.CreateLinkedTokenSource(cancellationToken, _cancellationTokenSource.Token).Token
: _cancellationTokenSource.Token;
WorkContext context = new(taskFunc, taskCompletionSource, linkedToken);
await _channel.Writer.WriteAsync(context, linkedToken);
await taskCompletionSource.Task;
}
public async ValueTask DisposeAsync()
{
await _cancellationTokenSource.CancelAsync();
_channel.Writer.Complete();
await _channel.Reader.Completion;
await Task.WhenAll(_workerTasks);
_cancellationTokenSource.Dispose();
}
private static async Task ProcessWorkAsync(WorkContext context)
{
if (context.CancellationToken.IsCancellationRequested)
{
context.TaskCompletionSource.TrySetCanceled(context.CancellationToken);
return;
}
try
{
await context.TaskFunc(context.CancellationToken);
context.TaskCompletionSource.TrySetResult();
}
catch (OperationCanceledException ex)
{
context.TaskCompletionSource.TrySetCanceled(ex.CancellationToken);
}
catch (Exception ex)
{
context.TaskCompletionSource.TrySetException(ex);
}
}
}
If the result of the work is required, this approach may be awkward since the provided Func<CancellationToken, Task>
would need to have side-effects. For example, something like the following:
string input = // ...
int result = -1;
await queue.EnqueueWorkAsync(async ct => result = await ProcessAsync(input, ct), cancellationToken));
// Do something with the result here
// ...
An alternate approach would be to have the WorkQueue
take the processing function and then the EnqueueWorkAsync
method could return the result directly. This requires the work queue to process inputs of the same type and in the same way, but can make the calling pattern more elegant:
string input = // ...
int result = await queue.EnqueueWorkAsync(input, cancellationToken);
// Do something with the result here
// ...
The change to the implementation is straightforward. WorkQueue
becomes the generic WorkQueue<TInput, TResult>
and the Func<CancellationToken, Task>
becomes a Func<TInput, CancellationToken, Task<TResult>>
and can move from EnqueueWorkAsync
to the constructor.
public sealed class WorkQueue<TInput, TResult> : IAsyncDisposable
{
private readonly Func<TInput, CancellationToken, Task<TResult>> _processFunc;
private readonly CancellationTokenSource _cancellationTokenSource;
private readonly Channel<WorkContext> _channel;
private readonly Task[] _workerTasks;
private readonly record struct WorkContext(TInput Input, TaskCompletionSource<TResult> TaskCompletionSource, CancellationToken CancellationToken);
public WorkQueue(Func<TInput, CancellationToken, Task<TResult>> processFunc)
: this(processFunc, Environment.ProcessorCount)
{
}
public WorkQueue(Func<TInput, CancellationToken, Task<TResult>> processFunc, int parallelism)
{
_processFunc = processFunc;
_cancellationTokenSource = new CancellationTokenSource();
_channel = Channel.CreateUnbounded<WorkContext>();
// Create a bunch of worker tasks to process the work.
_workerTasks = new Task[parallelism];
for (int i = 0; i < _workerTasks.Length; i++)
{
_workerTasks[i] = Task.Run(
async () =>
{
// Not passing using the cancellation token here as we need to drain the entire channel to ensure we don't leave dangling Tasks.
await foreach (WorkContext context in _channel.Reader.ReadAllAsync())
{
await ProcessWorkAsync(context, _cancellationTokenSource.Token);
}
});
}
}
public async Task<TResult> EnqueueWorkAsync(TInput input, CancellationToken cancellationToken = default)
{
cancellationToken.ThrowIfCancellationRequested();
TaskCompletionSource<TResult> taskCompletionSource = new();
CancellationToken linkedToken = cancellationToken.CanBeCanceled
? CancellationTokenSource.CreateLinkedTokenSource(cancellationToken, _cancellationTokenSource.Token).Token
: _cancellationTokenSource.Token;
WorkContext context = new(input, taskCompletionSource, linkedToken);
await _channel.Writer.WriteAsync(context, linkedToken);
return await taskCompletionSource.Task;
}
public async ValueTask DisposeAsync()
{
await _cancellationTokenSource.CancelAsync();
_channel.Writer.Complete();
await _channel.Reader.Completion;
await Task.WhenAll(_workerTasks);
_cancellationTokenSource.Dispose();
}
private async Task ProcessWorkAsync(WorkContext context, CancellationToken cancellationToken)
{
if (cancellationToken.IsCancellationRequested)
{
context.TaskCompletionSource.TrySetCanceled(cancellationToken);
return;
}
try
{
TResult result = await _processFunc(context.Input, cancellationToken);
context.TaskCompletionSource.TrySetResult(result);
}
catch (OperationCanceledException ex)
{
context.TaskCompletionSource.TrySetCanceled(ex.CancellationToken);
}
catch (Exception ex)
{
context.TaskCompletionSource.TrySetException(ex);
}
}
}
This blog post shows two alternate approaches for implementing a limited parallelism work queue to manage many tasks while avoiding overscheduling. These two implementations are best suited to different usage patterns and can be further customized or optimized for your specific use-cases.
]]>Note that I previously wrote about a roaming developer console, but it was not as robust as I needed, and a lot has changed since then, for example the release of winget
.
You can find my completed script which I use for my personal setup on GitHub. I’d recommend forking it and tuning it for your own personal preferences.
A key requirement for this project, especially since I expected to iterate on it quite a bit at first, was to ensure the script was idempotent. The goal was to run and re-run the script multiple times while consistently achieving the desired machine state. This flexibility allowed me to make changes and easily apply them. As a result, I could even schedule the script to automatically incorporate any modifications I had made.
To enhance user-friendliness, I aimed for the script to skip unnecessary actions. Instead of blindly setting a registry key, I designed it to first check if the key was already in the desired state. This approach served two purposes: it provided valuable logging information to indicate what the script actually changed and avoided unnecessary elevation prompts.
Furthermore, I prioritized security and implemented a strategy to handle elevation. The script was designed to run unelevated by default, and only specific commands would require elevation if necessary. This adherence to the principle of least privilege improved security measures and mitigated potential issues related to file creation as an administrator. Admittedly, this has debatable value since this script is personal and so should be deemed trustworthy before executing it.
Overall, these considerations, including idempotence, skipping unnecessary actions, and managing elevation, played crucial roles in making the script more robust, user-friendly, and secure.
To ensure compatibility with different machine setups, the script begins by defining two crucial paths that might vary based on the drive topography of each machine. For example, on my personal machine I have a separate OS drive and data drive, while on my work machine I have a single drive. Specifically, these paths are the CodeDir
and BinDir
.
CodeDir
represents the root directory for all code, where I typically clone git repositories and store project files. BinDir
is the designated location for scripts and standalone tools.
The setup script initiates a prompt to determine the locations of CodeDir
and BinDir
, assuming they haven’t been defined previously. Once the user provides the necessary input, the script proceeds to set these paths as user-wide environment variables. Additionally, BinDir
is added to the user-wide PATH
, ensuring convenient access to scripts and tools from anywhere within the system.
Configuring Windows revolves around making modifications to the registry. The setup script encompasses several essential registry tweaks and configuration adjustments, including:
%BinDir%\init.cmd
(more on that later)CodeDir
from DefenderI will certainly be adding more to this list as time goes on.
When it comes to debloating scripts and tools, it’s important to strike a balance. I find that many available scripts tend to be overly aggressive, removing applications that might actually be useful or causing unintended harm to the system. In my personal experience, I find it unnecessary to uninstall essential applications like the Edge browser or OneDrive. Additionally, it’s worth noting that Microsoft discourages the use of registry cleaners due to potential malware risks, and honestly orphaned registry keys take up virtually no disk space and don’t slow the system down in any way.
Nevertheless, I do believe there is value in uninstalling a few specific applications that come bundled with Windows. These include:
Beyond that, a clean install of Windows should be relatively free of bloatware applications.
Many applications these days can be installed and updated via winget. Winget can easily be scripted to install a list of applications, and for me that list includes:
mstsc
While most applications can be installed via Winget, there are a few exceptions. In those cases, the script takes care of installing those applications separately. One such app is the Azure Artifacts Credential Provider (for Azure Feeds), and WSL. Note that installing WSL involves enabling some Windows Components which require a reboot to fully finish installing.
Once the applications are installed, the setup script proceeds to configure them. Some applications are configured by the registry while other use environment variables and some even use configuration files. The following configurations are performed by the script:
CodeDir
to be more appropriate.A keen eye may have noticed that the setup script installs Git, but the script lives on GitHub, so there is a bootstrapping problem. How can we download the script and other assets from GitHub?
Luckily it’s fairly easy to download an entire GitHub repository as a zip file. The following PowerShell will download the zip, extract it, and run it:
$TempDir = "$env:TEMP\MachineSetup"
Remove-Item $TempDir -Recurse -Force -ErrorAction SilentlyContinue
New-Item -Path $TempDir -ItemType Directory > $null
$ZipPath = "$TempDir\bundle.zip"
$ProgressPreference = 'SilentlyContinue'
Invoke-WebRequest -Uri https://github.com/dfederm/MachineSetup/archive/refs/heads/main.zip -OutFile $ZipPath
$ProgressPreference = 'Continue'
Expand-Archive -LiteralPath $ZipPath -DestinationPath $TempDir
$SetupScript = (Get-ChildItem -Path $TempDir -Filter setup.ps1 -Recurse).FullName
& $SetupScript @args
Remove-Item $TempDir -Recurse -Force
That’s a bit much to copy and paste though, so I saved that as a bootstrap.ps1
script in the repo, so the full bootstrapping is a one-liner:
iex "& { $(iwr https://raw.githubusercontent.com/dfederm/MachineSetup/main/bootstrap.ps1) }" | Out-Null
It’s a bit roundabout but the one-liner will download and execute bootstrap.ps1
, which will in turn download the entire repo as a zip file, extract it, and run the setup script.
BinDir
and autorunWith the bootstrap process in place, we can finally complete the picture with the aforementioned init.cmd
autorun script and the BinDir
. The repo contains a bin
directory which is copied to BinDir
and contains the init.cmd
autorun and other necessary scripts or files.
The init.cmd
autorun is described in more detail in my previous blog post, but essentially it’s a script that runs every time cmd
is launched. I use it primarily to set up DOSKEY
macros like n
for launching Nodepad++. Note that if you prefer PowerShell, you can set up similar behavior using Profiles (%UserProfile%\Documents\PowerShell\Profile.ps1
).
Additionally, the reason why BinDir
is on the PATH
is because any other helpful scripts can be added there and be invoked anywhere.
Finally, a backup of my Windows Terminal settings.json
is in this directory so that the setup script can simply copy it to configure Windows Terminal.
Setting up a new machine doesn’t have to be a cumbersome process. By adopting this setup script and following the outlined steps, you can significantly reduce the time and effort required to configure new machines while ensuring a consistent and optimized working environment. With the power of automation and the flexibility of customization, the setup script presented in this blog post offers a practical solution to streamline the machine setup experience. Embrace the script, tailor it to your preferences, and let it handle the heavy lifting for you, allowing you to focus on what matters most—writing code and building remarkable software.
]]>For background, ReferenceTrimmer is a NuGet package which helps identify unused dependencies which can be safely removed from your C# projects. Whether it’s old style <Reference>
, other projects in your repository referenced via <ProjectReference>
, or NuGet’s <PackageReference>
, ReferenceTrimmer will help determine what isn’t required and simplify your dependency graph. This can lead to faster builds, smaller outputs, and better maintainability for your repository.
Most notably among the changes are that it’s now implemented as a combination of an MSBuild task and a Roslyn analyzer which seamlessly hook into your build process. A close second, and very related to the first, is that it uses the GetUsedAssemblyReferences
Roslyn API to determine exactly which references the compiler used during compilation.
Because of the implementation being in an MSBuild task and Roslyn analyzer, the bulk of the work to use ReferenceTrimmer is to simply add a PackageReference
to the ReferenceTrimmer NuGet package. That will automatically enable its logic as part of your build. It’s recommended to add this to your Directory.Build.props
or Directory.Build.targets
, or if you’re using NuGet’s Central Package Management, which I highly recommend, your Directory.Packages.props
file at the root of your repo.
For better results, IDE0005 (Remove unnecessary using directives) should also be enabled, and unfortunately to enable this rule you need to enable XML documentation comments (xmldoc) due to dotnet/roslyn issue 41640. This causes many new analyzers to kick in which you may have many violations for, so those would need to be fixed or suppressed. To enable xmldoc, set the <GenerateDocumentationFile>
property to true
.
And that’s it, ReferenceTrimmer should now run as part of your build!
ReferenceTrimmer consists of two parts: an MSBuild task and a Roslyn analyzer.
The task is named CollectDeclaredReferencesTask
and as you can guess, its job is to gather the declared references. It gathers the list of references passed to the compiler and associates each of them with the <Reference>
, <ProjectReference>
, or <PackageReference>
from which they originate. It also filters out references which are unavoidable such as implicitly defined references from the .NET SDK, as well as packages which contain build logic since that may be the true purpose of that packages as opposed to providing a referenced library.
This information from the task is dumped into a file _ReferenceTrimmer_DeclaredReferences.json
under the project’s intermediate output folder (usually obj\Debug
or obj\Release
) and this path is added as a AdditionalFiles
item to pass it to the analyzer.
Next, as part of compilation, the analyzer named ReferenceTrimmerAnalyzer
will call the GetUsedAssemblyReferences
API as previously mentioned to get the used references and compare them to the compared references provided by the task. Any declared references which are not used will cause a warning to be raised.
The warning code raised will depend on the originating reference type. It will be RT0001
for <Reference>
items, RT0002
for <ProjectReference>
items, or RT0003
for <PackageReference>
items. These are treated like any other compilation warning and so can be suppressed on a per-project basic with <NoWarn>
. Additionally ReferenceTrimmer can be disabled entirely for a project by setting $(EnableReferenceTrimmer)
to false.
Note that because the warnings are raised as part of compilation, projects with other language types like C++ or even NoTargets projects will not cause warning to be raised nor need to be explicitly excluded from ReferenceTrimmer.
Ideas for future improvement include:
<ProjectReference>
which are required for runtime only. Or at least documenting explicit guidance around how to reference those properly such that the compiler doesn’t “see” them but the outputs are still copied.Contributions and bug reports are always welcome on GitHub, and I’m hopeful ReferenceTrimmer can be helpful in detangling your repos!
]]>Mutex
class in .NET helps manage exclusive access to a resource. When given a name, this can even be done across processes which can be extremely handy.
Though if you’ve ever used a Mutex
you may have found that it cannot be used in conjunction with async
/await
. More specifically, from the documentation:
Mutexes have thread affinity; that is, the mutex can be released only by the thread that owns it.
This can make the Mutex
class hard to use at times and may require use of ugliness like GetAwaiter().GetResult()
.
For in-process synchronization, SemaphoreSlim
can be a good choice as it has a WaitAsync()
method. However semaphores aren’t ideal for managing exclusive access (new SemaphoreSlim(1)
works but is less clear) and do not support system-wide synchronization eg. new Mutex(initiallyOwned: false, @"Global\MyMutex")
.
Below I’ll explain how to implement an async mutex, but the full code can be found at the bottom or in the Gist.
EDIT Based on a bunch of feedback, it’s clear to me that I over-generalized this post. This implementation was specifically for synchronizing across processes, not within a process. The code below is absolutely not thread-safe. So think of this more as an “Async Global Mutex” and stick with SemaphoreSlim
to synchronization across threads.
First, some background on how to properly use a Mutex
. The simplest example is:
// Create the named system-wide mutex
using Mutex mutex = new(false, @"Global\MyMutex");
// Acquire the Mutex
mutex.WaitOne();
// Do work...
// Release the Mutex
mutex.ReleaseMutex();
As Mutex
derives from WaitHandle
, WaitOne()
is the mechanism to acquire it.
However, if a Mutex
is not properly released when a thread holding it exits, the WaitOne()
will throw a AbandonedMutexException
. The reason for this is explained as:
An abandoned mutex often indicates a serious error in the code. When a thread exits without releasing the mutex, the data structures protected by the mutex might not be in a consistent state. The next thread to request ownership of the mutex can handle this exception and proceed, if the integrity of the data structures can be verified.
So the next thread to acquire the Mutex
is responsible for verifying data integrity, if applicable. Note that a thread can exit without properly releasing the Mutex
if the user kills the process, so AbandonedMutexException
should always be caught when trying to acquire a Mutex
.
With this our new example becomes:
// Create the named system-wide mutex
using Mutex mutex = new(false, @"Global\MyMutex");
try
{
// Acquire the Mutex
mutex.WaitOne();
}
catch (AbandonedMutexException)
{
// Abandoned by another process, we acquired it.
}
// Do work...
// Release the Mutex
mutex.ReleaseMutex();
However, what if the work we want to do while holding the Mutex
is async?
AsyncMutex
First let’s define what we want the shape of the class to look like. We want to be able to acquire and release the mutex asynchronously, so the following seems reasonable:
public sealed class AsyncMutex : IAsyncDisposable
{
public AsyncMutex(string name);
public Task AcquireAsync(CancellationToken cancellationToken);
public Task ReleaseAsync();
public ValueTask DisposeAsync();
}
And so the intended usage would look like:
// Create the named system-wide mutex
await using AsyncMutex mutex = new(@"Global\MyMutex");
// Acquire the Mutex
await mutex.AcquireAsync(cancellationToken);
// Do async work...
// Release the Mutex
await mutex.ReleaseAsync();
Now that we know what we want it to look like, we can start implementing.
Because Mutex
must be in a single thread, and because we want to return a Task
so the mutex can be acquired async, we can start a new Task
which uses the Mutex
and return that.
public Task AcquireAsync()
{
TaskCompletionSource taskCompletionSource = new();
// Putting all mutex manipulation in its own task as it doesn't work in async contexts
// Note: this task should not throw.
Task.Factory.StartNew(
state =>
{
try
{
using var mutex = new Mutex(false, _name);
try
{
// Acquire the Mutex
mutex.WaitOne();
}
catch (AbandonedMutexException)
{
// Abandoned by another process, we acquired it.
}
taskCompletionSource.SetResult();
// TODO: We need to release the mutex at some point
}
catch (Exception ex)
{
taskCompletionSource.TrySetException(ex);
}
}
state: null,
cancellationToken,
TaskCreationOptions.LongRunning,
TaskScheduler.Default);
return taskCompletionSource.Task;
}
So now AcquireAsync
returns a Task
which doesn’t complete until the Mutex
is acquired.
At some point the code needs to release the Mutex
. Because the mutex must be released in the same thread it was acquired in, it must be released in the Task
which AcquireAsync
started. However, we don’t want to actually release the mutex until ReleaseAsync
is called, so we need the Task
to wait until that time.
To accomplish this, we need a ManualResetEventSlim
which the Task
can wait for a signal from, which ReleaseAsync
will set.
private Task? _mutexTask;
private ManualResetEventSlim? _releaseEvent;
public Task AcquireAsync(CancellationToken cancellationToken)
{
TaskCompletionSource taskCompletionSource = new();
_releaseEvent = new ManualResetEventSlim();
// Putting all mutex manipulation in its own task as it doesn't work in async contexts
// Note: this task should not throw.
_mutexTask = Task.Factory.StartNew(
state =>
{
try
{
using var mutex = new Mutex(false, _name);
try
{
// Acquire the Mutex
mutex.WaitOne();
}
catch (AbandonedMutexException)
{
// Abandoned by another process, we acquired it.
}
taskCompletionSource.SetResult();
// Wait until the release call
_releaseEvent.Wait();
mutex.ReleaseMutex();
}
catch (Exception ex)
{
taskCompletionSource.TrySetException(ex);
}
},
state: null,
cancellationToken,
TaskCreationOptions.LongRunning,
TaskScheduler.Default);
return taskCompletionSource.Task;
}
public async Task ReleaseAsync()
{
_releaseEvent?.Set();
if (_mutexTask != null)
{
await _mutexTask;
}
}
Now the Task
will acquire the Mutex
, then wait for a signal from the ReleaseAsync
method to release the mutex.
Additionally, the ReleaseAsync
waits for the Task
to finish to ensure its Task
will not complete until the mutex is released.
The caller may not want to wait forever for the mutex acquisition, so we need cancellation support. This is fairly straightforward since Mutex
is a WaitHandle
, and CancellationToken
has a WaitHandle
property, so we can use WaitHandle.WaitAny()
public Task AcquireAsync(CancellationToken cancellationToken)
{
cancellationToken.ThrowIfCancellationRequested();
TaskCompletionSource taskCompletionSource = new();
_releaseEvent = new ManualResetEventSlim();
// Putting all mutex manipulation in its own task as it doesn't work in async contexts
// Note: this task should not throw.
_mutexTask = Task.Factory.StartNew(
state =>
{
try
{
using var mutex = new Mutex(false, _name);
try
{
// Wait for either the mutex to be acquired, or cancellation
if (WaitHandle.WaitAny(new[] { mutex, cancellationToken.WaitHandle }) != 0)
{
taskCompletionSource.SetCanceled(cancellationToken);
return;
}
}
catch (AbandonedMutexException)
{
// Abandoned by another process, we acquired it.
}
taskCompletionSource.SetResult();
// Wait until the release call
_releaseEvent.Wait();
mutex.ReleaseMutex();
}
catch (OperationCanceledException)
{
taskCompletionSource.TrySetCanceled(cancellationToken);
}
catch (Exception ex)
{
taskCompletionSource.TrySetException(ex);
}
},
state: null,
cancellationToken,
TaskCreationOptions.LongRunning,
TaskScheduler.Default);
return taskCompletionSource.Task;
}
To ensure the mutex gets released, we should implement disposal. This should release the mutex if held. It should also cancel any currently waiting acquiring of the mutex, which requires a linked cancellation token.
private CancellationTokenSource? _cancellationTokenSource;
public Task AcquireAsync(CancellationToken cancellationToken)
{
cancellationToken.ThrowIfCancellationRequested();
TaskCompletionSource taskCompletionSource = new();
_releaseEvent = new ManualResetEventSlim();
_cancellationTokenSource = CancellationTokenSource.CreateLinkedTokenSource(cancellationToken);
// Putting all mutex manipulation in its own task as it doesn't work in async contexts
// Note: this task should not throw.
_mutexTask = Task.Factory.StartNew(
state =>
{
try
{
CancellationToken cancellationToken = _cancellationTokenSource.Token;
using var mutex = new Mutex(false, _name);
try
{
// Wait for either the mutex to be acquired, or cancellation
if (WaitHandle.WaitAny(new[] { mutex, cancellationToken.WaitHandle }) != 0)
{
taskCompletionSource.SetCanceled(cancellationToken);
return;
}
}
catch (AbandonedMutexException)
{
// Abandoned by another process, we acquired it.
}
taskCompletionSource.SetResult();
// Wait until the release call
_releaseEvent.Wait();
mutex.ReleaseMutex();
}
catch (OperationCanceledException)
{
taskCompletionSource.TrySetCanceled(cancellationToken);
}
catch (Exception ex)
{
taskCompletionSource.TrySetException(ex);
}
},
state: null,
cancellationToken,
TaskCreationOptions.LongRunning,
TaskScheduler.Default);
return taskCompletionSource.Task;
}
public async ValueTask DisposeAsync()
{
// Ensure the mutex task stops waiting for any acquire
_cancellationTokenSource?.Cancel();
// Ensure the mutex is released
await ReleaseAsync();
_releaseEvent?.Dispose();
_cancellationTokenSource?.Dispose();
}
AsyncMutex
allows usage of Mutex
with async
/await
.
Putting the whole thing together (or view the Gist):
public sealed class AsyncMutex : IAsyncDisposable
{
private readonly string _name;
private Task? _mutexTask;
private ManualResetEventSlim? _releaseEvent;
private CancellationTokenSource? _cancellationTokenSource;
public AsyncMutex(string name)
{
_name = name;
}
public Task AcquireAsync(CancellationToken cancellationToken)
{
cancellationToken.ThrowIfCancellationRequested();
TaskCompletionSource taskCompletionSource = new();
_releaseEvent = new ManualResetEventSlim();
_cancellationTokenSource = CancellationTokenSource.CreateLinkedTokenSource(cancellationToken);
// Putting all mutex manipulation in its own task as it doesn't work in async contexts
// Note: this task should not throw.
_mutexTask = Task.Factory.StartNew(
state =>
{
try
{
CancellationToken cancellationToken = _cancellationTokenSource.Token;
using var mutex = new Mutex(false, _name);
try
{
// Wait for either the mutex to be acquired, or cancellation
if (WaitHandle.WaitAny(new[] { mutex, cancellationToken.WaitHandle }) != 0)
{
taskCompletionSource.SetCanceled(cancellationToken);
return;
}
}
catch (AbandonedMutexException)
{
// Abandoned by another process, we acquired it.
}
taskCompletionSource.SetResult();
// Wait until the release call
_releaseEvent.Wait();
mutex.ReleaseMutex();
}
catch (OperationCanceledException)
{
taskCompletionSource.TrySetCanceled(cancellationToken);
}
catch (Exception ex)
{
taskCompletionSource.TrySetException(ex);
}
},
state: null,
cancellationToken,
TaskCreationOptions.LongRunning,
TaskScheduler.Default);
return taskCompletionSource.Task;
}
public async Task ReleaseAsync()
{
_releaseEvent?.Set();
if (_mutexTask != null)
{
await _mutexTask;
}
}
public async ValueTask DisposeAsync()
{
// Ensure the mutex task stops waiting for any acquire
_cancellationTokenSource?.Cancel();
// Ensure the mutex is released
await ReleaseAsync();
_releaseEvent?.Dispose();
_cancellationTokenSource?.Dispose();
}
}
PackageReference
has replaced packages.config
as the primary mechanism for consuming NuGet packages. For those looking to migrate, there is documentation available to help you. But how does it actually work under the hood?
Historically with packages.config
files, NuGet’s role was simply to download the exact packages at the exact versions you specified, and then copy the packages into a repository-relative path configured in your NuGet.Config
file, usually /packages
. Actually consuming the package contents was ultimately up to the consuming projects, however the Visual Studio Package Manager UI would help update the relevant project with various <Import>
, <Reference>
, and <Content>
elements based on convention.
With PackageReference
, these conventions have been effectively codified. It becomes very cumbersome to consume packages these days which do not conform to the conventions. Additionally PackageReference
adds much-needed quality-of-life features, such as automatically pulling in dependencies and unifying package versions.
As I hinted earlier, NuGet’s job previously was to download packages only, so a nuget restore
of a packages.config file did that and only that. Now with PackageReference
, the restore process does not only that but also generates files per-project which describe the contents of each consumed package and is used during the build to dynamically add the equivalents of the previous <Import>
, <Reference>
, and <Content>
elements which were present in projects.
One benefit of these generated files is that the project files are left much cleaner. The project file simply has a PackageReference
, rather than consuming a bunch of stuff which happens to all be from a path inside that package with lots of duplication.
Another benefit is that the copy of all package contents from the global package cache to the repository-relative /packages
directory is no longer necessary as the generated files can point directly into the global package cache. This can save a lot of disk space and a lot of restore time (at least in a clean repository). Note that the global package cache is %UserProfile%\.nuget\packages
by default on Windows machines, but can be redirected as desired, for example to the same drive as your code which is ideally an SSD, by setting %NUGET_PACKAGES%
.
These generated files are output to $(RestoreOutputPath)
, which by default is $(MSBuildProjectExtensionsPath)
, which by default is $(BaseIntermediateOutputPath)
, which by default is obj\
(Phew). The notable generated files are project.assets.json
, <project-file>.nuget.g.props
, and <project-file>.nuget.g.targets
.
An interesting but important note is that PackageReference
items are only used during the restore. During the build, any package related information comes from the files generated during the restore.
Let’s start with the generated props and targets files as they’re more straightforward.
These generated props file is imported by this line in Microsoft.Common.props
(which is imported by Microsoft.NET.Sdk
):
<Import Project="$(MSBuildProjectExtensionsPath)$(MSBuildProjectFile).*.props" Condition="'$(ImportProjectExtensionProps)' == 'true' and exists('$(MSBuildProjectExtensionsPath)')" />
Similarly, the targets file is imported by a similar like in Microsoft.Common.targets
.
The props file always defines a few properties which NuGet uses at build time like $(ProjectAssetsFile)
, but the interesting part to a consumer is that the <Import>
elements into packages which used to be directly in the projects are generated to these files, the packages’ build\<package-name>.props
in the <project-file>.nuget.g.props
and the build\<package-name>.targets
in the <project-file>.nuget.g.targets
.
As an example, you’ll see a section similar to this in the generated props file for a unit test project using xUnit:
<ImportGroup Condition="'$(ExcludeRestorePackageImports)' != 'true'">
<Import Project="$(NuGetPackageRoot)xunit.runner.visualstudio\2.4.3\build\netcoreapp2.1\xunit.runner.visualstudio.props" Condition="Exists('$(NuGetPackageRoot)xunit.runner.visualstudio\2.4.3\build\netcoreapp2.1\xunit.runner.visualstudio.props')" />
<Import Project="$(NuGetPackageRoot)xunit.core\2.4.1\build\xunit.core.props" Condition="Exists('$(NuGetPackageRoot)xunit.core\2.4.1\build\xunit.core.props')" />
<Import Project="$(NuGetPackageRoot)microsoft.testplatform.testhost\17.1.0\build\netcoreapp2.1\Microsoft.TestPlatform.TestHost.props" Condition="Exists('$(NuGetPackageRoot)microsoft.testplatform.testhost\17.1.0\build\netcoreapp2.1\Microsoft.TestPlatform.TestHost.props')" />
<Import Project="$(NuGetPackageRoot)microsoft.codecoverage\17.1.0\build\netstandard1.0\Microsoft.CodeCoverage.props" Condition="Exists('$(NuGetPackageRoot)microsoft.codecoverage\17.1.0\build\netstandard1.0\Microsoft.CodeCoverage.props')" />
<Import Project="$(NuGetPackageRoot)microsoft.net.test.sdk\17.1.0\build\netcoreapp2.1\Microsoft.NET.Test.Sdk.props" Condition="Exists('$(NuGetPackageRoot)microsoft.net.test.sdk\17.1.0\build\netcoreapp2.1\Microsoft.NET.Test.Sdk.props')" />
</ImportGroup>
Note that $(NuGetPackageRoot)
is the global package cache directory as described earlier and is defined earlier in the same generated props file.
The generated props file also defines properties which point to package root directories for packages which have the GeneratePathProperty
metadata defined. These properties look like $(PkgNormalized_Package_Name)
and are mostly used as an escape valve for package which don’t properly follow the conventions and using custom build logic in the project file to reach into the package is required.
Next we’ll explore the project.assets.json
file.
The project.assets.json
file contains a boatload of information. It describes the full package dependency graph for each target framework the project targets, a list of the contents of all packages in the graph, the package folders the packages exist at, the list of project references, and various other miscellany.
Here is an example of the basic structure, with many omissions for brevity:
{
"targets": {
"net6.0": {
"xunit/2.4.1": {
"type": "package",
"dependencies": {
"xunit.analyzers": "0.10.0",
"xunit.assert": "[2.4.1]",
"xunit.core": "[2.4.1]"
}
},
"xunit.analyzers/0.10.0": {
"type": "package"
},
"ExampleClassLibrary/1.0.0": {
"type": "project",
"framework": ".NETCoreApp,Version=v6.0",
"dependencies": {
// ... the dependency project's package dependencies ...
},
// ... all other transitive package and project dependencies ...
}
}
},
"libraries": {
"xunit/2.4.1": {
"sha512": "XNR3Yz9QTtec16O0aKcO6+baVNpXmOnPUxDkCY97J+8krUYxPvXT1szYYEUdKk4sB8GOI2YbAjRIOm8ZnXRfzQ==",
"type": "package",
"path": "xunit/2.4.1",
"files": [
".nupkg.metadata",
".signature.p7s",
"xunit.2.4.1.nupkg.sha512",
"xunit.nuspec"
]
},
"ExampleClassLibrary/1.0.0": {
"type": "project",
"path": "../src/ExampleClassLibrary.csproj",
"msbuildProject": "../src/ExampleClassLibrary.csproj"
}
// ... all other transitive package dependencies' contents and transitive project dependencies' paths ...
},
"projectFileDependencyGroups": {
"net6.0": [
"ExampleClassLibrary >= 1.0.0",
"Microsoft.NET.Test.Sdk >= 17.2.0",
"xunit >= 2.4.1",
"xunit.runner.visualstudio >= 2.4.5"
]
},
"packageFolders": {
"C:\\Users\\David\\.nuget\\packages\\": {},
"C:\\Program Files (x86)\\Microsoft Visual Studio\\Shared\\NuGetPackages": {},
"C:\\Program Files\\dotnet\\sdk\\NuGetFallbackFolder": {}
},
"project": {
"version": "1.0.0",
// ... various information about the project ...
}
}
Examples of why one might want to look at this file are be to understand where a dependency is coming from or why a dependency version is resolving the way that it is.
The ResolvePackageAssets
target reads the project.assets.json
file to translate its contents into various items, like ResolvedAnalyzers
, _TransitiveProjectReferences
, ResolvedCompileFileDefinitions
(which end up becoming Analyzer
, ProjectReference
, and Reference
items respectively), and everything else which is used from a package.
Now why the ResolvePackageAssets
target exists as opposed to NuGet just generating these items in the generated props and targets files is anyone’s guess. It seems like that would be much simpler, straightforward, and performant. A complaint I have which I also see from others is that there is too much black-box magic, especially in ResolvePackageAssets
, but it is what it is.
I hope this helps shed some light on how PackageReference
works, explains why it’s better than the legacy packages.config
, and provides some of the details which can help with understanding and debugging your build.
In general, we want to arm the alarm when we’re not home. However, instead of doing it automatically, we preferred that a notification be sent to our phones reminding us to set it. This is because historically our presence detection has been a bit spotty, and there are also some scenarios where we might want to leave the alarm unarmed when we leave, for instance if we have guests and we need to run out to pick up take-out or something.
The individual components of this automation all seem pretty straightforward, but the state management gets a bit hairy. So let’s walk through it piece by piece.
First the trigger and condition. We want the automation to run when we leave the house and forget to arm the alarm. Note that I have a group set up containing all person
entities, and each person
has an associated device tracker (via the Mobile App). This is fairly straightforward:
trigger:
platform: state
entity_id: group.all_people
to: "not_home"
condition:
condition: state
entity_id: alarm_control_panel.alarm
state: disarmed
Next I wanted to just send a simple notification. I wanted the notification to come to both me and my wife’s phones, so I created a notify group containing both in configuration.yml
:
notify:
- name: all_phones
platform: group
services:
- service: mobile_app_person1_phone
- service: mobile_app_person2_phone
Now back in the automation, the group notification becomes pretty straightforward, including configuring it so that if you click on it, it brings you to the second lovelace tab (index 1) which is where my alarm panel card is:
action:
- alias: Send notification
service: notify.all_phones
data:
title: Home Alarm
message: Did you forget to set the alarm?
data:
channel: "home-alarm-reminder"
tag: "home-alarm-reminder"
importance: max
priority: high
ttl: 0
vibrationPattern: 0, 250, 250, 250
clickAction: /lovelace/1
Next I wanted to make the notification actionable so that the alarm could be armed directly rather than having to navigate to HA and use the alarm panel card. This is where things get slightly more complex. Showing additional actions in the notification isn’t too much extra, but handling it and having it perform an action requires a bit of fanciness.
In particular, the wait_for_trigger
action is used to wait for an event corresponding to the notification action (mobile_app_notification_action
). This event also has a name associated with it, and a unique one is preferred so that it doesn’t collide with other notification actions. This can be done by dynamically defining a variable which uses the automation’s context.id
as a way to guarantee uniqueness.
action:
- alias: Set up variables
variables:
# Including an id in the action allows us to identify this script run
# and not accidentally trigger for other notification actions
action_arm: "{{ 'arm_' ~ context.id }}"
- alias: Send notification
service: notify.all_phones
data:
title: Home Alarm
message: Did you forget to set the alarm?
data:
channel: "home-alarm-reminder"
tag: "home-alarm-reminder"
importance: max
priority: high
ttl: 0
vibrationPattern: 0, 250, 250, 250
clickAction: /lovelace/1
actions:
- action: "{{ action_arm }}"
title: Arm Alarm
- action: URI
title: Open Alarm Panel
uri: /lovelace/1
- alias: Wait for a response
wait_for_trigger:
- platform: event
event_type: mobile_app_notification_action
event_data:
action: "{{ action_arm }}"
- alias: Perform the action
service: alarm_control_panel.alarm_arm_away
target:
entity_id: alarm_control_panel.alarm
So far so good. However, I wanted the notification to clear when the alarm was armed in some way (potentially by the other person), or we came back home. So this required some extra triggers in the wait_for_trigger
to unblock the automation execution, a condition on the arming action, and a final action to execute for clearing the notification.
- alias: Wait for a response
wait_for_trigger:
- platform: event
event_type: mobile_app_notification_action
event_data:
action: "{{ action_arm }}"
# Stop waiting if it becomes moot (alarm gets set some other way or if we come home)
- platform: state
entity_id: alarm_control_panel.alarm
from: disarmed
- platform: state
entity_id: group.all_people
to: home
- alias: Perform the action
choose:
# Handle the arm action
- conditions: "{{ (wait is defined) and (wait.trigger is not none) and (wait.trigger.event.data.action == action_arm) }}"
sequence:
- service: alarm_control_panel.alarm_arm_away
target:
entity_id: alarm_control_panel.alarm
# Clear notifications once an action is taken *or* after it becomes moot
- alias: Clear notifications
service: notify.all_phones
data:
message: "clear_notification"
data:
tag: "home-alarm-reminder"
The wait_for_trigger
now gets unblocked if the action is tapped, the alarm is armed, or we come home. This means the arming action needs to check that the wait trigger was specifically the action being tapped and not the other triggers. Finally, the notification is cleared from all phones, no matter which of the triggers unblocked execution.
Piecing everything together, this brings the full automation to the following:
# NOTE: This automation's primary purpose is simply to send a notification, but to manage the
# notification state, including clearing notifications once it's done, the automation doesn't
# finish running until either the alarm is set or someone returns home.
- alias: Alarm - Notification for disarmed alarm when no one is home
id: alarm_forget_notification
trigger:
platform: state
entity_id: group.all_people
to: "not_home"
condition:
condition: state
entity_id: alarm_control_panel.alarm
state: disarmed
action:
- alias: Set up variables
variables:
# Including an id in the action allows us to identify this script run
# and not accidentally trigger for other notification actions
action_arm: "{{ 'arm_' ~ context.id }}"
- alias: Send notification
service: notify.all_phones
data:
title: Home Alarm
message: Did you forget to set the alarm?
data:
channel: "home-alarm-reminder"
tag: "home-alarm-reminder"
importance: max
priority: high
ttl: 0
vibrationPattern: 0, 250, 250, 250
clickAction: /lovelace/1
actions:
- action: "{{ action_arm }}"
title: Arm Alarm
- action: URI
title: Open Alarm Panel
uri: /lovelace/1
- alias: Wait for a response
wait_for_trigger:
- platform: event
event_type: mobile_app_notification_action
event_data:
action: "{{ action_arm }}"
# Stop waiting if it becomes moot (alarm gets set some other way or if we come home)
- platform: state
entity_id: alarm_control_panel.alarm
from: disarmed
- platform: state
entity_id: group.all_people
to: home
- alias: Perform the action
choose:
# Handle the arm action
- conditions: "{{ (wait is defined) and (wait.trigger is not none) and (wait.trigger.event.data.action == action_arm) }}"
sequence:
- service: alarm_control_panel.alarm_arm_away
target:
entity_id: alarm_control_panel.alarm
# Clear notifications once an action is taken *or* after it becomes moot
- alias: Clear notifications
service: notify.all_phones
data:
message: "clear_notification"
data:
tag: "home-alarm-reminder"
I hope this helps you get the most out of your security system, namely by being reminded to actual use it!
]]>This guide intends to help migration from the legacy Z-Wave integration to Z-Wave JS.
My personal setup uses Home Assistant OS (or HassOS, formerly “HassIO”) on a Raspberry Pi 3B+. This guide will focus on that scenario, so some steps may differ for other installation methods.
Before we begin, we should also understand the difference between an “add-on” and an “integration” in Home Assistant. An “add-on” is something specific to HassOS and those with other installation methods will not have this. An “integration” provides a specific functionality in Home Assistant across all installation types.
The fundamental architecture of the Z-Wave JS functionality in Home Assistant has two parts.
The first part is the Z-Wave JS server. This is what directly talks to your Z-Wave stick. For HassOS, this part will be provided by an add-on. For other installation methods, you will need to run the server yourself.
The second part is the Z-Wave JS integration in Home Assistant, used for all installation methods. This integration talks to the Z-Wave JS server to send commands to and receive information from your Z-Wave devices.
This split decouples Home Assistant from the Z-Wave controller, providing lots of flexibility in configuration and allowing the Home Assistant server to restart without restarting your Z-Wave network for instance.
First things first, backup your system. For those of you using HassOS, take a full snapshot and once it completes download the snapshot somewhere safe like OneDrive.
After migration, you’ll need to set up all your devices and entities again. To help with this, you should copy the current entity data, specifically which entity id and names you used for each Z-Wave node id.
Go to “Developer Tools” and filter the attributes by “node_id”
Next you’ll want to copy and and paste into Excel.
An easy way to do this is to:
ctrl+a
ctrl+v
To make sure you got everything, cross check entity count. Mine shows 107 entities in Home Assistant, while Excel shows 108 rows (1 extra for the header).
Take note of your device id your Z-Wave stick uses and the network key you use. The latter is especially important or you’ll need to completely set up your Z-Wave network, re-including all devices, from scratch.
If you’ve used yaml to configure this, you can simply comment it out for now so that it’s still available to you later.
zwave:
usb_path: /dev/ttyACM0
network_key: !secret zwave_network_key
From the integration page, simply delete the Z-Wave integration. As mentioned during preparation, you’ll also want to delete or comment out the zwave
configuration entry if you haven’t already.
Then restart Home Assistant to ensure the legacy Z-Wave inregration is completely gone.
As mentioned earlier, for installation types besides HassOS, you’ll need to get the Z-Wave JS server running yourself.
For HassOS users, simply go to the Add-on Store and find the Z-Wave JS add-on.
Installation may take a couple minutes, or at least it did for me, so be patient.
After the installation finishes, go to the Configuration for the add-on and add the device USB path and network key you found earlier. Remember to paste the actual network key, not the secret name.
Note that the dropdown did not show my device, so I had to click the 3 dots and “Edit in YAML”.
Pasting in the network key auto-formatted it for me, and my understanding is that both the “0x…” format as well as the “one hex string” formats are supported. Personally, I was using the “0x…” format before, so I just stuck with it.
Save the configuration and start the add-on. I suggest enabling the watchdog as well so that it restarts in case it crashes. You can also choose whether you want to enable auto-updates for the add-on.
Now that the Z-Wave JS server is now up and running, so the next step is to tell Home Assistant itself about it by adding the Z-Wave JS integration.
Go to the integrations page and add the Z-Wave integration. When asked to configur it, ensure the “Use Z-Wave JS Supervisor add-on” is checked if you’re using HassOS and the add-on. Other Home Assistant installation methods will not check that box and instead configure the integration to point to their manually configured Z-Wave JS server.
Submit and click through to finish. We’ll configure and rename each device later.
The integration should now be added!
You may notice that in the image above only 26 of the original 30 devices are shown. I found that the device count is more accurate with the new integration, as with the old integration I had several dead nodes which showed up as devices with no entities in Home Assistant.
You may also notice that battery-powered Z-Wave devices may not initially be properly recognized or populated with entities until they “wake up” and check in with the controller (your Z-Wave stick).
Most devices will wake up on some time interval, or you can look up how to manually wake up a device by reading the manual for that specific device, which usually involves pressing a physical button on the device.
You can check the overall status of the Z-Wave network, including how many nodes are ready, by clicking on “Configure” for the integration.
Because the integration uses a completely different back-end, entities may be different too. All the old zwave.*
entities are gone, and there are some added but disabled entities. For example all my light switches now have an entity ending in _basic
. Beyond some additions and substrations, some entities will just be different.
Unfortunately this part is tedious, especially if you have a large number of devices.
When clicking on a specific device you can see its node id, which you’ll then cross-reference with your entity data pasted into Excel to figure out which device it’s referring to.
I would recommend renaming the device first before its entities, because once you rename a device Home Assistant should, for the most part, rename the entities accordingly and sometimes it’ll just happen to match what you had before.
Now despite the Z-Wave JS integration being the “new thing” and the legacy Z-Wave integration being officially deprecated (but still existing), the new integration definitely has some major flaws and feature gaps. A list of known limitations is even listed on the docs. Some people I’ve seen even go as far to say that the new integration probably should have remained in beta for some time until it fills some of these gaps and has a better migration story.
One feature gap in particular is that a Node Configuration UI is not yet available. According to the docs:
Configuration of Z-Wave nodes and/or configuration with the Home Assistant UI is currently not yet implemented.
Based on forum posts however, this is only missing because it didn’t make it for the 2021.2 release. That will come in some future release, and supposedly soon.
One particularly disappointing aspect of the migration for me was that I was never able to get my door/windows sensors to work. I have several Aeotec door/window sensor gen 5 (ZW120-A) devices, and even after trying various restarts, pushing the hardware button on the sensors to force wake-ups, and giving it 4+ hours to stabilize, these devices consistently failed to inverview according to the Z-Wave JS logs.
Update Mar 3, 2021: As of the 2021.3 release, the door/window sensors work. I still had to wake up some of them a couple times, but that may have been because the first round I attempted the wake-ups during the initial surge of interviews, including the ones for wired devices, and the sensors only stay awake for 10 seconds.
Z-Wave JS is supposedly “blazing fast”, and others seem to corroborate the statement, however that was not the case for me. For example, I have an automation to turn on my kitchen pendants and under-cabinet lighting when the primary kitchen lights are turned on (via a light switch), and this took several seconds to trigger with the Z-Wave JS solution despite being near-instantaneous with the legacy integration.
I do wonder though whether this is perhaps due to the initial surge of traffic when migrating, including the device interview failures mentioned above, which caused the network as a whole to initially be slow. Maybe if I gave it more time it would have eventually stabilized, although as mentioned above I did give it 4 hours.
Update Mar 3, 2021: As of the 2021.3 release, the door/window sensors work, so I was successfully able to migrate.
The door/window sensors being unable to successfully interview was a deal breaker for me since these tie into my home’s security system, so I eventually had to go back to the legacy Z-Wave integration via a restore from backup. This is exactly the reason backing up beforehand is so important.
Since this is still very new though, these issues will hopefully be addressed in a future update, perhaps even the 2021.3 release scheduled for this coming week. The Z-Wave JS integration, both on the Z-Wave JS side and the Home Assistant side, seems to have a lot of attention right now and looks like it’ll be actively maintained going forward, so things are likely to get better.
Unfortunately, the question for me is how quickly the new integration can catch up to the legacy one. Personally, I could not wait for fixes and had to roll back, and I suspect many others who attempted migration did the same.
Additionally about a month or so ago, before Z-Wave JS was announced, I attempted to migrate to the OpenZWave beta integration. This was at the time supposedly the new thing, but is now basically abandoned. I also had issues with it (the same door/window sensors in fact…), so even then had to roll back to the legacy integration.
Assuming others are having similar experiences as me, I can’t blame anyone for feeling burned by the Home Assistant team and being pessimistic about the new Z-Wave JS integration. There’s certainly some trust lost in how Z-Wave has been handled, and the Home Assistant devs will need to work hard to build back some of that trust with users. I worry some users may even jump to another platform since trust is just such an important thing when it comes to people’s home.
Personally, I am hopeful about the future of the integration and have faith that it will (eventually) be great. I will certainly be trying to migrate again after the 2021.3 release, and I’m optimistic that it will have addressed the larger issues surrounding the integration.
]]>This blog was originally hosted on a WordPress site which shared an Azure App Service with some other websites I have and it’s own MySql database. Now not only did that cost money (or would have if it wasn’t sharing existing resources), but it was just way overkill for what I was doing, and even for all that it was just plain slow. Furthermore, and this is possibly just personal preference, I really just wanted to write Markdown and not have to deal with a fancy text editor or raw HTML. WordPress may be OK for people who don’t want to deal with any sort of programming or configuration but I, and I suspect most programmers, are more comfortable working with some sort of markup language like Markdown.
After looking around, I ended up landing on GitHub Pages. In essence, GitHub Pages allows you to host static web content for free. They also provide integration with Jekyll, a static content generator, which gives a little bit more flexibility. For those not familiar with static content generation, it’s basically just a tool which transforms some content and configuration into a full website. This allows you to create templates, shared includes, and variables to avoid having to write and update full HTML pages. GitHub Pages is also really easy to set up as it’s just a special GitHub repo, and it’s blazingly fast since your content is extremely cacheable so is generally served from CDN.
Assuming I’ve sold you on GitHub Pages, let’s see how easy it is to set up. There is documentation for both GitHub pages and Jekyll, but in my opinion the docs can be a bit hard to navigate since it’s split across the two sites and many of Jekyll’s features are not available on GitHub pages, which is unclear from the docs. This guide intends to explain the basics, as well as some of the more advanced topics I found useful. You can also see this blog’s repo for reference when configuring your own blog.
GitHub Pages allows a user, organization, or even a project to have its own site. For user sites, it’s in is own repo. The GitHub Pages website gives step-by-step instructions, but really all you have to do is create a repo named <username>.github.io
.
After the repo is created, clone it locally and clear out the initial boilerplate GitHub gives you.
(Users not using Windows can skip this section)
Unfortunately, Windows is not officially supported by Jekyll. They provide some workarounds, but personally it seemed more trouble than it’s worth. Because of this, I recommend using the Windows Subsystem for Linux, or WSL.
First, ensure CPU Virtualization is enabled in the BIOS. The process for enabling it varies by manufacturer, but you can check whether it’s enabled in the Task Manager under the performance tab.
Next, you’ll need to actually install WSL 2. Follow the official instructions for a step-by-step guide. Personally, I ended up using the Ubuntu 20.04 distro, but you should be able to use whichever you prefer.
Jekyll requires Ruby, so you’ll first need to install it. On Ubuntu, just run:
# Install Ruby
sudo apt-get install ruby-full build-essential zlib1g-dev
# Ensure RubyGems packages are installed under the user account instead of root.
echo '# Install Ruby Gems to ~/gems' >> ~/.bashrc
echo 'export GEM_HOME="$HOME/gems"' >> ~/.bashrc
echo 'export PATH="$HOME/gems/bin:$PATH"' >> ~/.bashrc
source ~/.bashrc
# Install Jekyll and Bundler:
gem install jekyll bundler
From your Linux shell, navigate to your GitHub repository created earlier and run:
jekyll new .
Note that for Windows users, your Windows drives like C: are mounted in WSL, so you can get to a path like C:\Users\David\Code\dfederm.github.io
via /mnt/c/Users/David/Code/dfederm.github.io
.
The new Jekyll template is a good starting point, but you’ll want to make a few changes to work properly with GitHub Pages.
From here on you can edit the files in your favorite editor, eg. Visual Studio Code. You only need to use your Linux shell to run ruby, bundle, and Jekyll commands.
First, replace the Gemfile
contents with the following:
source "https://rubygems.org"
# To update to the latest github dependencies run: `bundle update`
# To list current versions: `bundle exec github-pages versions`
# Check github versions: https://pages.github.com/versions/
gem "github-pages", group: :jekyll_plugins
group :jekyll_plugins do
gem 'jekyll-feed'
gem 'jekyll-paginate'
gem 'jekyll-seo-tag'
gem 'jekyll-sitemap'
end
# Windows and JRuby does not include zoneinfo files, so bundle the tzinfo-data gem
# and associated library.
install_if -> { RUBY_PLATFORM =~ %r!mingw|mswin|java! } do
gem "tzinfo", "~> 1.2"
gem "tzinfo-data"
end
# Performance-booster for watching directories on Windows
gem "wdm", "~> 0.1.1", :install_if => Gem.win_platform?
You’ll notice that the github-pages
gem is there, which ensures what you’re using locally matches what GitHub Pages uses. Notably GitHub pages does not support arbitrary Jekyll plugins, so you generally shouldn’t deviate from this Gemfile too much. The list of Jekyll plugins and other Ruby Gems GitHub pages supports can be found on their website.
After updating the Gemfile
, you’ll want to bundle update
to install everything.
To build the site and serve it locally, run:
bundle exec jekyll serve --drafts --livereload
For those running Windows, I recommend adding --force_polling
. Otherwise, saving your content sometimes does not auto-regenerate the site.
Your site should now be running at http://localhost:4000
!
For the curious, you can see the entire generated website under the _site
folder.
Once you commit and push your changes, GitHub will automatically build your website and deploy it within minutes. Your website will be at <username>.github.io
. You’re up and running!
Jekyll is quite powerful and the docs go into details about every feature. Below I’ll describe the major ones which will get you up and running.
_config.yml
is the primary configuration for the site as a whole. It describes how to build the site, site-wide configuration, and custom site-wide variables you may want to define.
The new site template hits a few of the major configurations, however I’d recommend adding a few more:
# Site settings
permalink: /:title/
markdown: kramdown
paginate: 5
paginate_path: "/:num/"
date_format: "%b %-d, %Y"
To describe these settings:
permalink
is the url format for your permalinks. I like the url to just be the post title.markdown
is the markdown formatter.paginate
is the number of posts per page if using pagination. (requires the jekyll-paginate
plugin)paginate_path
is the url format for pages. I like a simple /1
, /2
, etc. (requires the jekyll-paginate
plugin)date_format
is the default date format the site uses.GitHub Pages also forces some configuration which you cannot change. Be sure to avoid changing these or you’ll only see the behavior locally and they’ll be lost when deployed.
This is also where you configure your plugins, for example:
plugins:
- jekyll-feed
- jekyll-paginate
- jekyll-seo-tag
- jekyll-sitemap
To describe these plugins:
jekyll-feed
creates an Atom feed for your site at /feed.xml
.jekyll-paginate
enables paginationjekyll-seo-tag
adds search engine metadata to the site.jekyll-sitemap
creates a site map for your site at /sitemap.xml
.You can also add any other custom various in this file as well. Simply add them to the _config.yml
file, for example:
google_analytics: <your-ga-id>
These custom variables can be used in your content like {{ site.google_analytics }}
.
These are for standalone content for your site, like the home page, about page, contact page, etc. These can be either .html
or .md
files, based on whichever is better for writing your content.
By default, the url for pages follows the folder structure you use, so documentation\doc1.md
would become /documentation/doc1.html
, but this can be overridden.
Jekyll is a templating engine, which helps avoid duplication and enable you to express what you want to happen rather than having to type it up by hand.
“Front Matter” is a term for a file that contains a YAML block at the top of the file and is processed by Jekyll. The YAML must be set between triple-dashed lines and is where you define the file-specific variables. For example, you can specify the layout for Jekyll to use, the title, and custom variables to use within the page.
An example from my About page:
---
layout: page
title: About
order: 2
---
Layouts are basically the template for the content. There are some default layouts, but you’ll likely want to customize your own. Layouts reside under the _layouts
folder and the layout name is just the file name without extension. In the example above for my about page, I have the layout at _layouts\page.html
.
A layout may inherit other layouts (and in fact, my page
layout inherits my default
layout), and specifies where to put the file’s content with {{ content }}
.
Finally, includes can be used to insert files into the current file without having to repeat it. It can also help organize your content and layouts by extracting logical blocks into separate files.
To put it all together, for my site I have something like the following files (simplified for brevity, and omitted some files):
about.md:
---
layout: page
title: About
order: 2
---
## Subtitle 1
Some Content
## Subtitle 2
Some Content
_layouts\page.html:
---
layout: default
---
<article class="post">
<header class="post-header">
<h1 class="post-title">{{ page.title | escape }}</h1>
</header>
<div class="post-content">
{{ content }}
</div>
</article>
_layouts\default.html:
<!DOCTYPE html>
<html lang="en">
{%- include head.html -%}
<body>
{%- include header.html -%}
<main class="page-content"
aria-label="Content">
<div class="wrapper">
{{ content }}
</div>
</main>
{%- include footer.html -%}
</body>
</html>
_includes\head.html:
<head>
<meta charset="utf-8">
<meta http-equiv="X-UA-Compatible" content="IE=edge">
<meta name="viewport" content="width=device-width, initial-scale=1">
{%- include favicons.html -%}
{%- seo -%}
<link rel="stylesheet" href="{{ "/assets/css/style.css" | relative_url }}">
{%- feed_meta -%}
{%- if jekyll.environment == 'production' and site.google_analytics -%}
{%- include google-analytics.html -%}
{%- endif -%}
</head>
_includes\header.html:
<script async src="https://www.googletagmanager.com/gtag/js?id={{ site.google_analytics }}"></script>
<script>
window.dataLayer = window.dataLayer || [];
function gtag() { dataLayer.push(arguments); }
gtag('js', new Date());
gtag('config', '{{ site.google_analytics }}');
</script>
Posts are what blogs are all about. Posts go in the _posts
folder and should be named YEAR-MONTH-DAY-title.md
, so for example this post is in _posts/2021-01-18-creating-a-blog-using-github-pages.md
.
Posts also are required to have front matter, which you’ll typically use to specify the layout and title of the post.
An example post file is as simple as:
---
layout: post
title: My first post!
categories: [blogging]
---
## Hello!
My first blog post
You can also create drafts when you’re not read to post something quite yet. Just put the file in the _drafts
folder and don’t have a date in the file name. Drafts are only included in the site when using the --drafts
command-line parameter, so they won’t be included on your production site. This allows you to push your unfinished changes instead of having to create topic branches in git like you would with code.
Static files like images are pretty simple. You can just reference them as a relative url using standard markdown. Personally, I used the “assets” folder for static content, although “assets” mean something slight different in Jekyll.
---
layout: post
title: My first post!
categories: [blogging]
---
## Image example
![Image alt text](/assets/some-image.png)
“Assets” in Jekyll refers to the built-in support for Sass. Put your main SCSS or Sass files where you want them, like assets/css/style.scss
, and be sure to make them proper “front matter”, with the two lines of triple dashes. The _sass
directory is the base directory for your imported SCSS/Sass files.
Personally, I recommend your assets/css/style.scss
file simply importing a root-level SCSS file, and having all your actual styles under the _sass
directory.
For example:
assets/css/style.scss:
---
# Only the main Sass file needs front matter (the dashes are enough)
---
@import "site";
_sass\site.scss:
@charset "utf-8";
/* All your actual variables and styles */
_includes\head.html (or wherever your <head>
tag is):
<link rel="stylesheet" href="/assets/css/style.css">
Jekyll also has support for themes, however, GitHub pages only supports a small set of them. A theme may help you get off the ground quickly, but I recommend just customizing to make your blog your own. Personally, I started with the minima theme as a base (ie. I just copied the scss files), and then just customized those files as desired.
GitHub pages supports custom domains, for example this blog is hosted on dfederm.com
instead of dfederm.github.io
.
GitHub pages supports both apex domains (eg mysite.com) and subdomains (eg blog.mysite.com). They’re slightly different, but both are pretty easy to set up.
In either case, the first step is to configure the GitHub side. Navigate to the repository settings and under the “Custom domain” option provide your custom domain. This will commit a CNAME
file at the root of the repo pointing to the custom domain. It’s also strongly recommended to check the “Enforce HTTPS button” setting just below.
Next, you’ll need to configure things with your DNS provider. The specific details for making this configuration varies by DNS provider, but is generally straightforward.
If you’re configuring an apex domain, you’ll need to create an A
record to the following IP addresses:
185.199.108.153
185.199.109.153
185.199.110.153
185.199.111.153
Note that if you’re configuring an apex domain, it’s also recommended to configure the www
subdomain.
If you’re configuring a subdomain (www
or otherwise), you’ll need to create a CNAME
record for the subdomain to the alias <username>.github.io
.
Note that DNS changes may take up to 24 hours to propagate.
As you add more content over time, you will likely want a categories page as a quick way for users to find related content.
This can be implemented by a Page using some site variables, specifically site.categories
.
This site.categories
variable contains a list of all the categories your posts have. A post can list its categories in the front matter section:
---
layout: post
title: Some post
categories: [Some Category, Some Other Category]
comments: true
---
...Post content...
The site.categories
variable’s contents are a little awkward in my opinion, as each item in the list is itself a list containing exactly 2 elements: the category name and the posts in the category. It’s unclear to me why it’s not a more structured object.
Here’s an example of what my categories page categories.html
looks like, which lists every category as headings in alphabetical order and a link to each post within that category in a bulleted list under it:
---
layout: page
title: Categories
order: 1
---
{%- assign categories = site.categories | sort -%}
{%- for category in categories -%}
{%- assign categoryName = category[0] -%}
{%- assign categoryNumPosts = category[1] | size -%}
<h2 id="{{categoryName | uri_escape | downcase }}">{{ categoryName }} ({{ categoryNumPosts }})</h2>
<ul>
{% assign sorted_posts = category[1] | reversed %}
{% for post in sorted_posts %}
<li>
<a href="{{ post.url }}"></a> -
<time datetime="{{ post.date | date_to_xmlschema }}"
itemprop="datePublished">{{ post.date | date: "%b %-d, %Y" }}</time>
</li>
{% endfor %}
</ul>
{%- endfor -%}
As content grows, it may even eventually be a good idea to add an index at the top of the categories page to quickly anchor to each category.
]]>First, it’s important to understand the basics of MSBuild syntax. The official MSBuild documentation is quite detailed in this regard, so for the rest of this article I’ll assume a basic understanding of MSBuild properties, items, and targets.
MSBuild unfortunately does not have a full-blown debugging experience, in terms of breakpoints and stepping through the MSBuild syntax line-by-line, but instead one has to primarily rely on logging. However, MSBuild has quite verbose logging, as anyone who has enabled diagnostic logging can attest to. Diagnostic logging has much of the required information for understanding what’s happening, but it can be near-impossible due to its incredible size and unstructured nature.
Enter the MSBuild Structured Log Viewer. Binary logging is built-into MSBuild itself, but as it’s a binary file you need a special viewer to properly consume it.
The log viewer has a few options on the start page, but the only one with major functionality implications is a recently added option to parent all targets directly under project instead of attempting (sometimes badly) to create a tree from the target graph. It now defaults to being enabled, so I also recommend this setting and will be using it throughout this article.
As the binary logger is build-into MSBuild, enabling it is as simple as using command-line option -binaryLogger
, or -bl
for short. As with other MSBuild command-line options, it works with the dotnet
CLI.
When a specific file is not provided, it defaults to dropping an msbuild.binlog
in the current directory.
Examples:
REM Produce msbuild.binlog
msbuild -bl
dotnet -bl
REM In a CI environment, you probably want to put the log somewhere specific
msbuild -BinaryLogger:path\to\logs\msbuild.binlog
To have an example to look at, I’ll be using a trivial project structure which can be created with the following commands:
dotnet new console -o App
dotnet new classlib -o Lib1
dotnet new classlib -o Lib2
dotnet add App\App.csproj reference Lib1\Lib1.csproj Lib2\Lib2.csproj
After running dotnet build App /bl
and opening the resulting msbuild.binlog
, you should see something like this:
There is quite a bit of top-level information, including:
dotnet build
gets translated to running the .NET Core flavor of MSBuild with specific options.dotnet build
translates to msbuild -restore
which does an implicit restore before building. You can disable this by providing --no-restore
to dotnet
.There is a search feature which can help if you know the property, item, target, or file name you’re interested in. In addition to just text searching, you can also filter by kind of thing, for example just searching properties.
For a given target, there is another target listed to the right which explains why the target executed. If you hover, you can see specifically whether it was because of BeforeTargets
, AfterTargets
, or DependsOnTargets
. You can also tell whether the target actually executed based on its condition by whether it’s dimmed.
A non-obvious trick is that if you double-click on a project or target, it will open the file it’s contained in. This can help give you a glance into the logic of the target. You can take this a bit further and right-click on a project and select “Preprocess”, which will give you the completely flattened XML for the entire project, exactly like the -pp
MSBuild switch. The preprocess can be extremely helpful in understanding the build logic.
As a general guide, you will mostly rely on the target execution log for determine what happened, while the preprocess will help answer why it happened. For example, the target execution log will show that a property was set to some specific value, while the preprocess will show the logic of why it was set to that value.
An interesting detail about the implicit restore you can observe is that there is a global property MSBuildRestoreSessionId
set. This is because during the restore, packages may not have been downloaded yet and thus any build logic which should be imported from packages may be missing. Setting a global property to an effectively random value forces the restore to be evaluated and execute in a completely separate context from the default targets. Then after restore when the default targets execute, it requires a new evaluation and imports from packages will actually be available. I’ll go into more details about how restore and how PackageReference
works in a future post.
@(Content)
item copyingIn my opinion, the best way to understand how to debug MSBuild is to actually dive into the logs and see if we can use them to answer some questions. In this example, we’ll dig into the logs to understand how content files in referenced projects propagate to a project’s output folder.
First, create some dummy content files:
echo Foo > Lib1\Foo.txt
echo Bar > Lib2\Bar.txt
echo Baz > App\Baz.txt
Next, configure the content to be copied to the output directories.
<!-- In Lib1\Lib1.csproj -->
<ItemGroup>
<Content Include="Foo.txt">
<CopyToOutputDirectory>PreserveNewest</CopyToOutputDirectory>
</Content>
</ItemGroup>
<!-- In Lib2\Lib2.csproj -->
<ItemGroup>
<Content Include="Bar.txt">
<CopyToOutputDirectory>PreserveNewest</CopyToOutputDirectory>
</Content>
</ItemGroup>
<!-- In App\App.csproj -->
<ItemGroup>
<Content Include="Baz.txt">
<CopyToOutputDirectory>PreserveNewest</CopyToOutputDirectory>
</Content>
</ItemGroup>
Now if we build using dotnet build App
, we’ll see the files: App\bin\Debug\net5.0\Foo.txt
, App\bin\Debug\net5.0\Bar.txt
, and App\bin\Debug\net5.0\Baz.txt
. So how did they get there?
First, search for “App\bin\Debug\net5.0\Foo.txt”:
The results at the end look related to incremental clean, so the one we want to look as is under the _CopyOutOfDateSourceItemsToOutputDirectory
target, especially since it says “Copying file” in the log message.
When navigating to that result, in fact all of the content the files we were interested in (and one we weren’t) are here.
Copying file from "C:\Users\David\Code\tmp\msbuild-debugging\App\Baz.txt" to "C:\Users\David\Code\tmp\msbuild-debugging\App\bin\Debug\net5.0\Baz.txt".
Copying file from "C:\Users\David\Code\tmp\msbuild-debugging\Lib1\Foo.txt" to "C:\Users\David\Code\tmp\msbuild-debugging\App\bin\Debug\net5.0\Foo.txt".
Copying file from "C:\Users\David\Code\tmp\msbuild-debugging\App\obj\Debug\net5.0\apphost.exe" to "C:\Users\David\Code\tmp\msbuild-debugging\App\bin\Debug\net5.0\App.exe".
Copying file from "C:\Users\David\Code\tmp\msbuild-debugging\Lib2\Bar.txt" to "C:\Users\David\Code\tmp\msbuild-debugging\App\bin\Debug\net5.0\Bar.txt".
Upon double-clicking the target, we see the definition for _CopyOutOfDateSourceItemsToOutputDirectory
:
<Target
Name="_CopyOutOfDateSourceItemsToOutputDirectory"
Condition=" '@(_SourceItemsToCopyToOutputDirectory)' != '' "
Inputs="@(_SourceItemsToCopyToOutputDirectory)"
Outputs="@(_SourceItemsToCopyToOutputDirectory->'$(OutDir)%(TargetPath)')">
<!--
Not using SkipUnchangedFiles="true" because the application may want to change
one of these files and not have an incremental build replace it.
-->
<Copy
SourceFiles = "@(_SourceItemsToCopyToOutputDirectory)"
DestinationFiles = "@(_SourceItemsToCopyToOutputDirectory->'$(OutDir)%(TargetPath)')"
OverwriteReadOnlyFiles="$(OverwriteReadOnlyFiles)"
Retries="$(CopyRetryCount)"
RetryDelayMilliseconds="$(CopyRetryDelayMilliseconds)"
UseHardlinksIfPossible="$(CreateHardLinksForAdditionalFilesIfPossible)"
UseSymboliclinksIfPossible="$(CreateSymbolicLinksForAdditionalFilesIfPossible)"
>
<Output TaskParameter="DestinationFiles" ItemName="FileWrites"/>
</Copy>
</Target>
So the Copy
task is called with @(_SourceItemsToCopyToOutputDirectory)
items as the source, and copied to the $(OutDir)
using their %(TargetPath)
metadata.
Side note: by convention properties, items, and targets which are prefixed by an underscore should be considered “private”. MSBuild doesn’t have any true notion of scope or access modifiers, but it’s an indication of an implementation detail in the build logic and may change behavior or even be removed in the future. Because of this, if you are writing your own custom build logic, you should not depend on “private” entities and instead look for the appropriate extension points.
We can look up the value of $(OutDir)
in a pretty straightforward way by looking at the properties for the project. In this example, we see OutDir = bin\Debug\net5.0\
. But how did that value come about? We can look this up in the preprocess. After right-clicking the project, selecting preprocess, and doing a ctrl+f
and looking for “<OutDir
”, we see this block of XML:
<!-- Required for enabling Team Build for packaging app package-generating projects -->
<OutDirWasSpecified Condition=" '$(OutDir)'!='' and '$(OutDirWasSpecified)'=='' ">true</OutDirWasSpecified>
<OutDir Condition=" '$(OutDir)' == '' ">$(OutputPath)</OutDir>
<!-- Example, bin\Debug\ -->
<!-- Ensure OutDir has a trailing slash, so it can be concatenated -->
<OutDir Condition="'$(OutDir)' != '' and !HasTrailingSlash('$(OutDir)')">$(OutDir)\</OutDir>
<ProjectName Condition=" '$(ProjectName)' == '' ">$(MSBuildProjectName)</ProjectName>
<!-- Example, MyProject -->
<!-- For projects that generate app packages or ones that want a per-project output directory, update OutDir to include the project name -->
<OutDir Condition="'$(OutDir)' != '' and '$(OutDirWasSpecified)' == 'true' and (('$(WindowsAppContainer)' == 'true' and '$(GenerateProjectSpecificOutputFolder)' != 'false') or '$(GenerateProjectSpecificOutputFolder)' == 'true')">$(OutDir)$(ProjectName)\</OutDir>
Because $(OutDir)
wasn’t specified before this, $(OutDirWasSpecified)
remains unset and so effectively $(OutDir)
is simply just $(OutputPath)
with a possible trailing slash appended if needed.
If we then search for “<OutputPath
”, we’ll find quite a few results.
<BaseOutputPath Condition="'$(BaseOutputPath)' == ''">bin\</BaseOutputPath>
<BaseOutputPath Condition="!HasTrailingSlash('$(BaseOutputPath)')">$(BaseOutputPath)\</BaseOutputPath>
<OutputPath Condition="'$(OutputPath)' == '' and '$(PlatformName)' == 'AnyCPU'">$(BaseOutputPath)$(Configuration)\</OutputPath>
<OutputPath Condition="'$(OutputPath)' == '' and '$(PlatformName)' != 'AnyCPU'">$(BaseOutputPath)$(PlatformName)\$(Configuration)\</OutputPath>
<OutputPath Condition="!HasTrailingSlash('$(OutputPath)')">$(OutputPath)\</OutputPath>
<!-- ... -->
<PropertyGroup Condition="'$(AppendTargetFrameworkToOutputPath)' == 'true' and '$(TargetFramework)' != '' and '$(_UnsupportedTargetFrameworkError)' != 'true'">
<IntermediateOutputPath>$(IntermediateOutputPath)$(TargetFramework.ToLowerInvariant())\</IntermediateOutputPath>
<OutputPath>$(OutputPath)$(TargetFramework.ToLowerInvariant())\</OutputPath>
</PropertyGroup>
<!-- ... -->
<PropertyGroup Condition="'$(AppendRuntimeIdentifierToOutputPath)' == 'true' and '$(RuntimeIdentifier)' != '' and '$(_UsingDefaultRuntimeIdentifier)' != 'true'">
<IntermediateOutputPath>$(IntermediateOutputPath)$(RuntimeIdentifier)\</IntermediateOutputPath>
<OutputPath>$(OutputPath)$(RuntimeIdentifier)\</OutputPath>
</PropertyGroup>
<!-- ... -->
<OutputPath Condition="'$(OutputPath)' != '' and !HasTrailingSlash('$(OutputPath)')">$(OutputPath)\</OutputPath>
<OutputPath Condition=" '$(Platform)'=='' and '$(Configuration)'=='' and '$(OutputPath)'=='' ">bin\Debug\</OutputPath>
$(OutputPath)
is set many times, but it’s mostly just appended to in order to avoid collisions when building with various dimensions. It’s basically just bin\<platform-if-not-anycpu>\<configuration>\<target-framework>\<rid-if-set>
, with various properties to control its behavior if desired.
It’s important here that all places where $(OutDir)
is set are below all places where $(OutputPath)
is set, so we don’t have to worry about ordering issues for these two properties in this case.
Now we understand the $(OutDir)
part of the copy destination, so next we should understand how the @(_SourceItemsToCopyToOutputDirectory)
item is created. When searching we see:
We have results from all three projects, which is expected since App depends on Lib1 and Lib2, so those other projects build first and would perform this logic themselves. How exactly App causes Lib1 and Lib2 to build first I will leave as an exercise to the reader.
To continue answering our original question, we want to look at the result for the App project, which leads us to the GetCopyToOutputDirectoryItems
target, which is defined as:
<Target
Name="GetCopyToOutputDirectoryItems"
Returns="@(AllItemsFullPathWithTargetPath)"
KeepDuplicateOutputs=" '$(MSBuildDisableGetCopyToOutputDirectoryItemsOptimization)' == '' "
DependsOnTargets="$(GetCopyToOutputDirectoryItemsDependsOn)">
<!-- ... -->
<CallTarget Targets="_GetCopyToOutputDirectoryItemsFromTransitiveProjectReferences">
<Output TaskParameter="TargetOutputs" ItemName="_TransitiveItemsToCopyToOutputDirectory" />
</CallTarget>
<CallTarget Targets="_GetCopyToOutputDirectoryItemsFromThisProject">
<Output TaskParameter="TargetOutputs" ItemName="_ThisProjectItemsToCopyToOutputDirectory" />
</CallTarget>
<ItemGroup Condition="'$(CopyConflictingTransitiveContent)' == 'false'">
<_TransitiveItemsToCopyToOutputDirectory Remove="@(_ThisProjectItemsToCopyToOutputDirectory)" MatchOnMetadata="TargetPath" MatchOnMetadataOptions="PathLike" />
</ItemGroup>
<ItemGroup>
<_TransitiveItemsToCopyToOutputDirectoryAlways KeepDuplicates=" '$(_GCTODIKeepDuplicates)' != 'false' " KeepMetadata="$(_GCTODIKeepMetadata)" Include="@(_TransitiveItemsToCopyToOutputDirectory->'%(FullPath)')" Condition="'%(_TransitiveItemsToCopyToOutputDirectory.CopyToOutputDirectory)'=='Always'"/>
<_TransitiveItemsToCopyToOutputDirectoryPreserveNewest KeepDuplicates=" '$(_GCTODIKeepDuplicates)' != 'false' " KeepMetadata="$(_GCTODIKeepMetadata)" Include="@(_TransitiveItemsToCopyToOutputDirectory->'%(FullPath)')" Condition="'%(_TransitiveItemsToCopyToOutputDirectory.CopyToOutputDirectory)'=='PreserveNewest'"/>
<_ThisProjectItemsToCopyToOutputDirectoryAlways KeepDuplicates=" '$(_GCTODIKeepDuplicates)' != 'false' " KeepMetadata="$(_GCTODIKeepMetadata)" Include="@(_ThisProjectItemsToCopyToOutputDirectory->'%(FullPath)')" Condition="'%(_ThisProjectItemsToCopyToOutputDirectory.CopyToOutputDirectory)'=='Always'"/>
<_ThisProjectItemsToCopyToOutputDirectoryPreserveNewest KeepDuplicates=" '$(_GCTODIKeepDuplicates)' != 'false' " KeepMetadata="$(_GCTODIKeepMetadata)" Include="@(_ThisProjectItemsToCopyToOutputDirectory->'%(FullPath)')" Condition="'%(_ThisProjectItemsToCopyToOutputDirectory.CopyToOutputDirectory)'=='PreserveNewest'"/>
<!-- Append the items from this project last so that they will be copied last. -->
<_SourceItemsToCopyToOutputDirectoryAlways Include="@(_TransitiveItemsToCopyToOutputDirectoryAlways);@(_ThisProjectItemsToCopyToOutputDirectoryAlways)"/>
<_SourceItemsToCopyToOutputDirectory Include="@(_TransitiveItemsToCopyToOutputDirectoryPreserveNewest);@(_ThisProjectItemsToCopyToOutputDirectoryPreserveNewest)"/>
<!-- ... -->
</ItemGroup>
</Target>
And in the execution logs we see:
Using the combination of the definition and the execution log, we see that this target ends up calling 2 other targets, _GetCopyToOutputDirectoryItemsFromTransitiveProjectReferences
and _GetCopyToOutputDirectoryItemsFromThisProject
, and aggregates and filters the resulting items into @(_SourceItemsToCopyToOutputDirectoryAlways)
and @(_SourceItemsToCopyToOutputDirectory)
items.
Based on the names we can guess what’s going on already. One target gathers items from project references while the other gathers items from this project. Then they’re separated into an “always” and a “preserve newest” item. We’ll focus on @(_SourceItemsToCopyToOutputDirectory)
since that’s what we are tracing, but the “always” variant works very similarly except the file copies are unconditional instead of dependent on file timestamps.
Let’s look at _GetCopyToOutputDirectoryItemsFromThisProject
first since it’s from this project and will likely be easier to follow. After searching abd finding the instance under the App project, we find that it’s defined as:
<Target
Name="_GetCopyToOutputDirectoryItemsFromThisProject"
DependsOnTargets="AssignTargetPaths;_PopulateCommonStateForGetCopyToOutputDirectoryItems"
Returns="@(_ThisProjectItemsToCopyToOutputDirectory)">
<ItemGroup>
<_ThisProjectItemsToCopyToOutputDirectory KeepMetadata="$(_GCTODIKeepMetadata)" Include="@(ContentWithTargetPath->'%(FullPath)')" Condition="'%(ContentWithTargetPath.CopyToOutputDirectory)'=='Always' AND '%(ContentWithTargetPath.MSBuildSourceProjectFile)'==''"/>
<_ThisProjectItemsToCopyToOutputDirectory KeepMetadata="$(_GCTODIKeepMetadata)" Include="@(ContentWithTargetPath->'%(FullPath)')" Condition="'%(ContentWithTargetPath.CopyToOutputDirectory)'=='PreserveNewest' AND '%(ContentWithTargetPath.MSBuildSourceProjectFile)'==''"/>
</ItemGroup>
<!-- ... -->
</Target>
_GetCopyToOutputDirectoryItemsFromThisProject
simply aggregates @(ContentWithTargetPath)
, @(_NoneWithTargetPath)
, @(EmbeddedResource)
, and for some reason @(Compile)
items which have either %(CopyToOutputDirectory)
as either “Always” or “PreserveNewest”.
Then if we look up @(ContentWithTargetPath)
items, we’ll find the AssignTargetPaths
target:
<Target
Name="AssignTargetPaths"
DependsOnTargets="$(AssignTargetPathsDependsOn)">
<!-- ... -->
<AssignTargetPath Files="@(Content)" RootFolder="$(MSBuildProjectDirectory)">
<Output TaskParameter="AssignedFiles" ItemName="ContentWithTargetPath" />
</AssignTargetPath>
<!-- ... -->
</Target>
The AssignTargetPath task adds the %(TargetPath)
metadata for items, which is either based on the %(Link)
metadata if provided, or the relative path of the file from the project directory if it’s under the project directory, or simply the filename otherwise.
Finally, we now see how the @(Content)
item for the current project (Baz.txt
in our example) gets copied to the output folder.
But we still need to understand the content from the referenced projects, Foo.txt
and Bar.txt
. Upon searching for _GetCopyToOutputDirectoryItemsFromTransitiveProjectReferences
, finding the result in the App project, and looking at the definition, we see:
<PropertyGroup>
<!-- ... -->
<_RecursiveTargetForContentCopying>GetCopyToOutputDirectoryItems</_RecursiveTargetForContentCopying>
<!-- ... -->
</PropertyGroup>
<!-- ... -->
<Target
Name="_GetCopyToOutputDirectoryItemsFromTransitiveProjectReferences"
DependsOnTargets="_PopulateCommonStateForGetCopyToOutputDirectoryItems;_AddOutputPathToGlobalPropertiesToRemove"
Returns="@(_TransitiveItemsToCopyToOutputDirectory)">
<!-- Get items from child projects first. -->
<MSBuild
Projects="@(_MSBuildProjectReferenceExistent)"
Targets="$(_RecursiveTargetForContentCopying)"
BuildInParallel="$(BuildInParallel)"
Properties="%(_MSBuildProjectReferenceExistent.SetConfiguration); %(_MSBuildProjectReferenceExistent.SetPlatform); %(_MSBuildProjectReferenceExistent.SetTargetFramework)"
Condition="'@(_MSBuildProjectReferenceExistent)' != '' and '$(_GetChildProjectCopyToOutputDirectoryItems)' == 'true' and '%(_MSBuildProjectReferenceExistent.Private)' != 'false' and '$(UseCommonOutputDirectory)' != 'true'"
ContinueOnError="$(ContinueOnError)"
SkipNonexistentTargets="true"
RemoveProperties="%(_MSBuildProjectReferenceExistent.GlobalPropertiesToRemove)$(_GlobalPropertiesToRemoveFromProjectReferences)">
<Output TaskParameter="TargetOutputs" ItemName="_AllChildProjectItemsWithTargetPath"/>
</MSBuild>
<ItemGroup>
<_TransitiveItemsToCopyToOutputDirectory KeepDuplicates=" '$(_GCTODIKeepDuplicates)' != 'false' " KeepMetadata="$(_GCTODIKeepMetadata)" Include="@(_AllChildProjectItemsWithTargetPath->'%(FullPath)')" Condition="'%(_AllChildProjectItemsWithTargetPath.CopyToOutputDirectory)'=='Always'"/>
<_TransitiveItemsToCopyToOutputDirectory KeepDuplicates=" '$(_GCTODIKeepDuplicates)' != 'false' " KeepMetadata="$(_GCTODIKeepMetadata)" Include="@(_AllChildProjectItemsWithTargetPath->'%(FullPath)')" Condition="'%(_AllChildProjectItemsWithTargetPath.CopyToOutputDirectory)'=='PreserveNewest'"/>
</ItemGroup>
<!-- ... -->
</Target>
So _GetCopyToOutputDirectoryItemsFromTransitiveProjectReferences
simply calls the GetCopyToOutputDirectoryItems
target on all project references.
As we’ve already seen, GetCopyToOutputDirectoryItems
gathers the “copy items” (@(Content)
, @(None)
, etc. with specific CopyToOutputDirectory
values) from a project and its dependencies recursively, so we finally fully understand how Foo.txt
and Bar.txt
were copied!
Better yet, we now know how to debug MSBuild!
]]>