Building a NAS and Media Server for under $500
Lately I’ve been realizing that purchased digital media isn’t really yours, and a recent event in particular sparked me into doing something I’ve been wanting to do for a while now: build a NAS to contain all my legally purchased digital media, digital backups of physical media, as well as personal documents and photos.
First, why build a NAS rather than buy a prebuilt one like the Synology DS1522+? There are pros and cons to each approach, but the DIY was attractive to me due to the better expansion, cost effectiveness, and subjectively I just have fun building PCs.
As this is a long post, here is a table of contents if you’d like to skip to a specific section:
Parts
The first part of building your own NAS is purchace the various components needed to build it. This is very similar to building any other PC, and this guide assumes you’re reasonably comfortable with building a PC. If this is your first time building a PC, I highly recommend checking out Linus Tech Tip’s How to build a PC, the last guide you’ll ever need!.
Note that I built my NAS is just over $400, although I did not include the price of tax since that very much depends on your location, nor did I include the cost of storage since that depends on your specific needs. However, that still is leaps and bounds better more economical than the prebuilt I mentioned above which at the time of writing is $700, not to mention much more powerful and flexible.
As prices and availability are always fluxuating, obviously any prices you see here may be different than what I saw, so feel free to change things up.
When selecting parts, I strongly recommend using PCPartPicker as it will help identify compatibility issues as well as help filter out incompatible parts based on what you’ve already chosen which massively helps with the tremendous amount of options out there.
Case
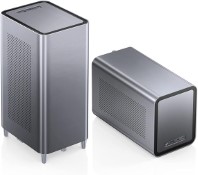
At risk of copying every other NAS build guide out there, I recommend the JONSBO N1. It’s specifically designed for NAS machines, so it’s pretty small. It requires a Mini-ITX motherboard, an SFX power supply, and has room for five 3.5” HDDs and well as one 2.5” drive.
CPU
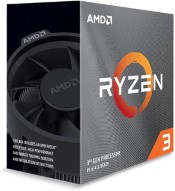
A NAS doesn’t need to be that powerful, even one which doubles as a media server, so I opted to go for something a few years older. I went with an AMD Ryzen 3 3100 which I found used on eBay. Because it’s fairly low-end, it’s also pretty power-efficient, which is great for a NAS which is intended to be powered 24/7. Do make sure that if you buy it used, it comes with the stock cooler so that you don’t have to buy one separately.
One thing to note is that this CPU does not have integrated graphics. This causes a bit of pain during the build, at least for me, but it’s something that can be easily worked past. If you want a smoother experience though, go with something with integrated graphics.
Motherboard
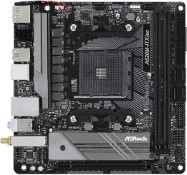
With the Mini-ITX form factor and AM4 CPU slot selected, there wasn’t really a ton of options for the motherboard. I ended up going with the ASRock A520M-ITX/AC because well, it was cheap and compatible. It also has 4 SATA ports, which at the moment is good enough for me and eventually I can just buy a cheap HBA for future expansion. The AM4 slot also should allow an upgrade to a better CPU in the future as well, if that becomes necessary.
The only downside is that it “only” has gigabit ethernet and not the faster 2.5 gigabit, but honestly plain old gigabit is good enough for me. If you need 2.5 gigabit since a NAS is a network attached storage and thus needs only the finest of network connectivity, you can spend a bit more for something like a GIGABYTE B550I AORUS PRO AX or an ASRock B550 Phantom Gaming-ITX/ax.
RAM
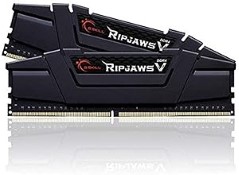
For RAM I went with G.SKILL Ripjaws V 16GB (2x8 GB). I basically just wanted something cheap and DDR4. I was debating going up to 32GB of RAM, but I found a good deal on eBay and so just went with 16 GB for now. In practice that’s more than enough for my usage at least.
Boot Drive
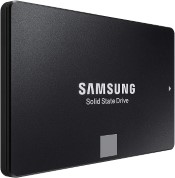
I was lucky enough to have a Samsung 860 EVO 500GB laying around from when I used to used it in my desktop several years ago. If I were to have bought something though, I would have just gone with the cheapest SSD I could have, like this TEAMGROUP 256GB NVMe or if you want to save the NVMe slot for an HBA, perhaps this Crucial BX500 240GB SATA SSD
PSU
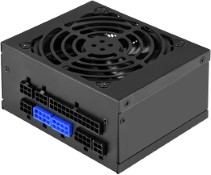
The NAS is pretty low power, so nothing super special is needed here. Personally though I wanted a fully modular power supply for the ease of use, and the 80+ Gold rating for the efficiency, so that combined with the need for the SFX form factor and I was basically just left with the Silverstone SX500-G. It’s a bit overkill as PCPartPicker estimates that the system only needs ~149W, but this should give plenty of headroom for future expansion. Plus, as I mentioned with all the requirements above I didn’t really have much of an option.
Storage
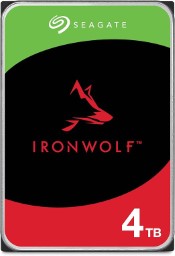
This will very much be dependent on your needs. I don’t have a massive amount of data to store (yet!) but I did want some resiliency, so I put a pair of Seagate IronWolf 4 TB drives in. This should give me plenty of room to drop in a few more drives in the future as my storage needs increase.
Parts Summary
To summarize my parts list and the prices I was able to get, here’s my build on PCPartPicker as well as a cost breakdown.
| Part | Name | Price |
|---|---|---|
| Case | JONSBO N1 | $120 ($130 with $10 promotional gift card w/ purchase) |
| CPU | AMD Ryzen 3 3100 | $45.15 (used) |
| Motherboard | ASRock A520M-ITX/AC | $104.99 |
| RAM | G.SKILL Ripjaws V 16GB (2x8 GB) | $33 (used) |
| Boot Drive | Samsung 860 EVO 500GB | $0 (already owned) |
| PSU | Silverstone SX500-G | $101.99 |
| Total (without storage) | $405.13 | |
| Storage | 2 x Seagate IronWolf 4 TB | 2 x $93.99 = $187.98 |
| Total (including storage) | $593.11 | |
Build

Now it’s time to build! As mentioned earlier, this won’t be super detailed, but I will go through most the steps and point out specific pain points I ran into with the specific parts I used.
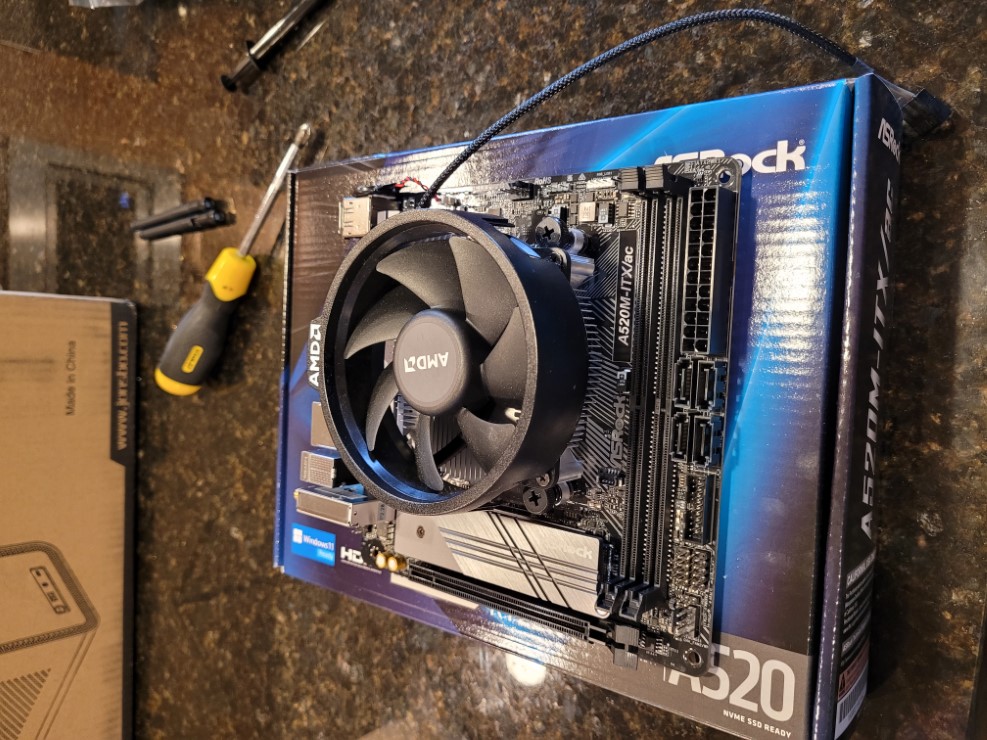
The first thing to do is take the motherboard out and place it onto the box it came in. Socketing the CPU is pretty straightforward; you just undo the latch, line up the triangle on the socket and the CPU, gently drop it in, and reengage the latch.
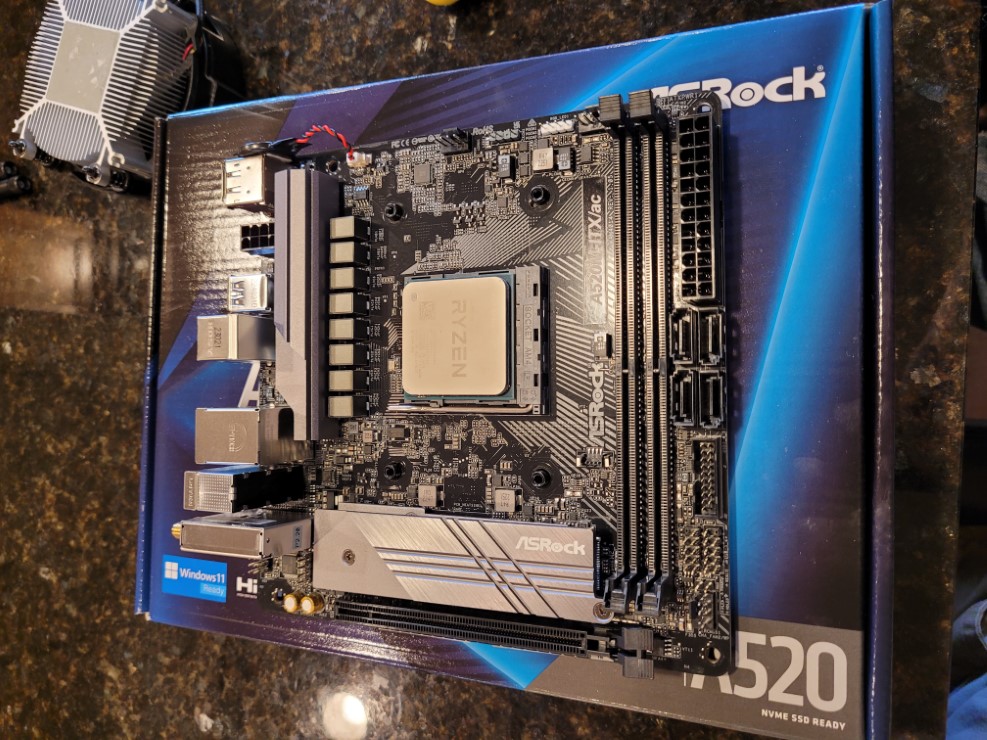
Next, put a pea-sized blob of thermal paste on and install the cooler. I had some Thermal Grizzly Kryonaut Thermal Paste left over from when I built my desktop, so I just used that, but I imagine anything will do.
A tip when installing the cooler, or really anything with 4 or more screws, is to use a star pattern when tightening. Also tighten in two passes such that the first pass is a gentle tightening and the second pass is where you tighten to the final torque. That way any alignment issues can still be corrected before the screws are too tight.
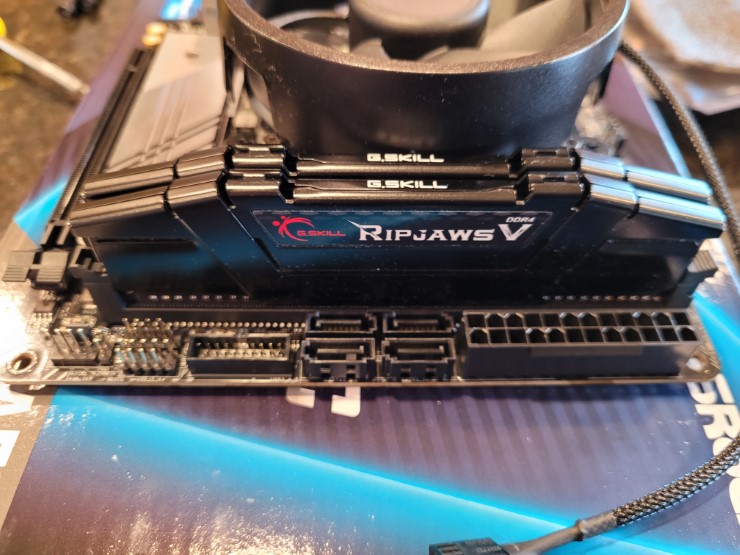
Install the RAM next, which is as simple as just aligning the sticks the right way since they’re keyed and firmly pressing them in until you hear the click.
Looking back, you should actually wait to install the RAM until you mount the motherboard in the case and connect the power switch and reset switch wires. I found it extremely difficult to do so while the RAM was installed, but perhaps I just don’t have the nimblest fingers.
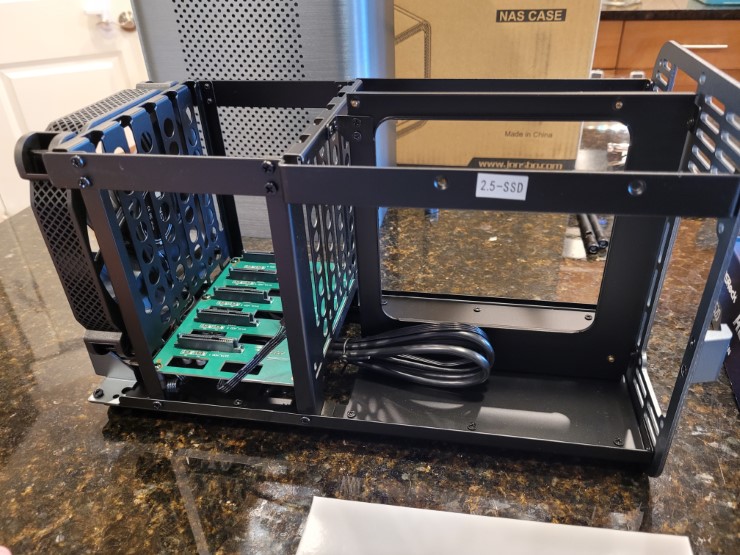
Next bring out the case and take off the outer shell. I had never worked with the Mini-ITX form factor previously, so I don’t have much reference to go on, but I found that the JONSBO N1 was relatively easy to work in. Don’t get me wrong, Mini-ITX was certainly challenging, but I feel like the case wasn’t the problem.

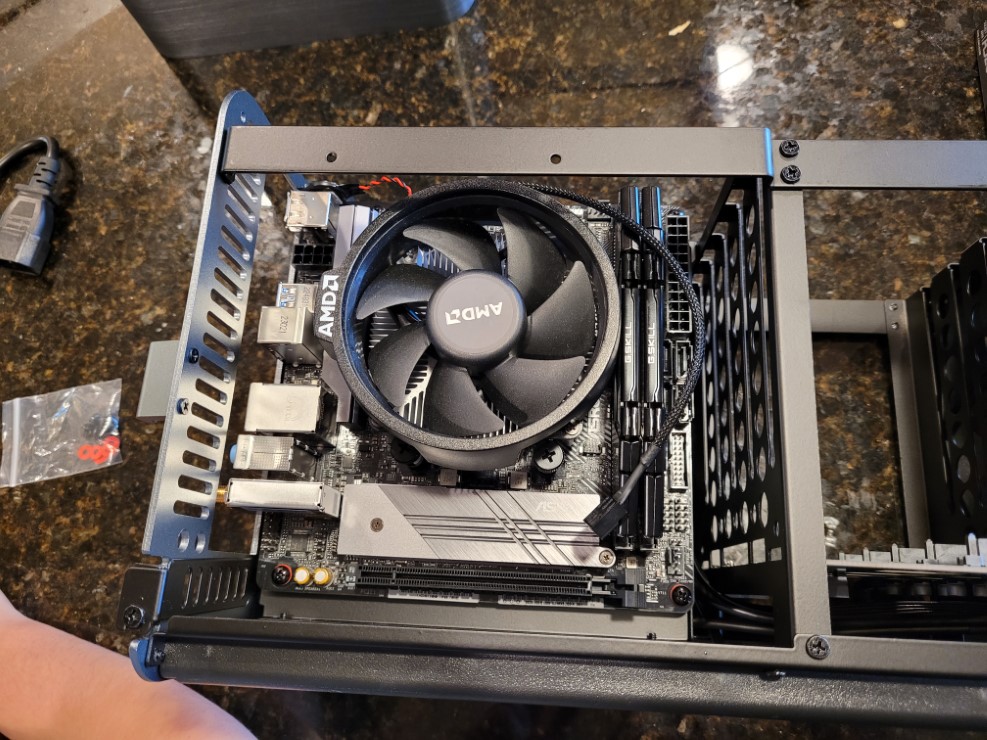
Mount the motherboard on the preinstalled standoffs using the same two-pass star pattern described earlier. I forgot the I/O shield as you’ll notice from the picture below and had to correct my mistake later. I noticed with the I/O shield in place though that the motherboard was a bit difficult to get perfectly aligned on the standoffs, so using the screw-tightening strategy described really helped ensure things went smoothly anyway.
Next install the power supply. This, and when you start plugging in cables (which I held off on a little later), is where the benefits of a fully modular power supply becomes apparent. I have to imagine a non-modular would be extremely challenging to work with in a Mini-ITX form factor.
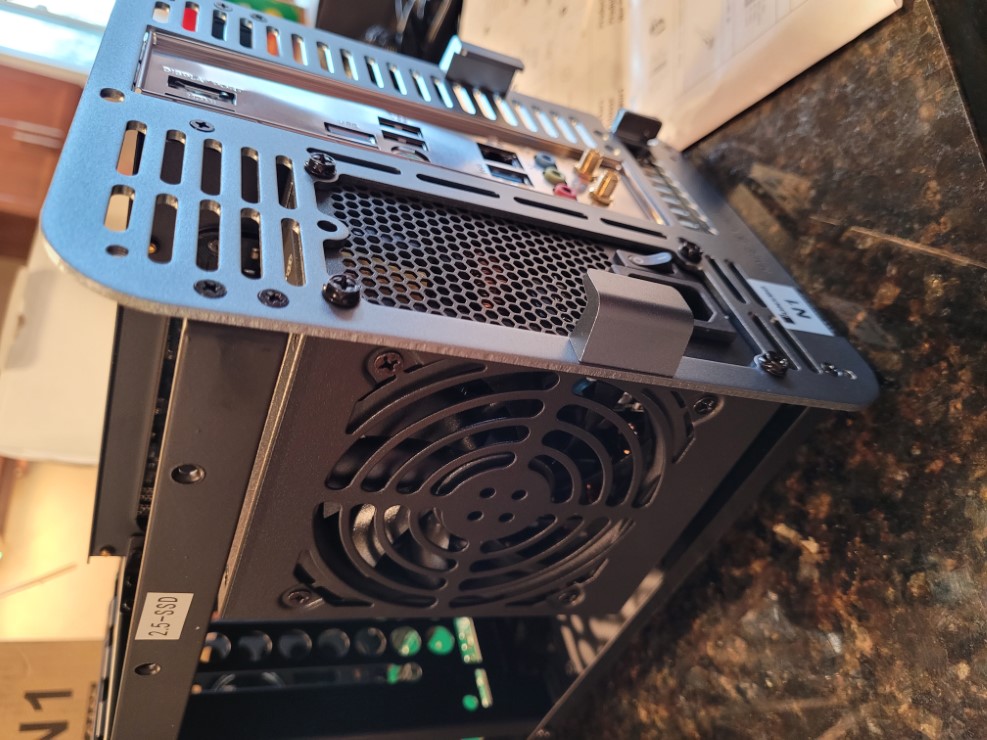
Installing the HDDs is an interesting part of working in the JONSBO N1. It has a host-swappable backplane for the SATA drives which is pretty neat. It was certainly a bit nerve-wracking to shove the drives into the bays and hope the connectors aligned properly, but after installing them, it seemed like a really elegant mechanism I ended up liking a lot.
If you’re using a SATA SSD for your boot drive, you’ll want to install that now as well, which is next to the power supply. I found the mounting solution there to be a bit sketchy, but as it’s an SSD and has no moving parts, it doesn’t really matter.
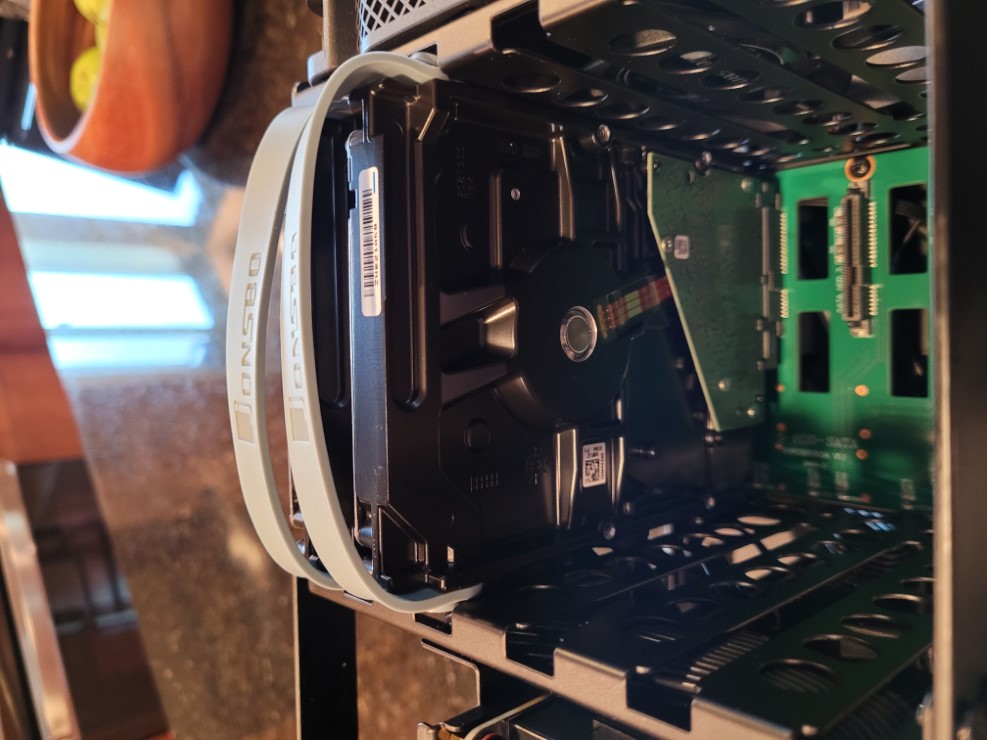
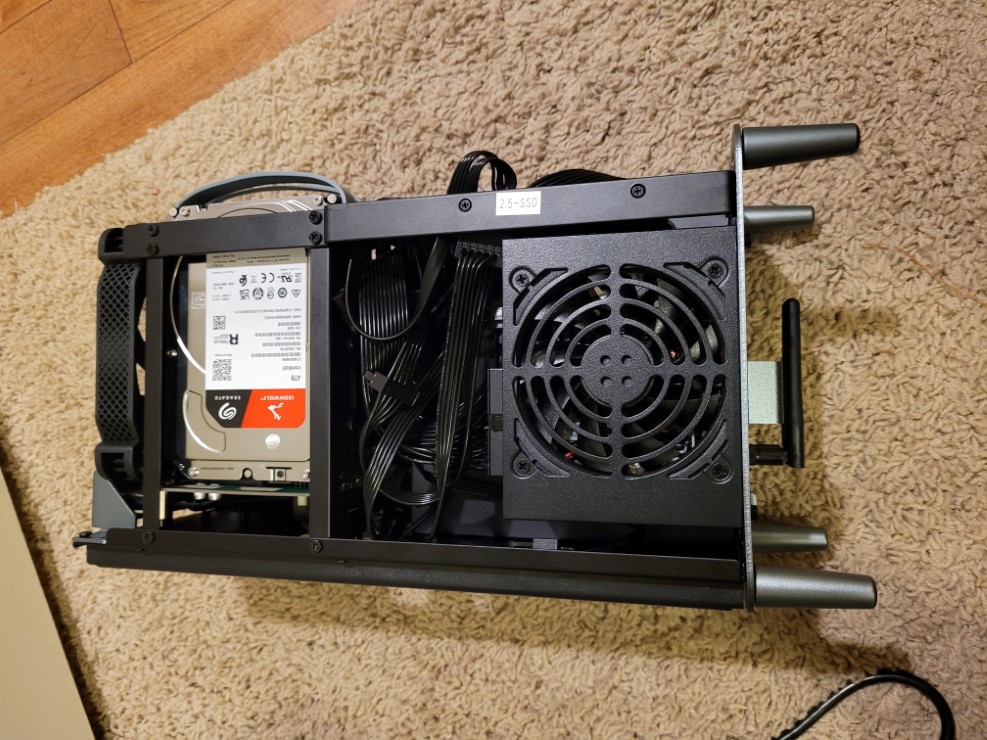
Now to start the messy work of plugging in cables. This is my least favorite part as I can never seem to have the patience (or skill?) to manage the cables properly and so it ends up being just a rat nest. Luckily the case ends up hiding the mess in the end, so just don’t let anyone go opening up the machine and discovering your dirty secret.
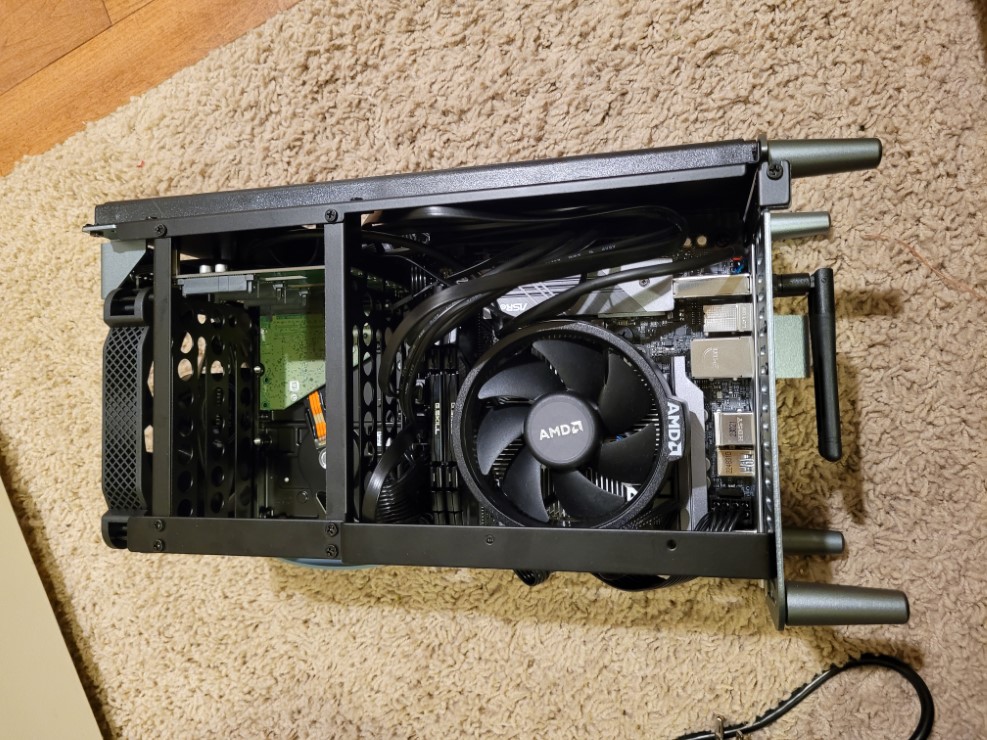
An important note is that you will want to route all cables through the middle of the chassis rather than try and go around the outside. I made that mistake with the CPU power cable and the outer shell of the case ended up not sliding on later. Don’t make my mistakes. Route it through the case the long way, the proper way.
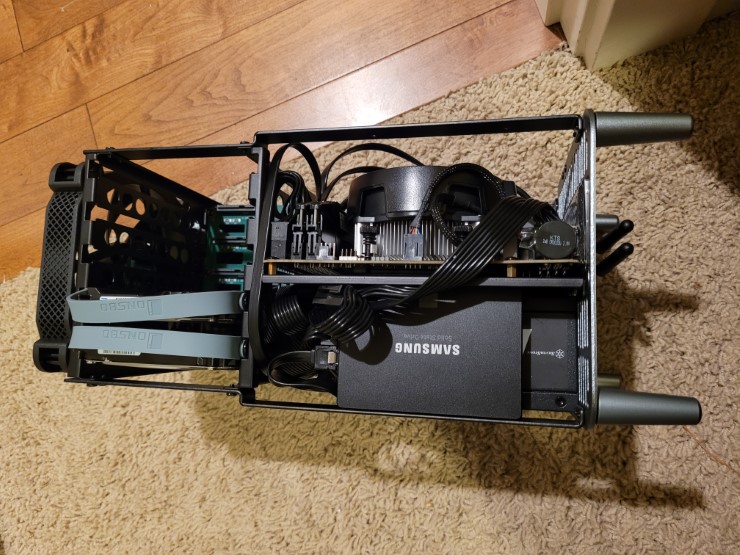
Ok, all the cables are shoved in there now I guess. Time to put the shell of the case back on and try things out!
Configuration
I decided to use TrueNAS Scale as the NAS OS and Jellyfin for the media server. Both are fully open source and well supported, so great options for the build.
Booting
To get started with TrueNAS Scale, first you must download the iso from their website and flash it to a USB drive using something like balenaEtcher.
Because I didn’t choose a CPU with integrated graphics, I decided to put the boot SSD into my desktop computer and use the newly flashed USB install media there. Just be very careful you install TrueNAS to the correct drive or you may accidentally wipe the wrong one.
After installing the OS and putting the boot SSD back into the NAS machine, I tried booting and… nothing happened. Well, the power turned on and the fan was blowing, but without a display it wasn’t clear what was happening.
I had expected this, but as TrueNAS Scale is supposed to connect to the network via DHCP and be configurable via a web portal, I expected it to show up in my router, but it didn’t.
This is where it would benefit having a CPU with integrated graphics or a cheap spare GPU to temporarily slot in while you do the initial configuration. I had neither so I ended up doing some mad science…
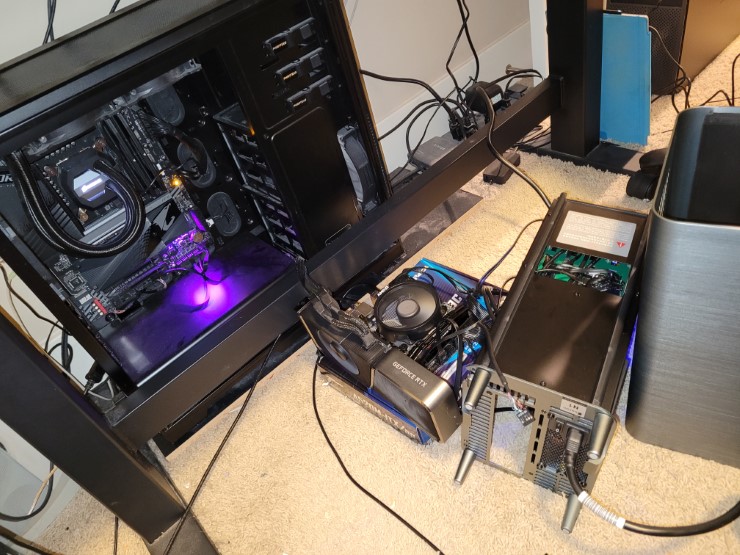
Yea, wow. So I took the graphs card out of my desktop, leaving the power cables though since the PSU in the NAS was very tight. But, a 3070 TI obviously won’t fit in the NAS, so I took the motherboard out but left everything I could attached and in the case. Now when turning on both machines (remember, my desktop PSU was powering the graphics card) I was able to see the video output.
Frustratingly, It ended up being one simple keystroke I needed to confirm something about the fTPM and then it booted properly into TrueNAS Scale. At this point I probably should can configured the BIOS as well, but my desktop machine kept turning itself off after some time, probably due to no display device being plugged into the motherboard, and I was just ready to move on.
So I put everything back together, put the NAS in its home, powered it on, and success! I was able to see a new device on my network and was able to hit the web portal for TrueNAS Scale.
Configuring TrueNAS Scale
I was able to connect to the web portal via http://truenas.local, but depending on your local network you may need to use the IP address instead, which you can get from your router’s web portal.
Personally I prefer to have my “infrastructure” devices to have static IP addresses, like my Raspberry Pi running Home Assistant, the Pi running my alarm panel and AdGuard Home instance, and yes the NAS. That way if something gets messed up with DNS or DHCP, I should always be able to access those devices.
To do this in TrueNAS Scale you click on the Network tab and in the Interfaces section you can edit the ethernet interface. You just need to uncheck DHCP and under “Aliases” add the IP and subnet you want.
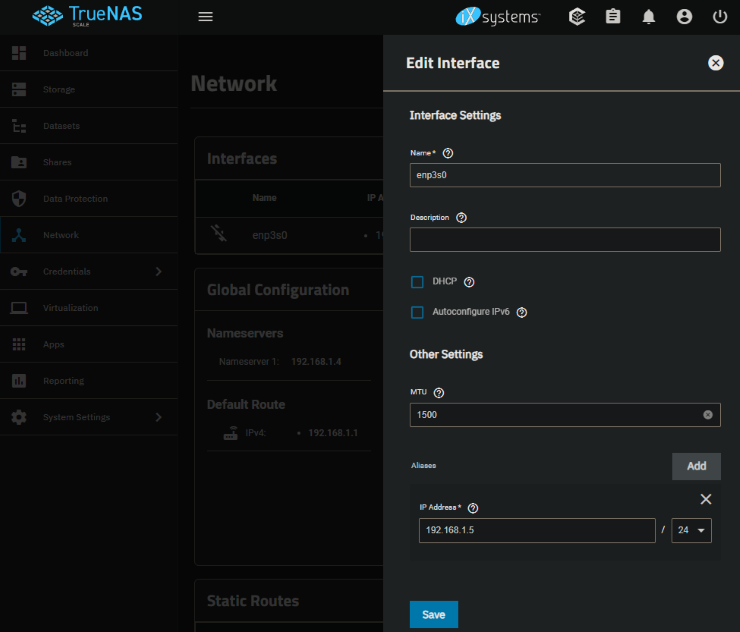
After this you’ll need to “Test Changes”, which is a convenient feature so you don’t misconfigure anything. It will automatically revert the network configuration if you don’t confirm it after some timeout. So after you make the changes, navigate to the new static IP and confirm the changes. At least for me, using the static IP was required as the host name resolution was stale and still pointing to the old DHCP-based IP.
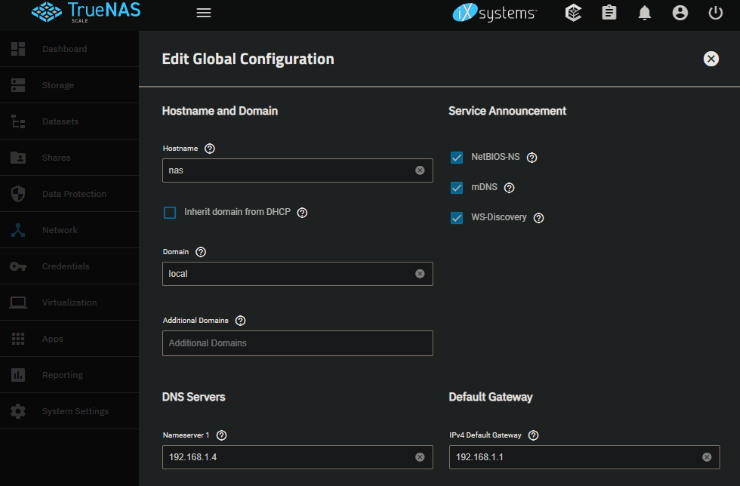
Next I changed the host name since I wanted to use nas.local instead of truenas.local (admittedly, very minor). Since the host name resolution was stale anyway, I figured why not. To do this, you go back to the Network tab and edit the Global Configuration with the desired host name. Because I have AdGuard Home, I also added that as the Nameserver.
Now that that’s out of the way, it’s time to actually set up the storage aspect of the NAS.
First a pool needs to be set up. A pool is organizes your physical disks into a virtual device, or VDEV. This is where you configure your desired disk layout, for example your desired RAID settings, or in the case of TrueNas Scale your RAID-Z settings. RAID-Z is a non-standard RAID which uses the ZFS file system. In my case I only have 2 data disks, so I chose to just use a mirror. When I add more disks I’ll end up converting to a RAIDZ1 (one drive can fail without data loss).
Note that Mirroring or RAID/RAID-Z are not proper substitutes for backups! They’re mostly to avoid inconvenience and downtime. You should always still take proper backups of your important data.
If you have an extra NVMe drive to use as a cache, you will also configure that here. Note though that it’s not recommended unless you have over 64GB of RAM, as the RAM cache (called “ARC”) is faster and the overhead to support the SSD Cache (“L2ARC”) requires RAM and thus eats into and reduces the size of the ARC cache. At least for me, the network is the bottleneck anyway, although that’s exacerbated by the fact that I stuck to a 1 gig interface.
Once the pool is configured, you’ll also need to configure a “dataset”, which is a logical folder within the pool, or perhaps it can be though of as a volume on a drive. Permissions are applied at the dataset level though, so if you intend to partition your data, this is where you would do so.
Next you’ll want to set up a share so you can transfer data to and from the NAS. In my case I use Windows for my primary desktop machine, so I set up an SMB share. Once you create the share it’ll prompt you to start the SMB service on the NAS, which is the server process which actually handles SMB traffic.
Finally, you’ll need to set up a user to access the SMB share. Go to the Credentials -> Local Users tab and add a new user. You’ll want to set up additional users for any family members who you want to access the SMB share directly. Note that later when configuring Jellyfin there will be separate user accounts to access the Jellyfin server, so if for example you only want your kids to consume media from the NAS but not directly access the data, you wouldn’t want to set up a user in TrueNAS Scale for them.
Now you should be able to access the share via \\nas.local\<share-name> from your Windows PC.
I recommend mapping the share as a network drive to avoid needing to re-enter credentials:
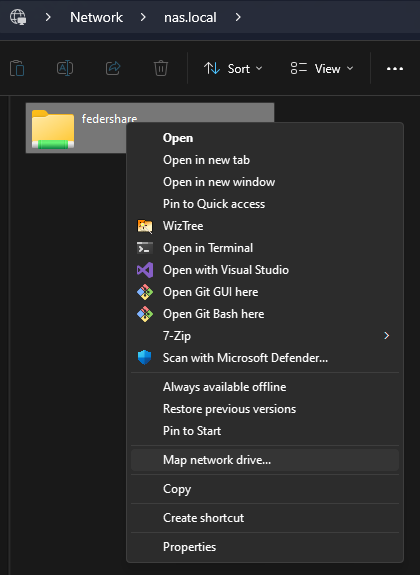
This allows you to see it as if it were a drive on your machine, in my case Z:.

At this point you can copy all your data!
Configuring Jellyfin
TrueNAS Scale supports installing “Apps”, which are effectively just docker containers. One such supported app is the Jellyfin app, a media server.
First go to the Apps tab and find the Settings drop down to choose a pool to use for the applications. It will create a dataset inside the selected pool called “ix-applications” to store the application data. TrueNAS recommends using an SSD pool if possible, but in my case I only have 1 pool, the HDD pool, so I just used it.
Now that an application pool is selected, you can install the Jellyfin app. Click “Discover Apps” and search for and install Jellyfin.
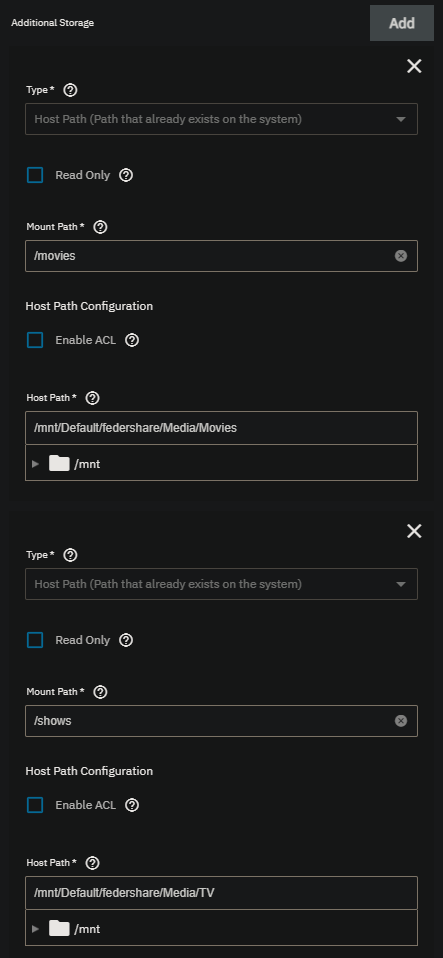
You’ll mostly just use the default settings, but there is one key piece you need to configure. You will need to give the Jellyfin app access to your data.
Under the Storage Configuration you should see “Additional Storage”. Click “Add”, and use Type: Host Path. For the Mount Path, use whatever path you want to be visible on the Jellyfin side, eg /movies. For the Host Path, select the path to the dataset with your movies, eg /mnt/Default/federshare/Media/Movies. Repeat this process for TV Shows, for example /shows as the mount path and /mnt/Default/federshare/Media/TV as the host path.
It’ll take a minute or two for the Jellyfin app to install and start, but once it’s done you can click the “Web Portal” button which will take you to the Jellyfin web portal where you can configure Jellyfin. Here you’ll need to configure Jellyfin user names and libraries.
The users you configure will be how users log into a Jellyfin client application to watch media, so is likely the users you will need to set up for your family members. I set up separate accounts for each of my family members so that I could apply parental controls.
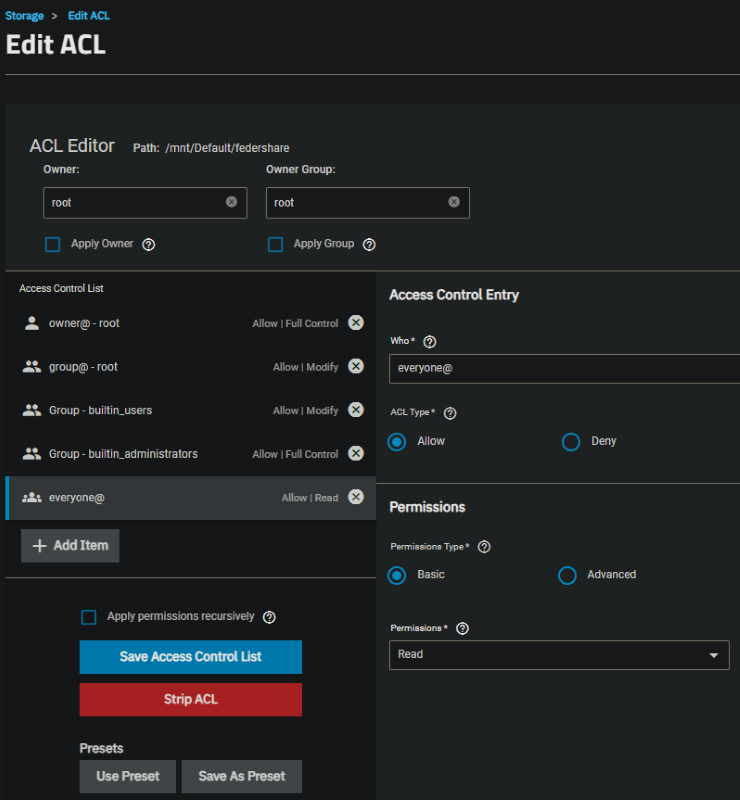
I did run into a permissions quirk where the Jellyfin app didn’t have permissions to the /movies and /shows mount paths I configured, possibly because of the SMB share, but I’m not certain of the reason. I ended up needing to go to the dataset and editing the permissions and granting the everyone@ group read permissions.
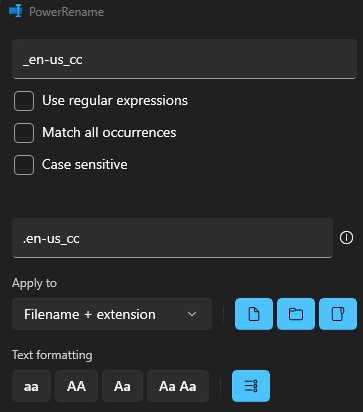
Another quirk I ran into is that my subtitles were not named in a way which Jellyfin was able to automatically pick up. They were named <Movie Title>-en-us_cc.srt where Jellyfin requires <Movie Title>.en-us_cc.srt. This was fixed easily enough with PowerRename.
Now you’re ready to install the Jellyfin client on your various devices and enjoy your own personal local media streaming service!
Disclosure: As an Amazon Associate, I earn from qualifying purchases. This adds no extra cost to you, but helps me in a small way if you choose to purchase a product linked in this post.

