
Migrating pictures from OneDrive to Immich on TrueNAS Scale
As I continue on my self-hosting journey, I decided to migrate my photos and videos from OneDrive to ensure my photos are stored safely, privately, and securely on my own server. After exploring various solutions, I chose Immich for its extensive features and, perhaps more importantly, its active development community.
Installing Immich
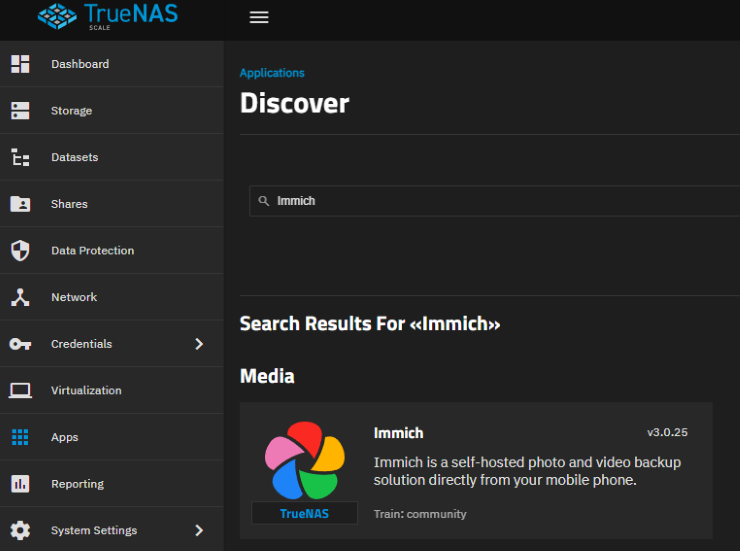
TrueNAS Scale supports installing Apps, so the first step is to install the Immich app. Immich has full instuctions, but I’ll go over the specific configuration I used. In TrueNAS Scale, go to the Apps tab, click “Discover Apps”, search for “Immich” and click “Install”.
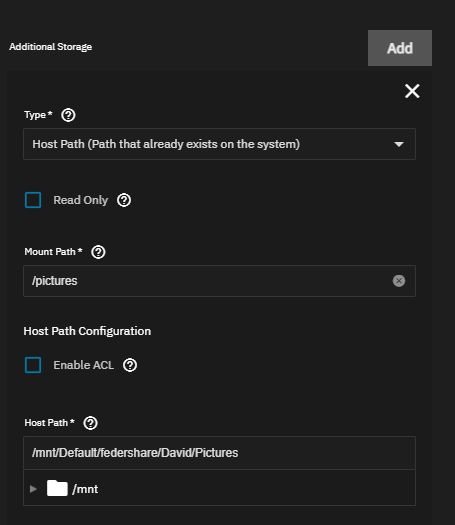
For the configuration, I mostly used the defaults, including for the “Immich Libray Storage” section. Because I’m migrating my existing photos from OneDrive and using the NAS storage as the “source of truth”, I didn’t plan on actually storing anything directly in Immich to avoid it reorganizing the files itself. Instead, Immich has a notion of an “External Library”, which I’ll discuss more later once Immich is installed. To set that up though, a folder on the NAS holding all the photos will need to be shared with Immich. This is done in the “Additional Storage” section, and I mounted the host path /mnt/Default/federshare/David/Pictures (path on the NAS) to /pictures inside the app.
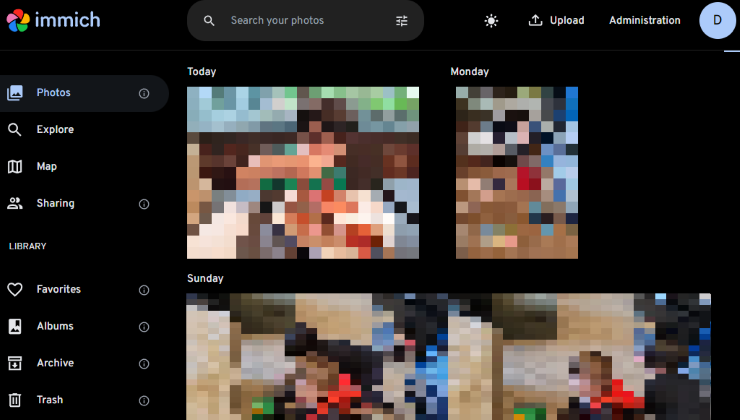
Finish up the app install and once running, you can navigate to the Immich Web Portal and go through the configuration process to create an admin user.
To import your pictures, you will create an External Library. Click “Adminitration” in the top right, then in the “External Libraries” tab, click “Create Library” and select an owner. The owner is the Immich account the pictures will be associated with.
Importing Pictures
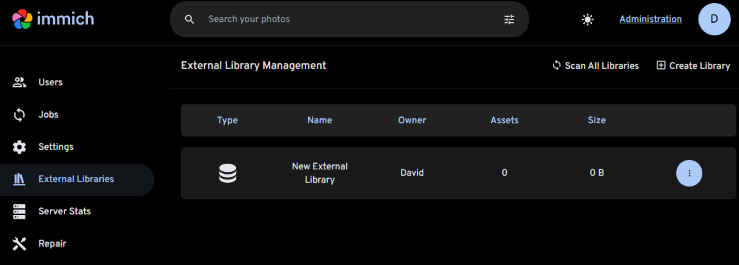
Then click the “…” and rename the External Library to whatever you desire; I chose “David’s Pictures (NAS)”. Then click the “…” again and click “Edit Import Paths”, “App path”, type “/pictures” (or whtever mount path you used earlier), and save.

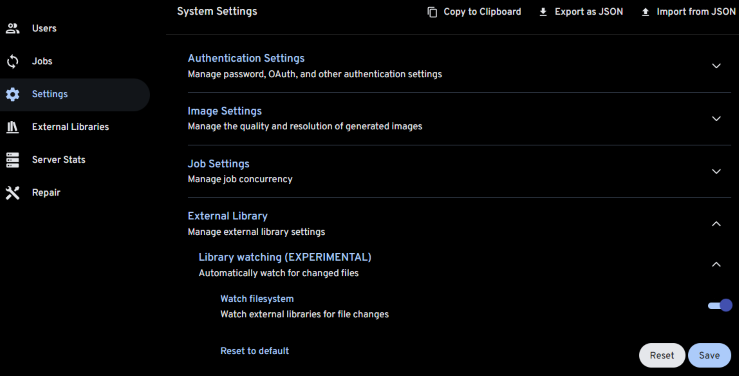
You can then click “Scan All Libraries” to on-demand import the pictures from that folder at any time. To configure this to happen on a schedule, you can go to the “Settings” tab, expand the “External Library” section, and configure the “Library Watching” and “Periodic Scanning” values. Personally, I chose to enabled Library Watching and scan the library every hour. Anecdotally, I found the Library Watching feature to not work very well, so if you want a picture to appear immediately and don’t want to wait for the time, you’ll want to manually scan the external library.
NOTE! Deleting a picture in Immich (and emptying the trash) deletes it from the NAS! ie the External Library syncs both ways.
At this point you can manually copy all your pictures from OneDrive to your NAS. After scanning the External Library (manually or otherwise), your photos should be viewable in Immich!
If you back up your NAS to OneDrive, the pictures will be copied back to OneDrive (ironic!), so you can safely use the NAS as the source of truth going forward. There are Android and iOS mobile apps for Immich, which you should install at this point as well.
Syncing Pictures from Android
Speaking of the NAS being the source of truth and mobile apps, the final step to complete the process is to sync your phone’s pictures to the NAS instead of OneDrive. There are many ways to do this, but as an Android user I chose to use FolderSync.
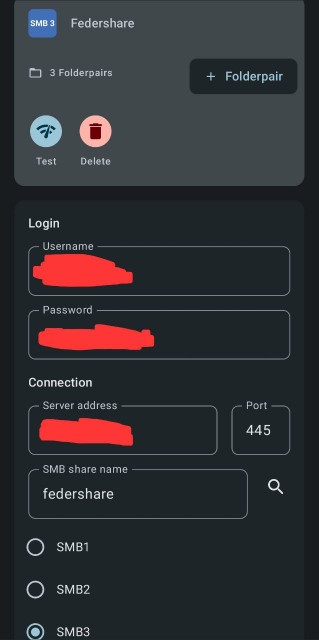
First add an Account to sync to, and in this case at the bottom you’ll find SMB. Configure it with your SMB share name, SMB credentials, and the IP of your NAS. TrueNAS Scale supports SMB3, so be sure to select that for the fastest syncing.
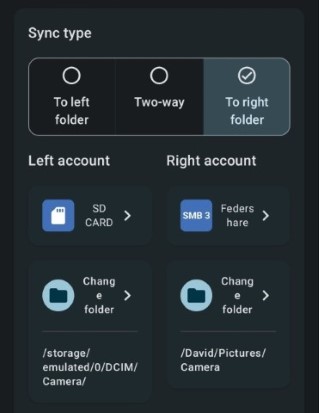
Next, add one or more “folder pairs”. These are a pair of folders to sync. In this case you’ll configure the left to be your phone’s camera storage (eg /storage/emulated/0/DCIM/Camera) and the right will be the SMB share under the path where you want to place the pictures, in particular the same directory or a subdirectory of what you mounted in the Immich app. (/David/Pictures/Camera in my case). I configured the sync to be “to right folder”, which means it will sync only one-way from the phone to the NAS.
There are additional configurations to play around with for a folder pair, for instance I added a regular sync nightly at midnight, and also configured it to monitor the device folder so that it immediately syncs, although note that this fails when you’re not on your local network which is why I use a scheduled sync in additional.
I also was hitting some file conflicts, very likely due to bad file management from me originally on OneDrive, so I ended up configuring the left file to always “win” in the case of a conflict.
Looking Forward
At this point, the migration was complete as al my primary requirements were met. However, Immich has many features which make the experience after migration even better than it was before. For example, Facial Recognition, which analyzes the photots to identify faces and associate them with distinct people. This all happens locally, which is a relief as allowing a remote third-party to analyze pictures of my family, including my yound children, is not something I’m terribly comfortable with. Relatedly, the Smart Search feature allows for searching your pictures without having to tag them specifically, for example I can search for “<wife’s name> holding <son’s name>” and it does a reasonably good job at finding relevant photots. It’s certainly not perfect, but impressive for running locally and should improve over time.
Lastly, I really enjoy the ability to create links to share specific photos externally. This does require some extra work though to expose Immich externally, the details of which I won’t go into here, but it makes sharing full-quality pictures with family who I still primarily talk to over SMS way easier.