Migrating my Homelab from TrueNAS to Proxmox
For a while now I’ve been considering ditching TrueNAS Community Edition (formerly TrueNAS Scale) for my homelab in favor of running on Proxmox. While the recent controversy and dismissive response were the final push I needed, I’ve been pulled in this direction for some time. One issue I have is with the instability and confusion around its VM and container story. Things which should be easy aren’t, like GPU passthrough to Jellyfin. And things which should be simple are way too complex, like SMB permissions. Honestly I’m probably not the right user for TrueNAS in the first place; I am trying to run my whole homelab on the hardware, not “just” a NAS with some extras.
Table of contents:
- The goal
- Prepare services
- Back up everything
- Install Proxmox and import ZFS
- Set up infrastructure
- Deploy and restore services
The goal
The philosophy is that everything becomes scriptable and declarative. I don’t know how many times I’ve made some change to my homelab and then months or years later I can’t remember the specifics and have to figure out what I did to either extend or re-do it. This is why having the configuration be declarative is so important. This is a hobby not a job, and I will absolutely forget things in the sometimes months between tinkering sessions.
I also wanted everything to live in a git repo, both for sharing and to make sure it lived somewhere external to the homelab itself. The repo for my homelab is hosted on GitHub, so feel free to use it as a base or inspiration for your own homelab.
As for the high-level end goal, I decided to go with Proxmox VE as the hypervisor, and LXC containers for services instead of VMs. The ZFS pool is directly attached to the Proxmox host, and the LXCs use bind mounts to directly access the ZFS pool (no SMB middleman). The Docker host is an LXC as well as the SMB server. For Home Assistant, I used a full-blown VM since it requires its own OS, Home Assistant OS.
Prepare services
Proxmox has basic system monitoring built-in, but I wanted service-level monitoring and alerting too. I wanted to set this up before the migration so that I’d have visibility immediately after migrating.
I chose to add Beszel for system monitoring and Dozzle for viewing Docker logs. I know there is some overlap between the two, but Beszel seems better tuned for monitoring and Dozzle seems better tuned for log viewing, so I decided to just have both. Together they use ~55 MB of RAM for my setup, so there’s really no harm having both. I was previously using Portainer for log viewing, but Dozzle is much more lightweight and simpler.
I also decided to add Uptime Kuma to help monitor whether services were actually responding to requests, as opposed to simply running. The configuration is very simple and easy to set up so is a nice addition to the homelab.
While I was adding and replacing services, I decided to take care of a few other things I had been meaning to do for a while but hadn’t gotten around to:
- I added homepage
- I replaced a custom-built reverse proxy using YARP (why did I think that was a good idea?) with Caddy
- I pinned all my docker image versions for determinism and stability and configured Renovate to keep them updated.
Back up everything
As they say, safety first. My critical data is already backed up properly, so this is mostly about getting back into a good state if something goes wrong and I needed to turn back.
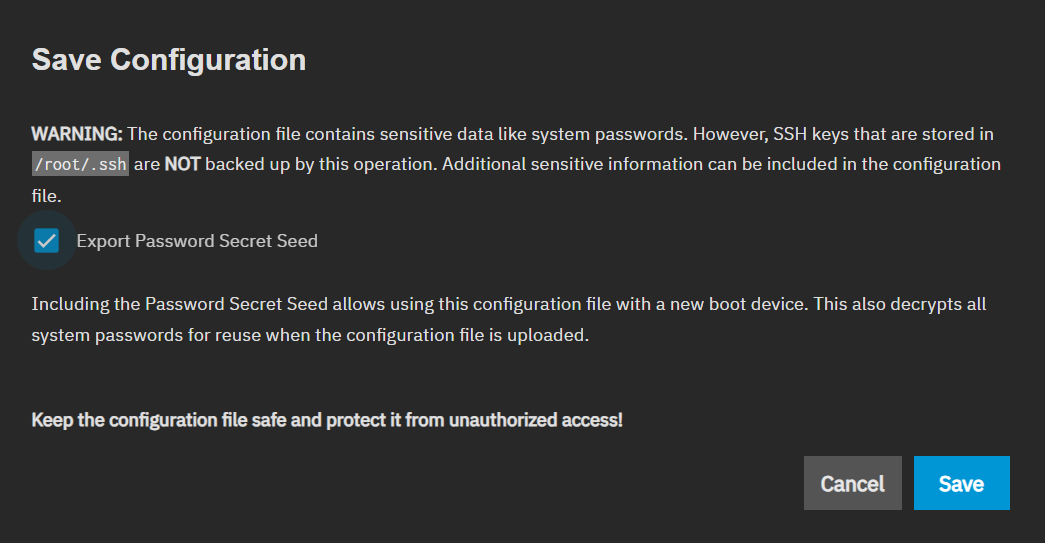
First save off the TrueNAS configuration. To do this, navigate to System -> Advanced Settings -> Manage Configuration and click Download File. Save the file to a safe location, not on the NAS. I just saved it to the laptop I was using to do the migration.
Additionally you should generally note the structure of your ZFS datasets, most importantly your ZFS pool name (the default is tank).
To ensure that SMB clients continue to work after migration, you will want to make sure you have all active SMB usernames and passwords as you will need to manually set them on the new system as part of the migration.
I was running a VM on TrueNAS which was the Docker host for all my containers. As the goal is to move that to an LXC, I needed to back up all docker volumes I was using. Docker volumes live in the VM’s filesystem, not directly in ZFS. For the most part I used bind mounts to the NAS, which would survive the migration, but I did have a few volumes to keep. Going forward I plan on using bind mounts for (almost) everything, and the migration plan includes that.
You can list all volumes by SSH’ing into the VM and running docker volume ls. To back up a volume, you can use this command:
docker run --rm \
  -v VOLUME_NAME:/source:ro \
  -v /path/to/backup:/backup \
  alpine tar czf /backup/VOLUME_NAME.tar.gz -C /source .
Replace the VOLUME_NAME with the volume name, and /path/to/backup to where you want your backups to go. A path within ZFS is fine as we will be importing the ZFS pool later in the migration and will be able to restore state from there.
Or use this script to back up all volumes (usage: ./backup-docker-volumes.sh <backup-dir>).
I also was running a VM for Home Assistant. To take a backup in Home Assistant, in the UI navigate to Settings -> System -> Backups and click Backup Now. Save it to the machine you’re orchestrating the migration from for ease of restoring it later.
As a final backup step, create a ZFS snapshot. This allows you to roll back easily if something gets messed up during migration, like bad permissions or a service gets misconfigured and writes bad data.
To do this, open the TrueNAS shell by going to System Settings -> Shell and type:
sudo zfs snapshot -r tank@migration
Replace tank with your ZFS pool name. migration can be any string you want if desired. Note that taking a snapshot is instant and does not duplicate data, so this is a quick and easy operation.
If you want to be extra safe, you can also do a scrub to verify data integrity and that no drives are currently failing. It takes a very long time (75 TiB took 7.5 hours for me), and TrueNAS regularly scrubs anyway, so this step is optional. If your last scrub was recent, I’d say just skip it.
To perform a scrub, in the TrueNAS shell run:
sudo zpool scrub -w tank
sudo zpool status tank
Replace tank with your ZFS pool name. Then wait until the scrub finishes. The status is visible in the web UI as well so you don’t have to keep the shell active.
That’s all the backing up I needed to do, but make sure anything else that’s not in the ZFS pool are completely backed up. I also cannot stress enough how important it is to have an external backup of all your critical data.
Install Proxmox and import ZFS
This is it, the point of no return! The NAS will be offline from this point on until you finish the migration.
Download the Proxmox ISO and flash it to a USB drive using balenaEtcher or similar USB flashing application. Shut down your VMs and TrueNAS and then install Proxmox on the boot drive. Make sure when installing Proxmox that you leave your storage drives with ZFS untouched!
The Proxmox graphical installer is pretty straightforward.
- For the host name put something like
proxmox.localor whatever you want to call the Proxmox host. - Use a static IP with something like
192.168.1.2/24, or whatever you prefer. - Set both the gateway and DNS to your router’s IP address, usually
192.168.1.1. - Ensure “pin network interface names” is checked as it ensures your network interface name stays consistent across reboots. Without it, the name could change if you add/remove hardware, which would break the network bridge.
- The default names for the network interfaces are fine, mine were
nic0(ethernet) andnic1(WiFi), and if you have both definitely choose the wired connection as the management interface.
After those inputs, it should take a few more minutes to finish installing Proxmox.
Once installed and booted up, you should immediately be able to ssh into it using the password you set up during the install:
ssh root@192.168.1.2
Note: I prepared for this quite a bit. I had a plan and scripts to help make the process smoother and faster, but I still ran into some issues along the way. You’ll want to account for extra time in debugging, and ensure your scripts are idempotent so that if you need to make fixes you can just run the whole script again instead of trying to figure out what needs to be done and what needs to be skipped. For example, git refused to operate on the repo because it was created on a different system, so I needed to add
git config --global --add safe.directory /path/to/repoto the setup script. If you’re using my scripts, I did fix the issues I ran into but you’ll still want to be prepared to troubleshoot issues unique to your setup.
Once SSH’d you will need to import the ZFS pool and fix ZFS properties.
To import the pool, run:
zpool import -f tank
The -f flag is needed because TrueNAS marked the pool as in use. As TrueNAS is shut down, it is safe to force the operation.
Verify the import worked by listing files on the pool. If you’re following along with my homelab repo run:
ls /tank/homelab/config/
This should list the .env files you expect to be there, one of which should match the name of your Proxmox host.
At this point you should run the migration script:
bash /tank/homelab/repo/scripts/migrate.sh
Adjust the path to match your pool and repo layout. The migration script does some one-time migration actions, calls the setup script internally, then handles a few more one-time migration tasks. Although the migration script handles the full remainder of the migration, we’ll walk through what it does step-by-step.
The first thing the script does is run these three commands for each dataset:
zfs set acltype=posixacl tank/dataset
zfs set aclmode=passthrough tank/dataset
zfs set xattr=sa tank/dataset
This is because TrueNAS uses NFSv4-style ACLs and its own permission management. Standard Linux tools (chmod, setfacl, chown) expect POSIX ACLs. Without all three, you’ll hit mysterious permissions failures like I did initially (fixed in the script now).
Set up infrastructure
Now that Proxmox is installed and ZFS is mounted, it’s time to create and configure the LXCs and VMs, including setting up SMB.
My setup script (which is called by the migration script above) runs a list of modules declared in a per-host .env file. My Proxmox host’s looks like:
HOMELAB_SETUP_MODULES="configure-proxmox-repos install-tools configure-amdgpu configure-ssh create-lxcs create-vms"
First up is configuring the Proxmox apt repositories (configure-proxmox-repos). By default, Proxmox is configured to use enterprise repos which require a paid subscription. apt-get update will return a 401 Unauthorized error, meaning installing or updating any packages is completely blocked. It is an unfortunate default behavior of Proxmox and all free Proxmox users have to reconfigure the apt repositories to replace the enterprise paid repositories with the free community repositories.
The base Proxmox installation is pretty barebones, by design. Most functionality should be in an LXC or VM. However, we do need a small set of common tools for the homelab scripts and basic maintenance work when SSH’d into the host. The install-tools module installs these.
For my machine I had an AMD iGPU. Proxmox already includes the amdgpu kernel driver, so the configure-amdgpu module loads the kernel module and ensures it is loaded on boot going forward.
Initially we used a password to SSH into the Proxmox host, but a more secure option is to use key-based authentication. The configure-ssh module turns off password authentication and deploys an authorized key file from ZFS. The reason for this file being on ZFS is so that it can be shared across all your hosts and can survive re-paves.
Next is what Proxmox is best at: creating LXCs and VMs (create-lxcs and create-vms). Like the modules list, LXC and VM definitions also live in the per-host .env file. My Proxmox host’s configures a NAS LXC, docker LXC, and a Home Assistant VM and looks similar to this:
####################
# LXC Containers
####################
HOMELAB_LXCS="NAS_LXC DOCKER_LXC"

# NAS LXC
NAS_LXC_VMID=100
NAS_LXC_HOSTNAME=nas
NAS_LXC_IP=192.168.1.4
NAS_LXC_MEMORY_MIB=512
NAS_LXC_CORES=1
NAS_LXC_ROOTFS_GIB=4
NAS_LXC_NESTING=0
NAS_LXC_MP0=/tank/homelab,mp=/mnt/homelab
NAS_LXC_MP1=/tank/media,mp=/mnt/media
NAS_LXC_MP2=/tank/share,mp=/mnt/share

# Docker LXC
DOCKER_LXC_VMID=101
DOCKER_LXC_HOSTNAME=docker
DOCKER_LXC_IP=192.168.1.5
DOCKER_LXC_MEMORY_MIB=16384
DOCKER_LXC_CORES=12
DOCKER_LXC_ROOTFS_GIB=32
DOCKER_LXC_NESTING=1
DOCKER_LXC_GPU=1
DOCKER_LXC_MP0=/tank/homelab,mp=/mnt/homelab
DOCKER_LXC_MP1=/tank/media,mp=/mnt/media
DOCKER_LXC_MP2=/tank/share,mp=/mnt/share

####################
# VMs
####################
HOMELAB_VMS="HAOS_VM"

# Home Assistant VM (hestia)
HAOS_VM_VMID=102
HAOS_VM_HOSTNAME=homeassistant
HAOS_VM_IP=192.168.1.3
HAOS_VM_MEMORY_MIB=2048
HAOS_VM_BIOS=ovmf
HAOS_VM_MACHINE=q35
HAOS_VM_OSTYPE=l26
HAOS_VM_AGENT=1
HAOS_VM_CORES=2
HAOS_VM_IMAGE=/tank/homelab/images/HomeAssistant/haos_ova-17.1.qcow2
Note the DOCKER_LXC_GPU=1, which causes the setup script to passthrough the GPU to the LXC. It essentially adds these two lines to the LXC config:
lxc.cgroup2.devices.allow: c 226:* rwm
lxc.mount.entry: /dev/dri dev/dri none bind,optional,create=dir
The first line allows the LXC to access the DRI device, and the second line bind-mounts /dev/dri from the host into the container. This is so much simpler than messing around with IOMMU/VFIO on TrueNAS, which I never actually got working.
Now that the LXCs are created, the setup script recursively sets them up using their host-specific .env files. My NAS’s has:
HOMELAB_SETUP_MODULES="create-users install-tools configure-ssh install-samba set-share-permissions"
The create-users module creates users and groups for the homelab based on config. For configuration which applies to the entire homelab and so shared across multiple hosts, there is actually a common.env which the scripts use in addition to the per-host files.
My common.env has something like this for the user config:
HOMELAB_GROUPS="ADMIN ADULTS KIDS FAMILY"
ADMIN_GID=1099
ADULTS_GID=1100
KIDS_GID=1101
FAMILY_GID=1102

HOMELAB_USERS="DAVID SPOUSE KID1 KID2 KID3"
DAVID_UID=1001
DAVID_GROUPS="admin,adults,family"
SPOUSE_UID=1002
SPOUSE_GROUPS="adults,family"
KID1_UID=1003
KID1_GROUPS="kids,family"
KID2_UID=1004
KID2_GROUPS="kids,family"
KID3_UID=1005
KID3_GROUPS="kids,family"
Note that in my case, my spouse is not technical so she’s not in the admin group. Not necessarily a trust issue but a matter of avoiding providing privilege where it isn’t needed and won’t be used.
install-tools and configure-ssh work exactly as they did on the Proxmox host. install-samba installs Samba and configures which shares exist and who can see them. set-share-permissions then defines permissions by setting POSIX ACLs on each user’s directories. The way I have it set up is:
- Each user has full control in their own directory
- Adults have read-only access to other adults’ directories
- Adults have full control in kids’ directories (parental oversight)
- There is an
adultsdir where all adults have full access - There is a
familydir where everyone has full access - Admins have full control everywhere
My docker host’s .env file has:
HOMELAB_SETUP_MODULES="create-users install-tools configure-ssh install-docker configure-macvlan-bridge"
create-users, install-tools, and configure-ssh all do the same as before. install-docker simply installs docker using the official method, configures it to start on boot, and also starts it immediately. I’ll describe deploying the docker services, and restoring the backed up volumes, later.
One of my docker services, AdGuard Home, needs a dedicated IP address since it’s a DNS resolver and needs to avoid conflicting with the host’s own DNS resolution. It does this by using a macvlan network, but due to how macvlan works at the Linux kernel level, a workaround is needed to ensure that the docker host can talk to its own macvlan container. This is what the configure-macvlan-bridge module does.
If you also have a DNS server running as a Docker service, one important thing to watch out for is that you point your infrastructure (eg, your LXCs and VMs) to your router for DNS instead of your DNS server. I have my router configured to use my DNS server as its primary but falls back to 1.1.1.1 when my DNS server is unavailable. Otherwise you hit a chicken-and-egg situation when bootstrapping the host that runs the DNS server.
The Home Assistant VM is also created by the script, but since HAOS needs to be restored from backup, we’ll cover that in the next section. One important gotcha I ran into is that the default SCSI controller type (lsi) doesn’t work with UEFI boot, which HAOS uses, and so virtio-scsi-pci is needed instead. The setup script uses this for all VMs since it has better performance and compatibility than the legacy lsi one.
Deploy and restore services
With the infrastructure in place, now it’s time to get the services running and restore data.
The last thing the setup script does is deploy the docker services. Like with the other configs, the list of docker services to deploy is also config-driven. My docker host’s .env file has:
HOMELAB_SERVICES=dns,reverse-proxy,jellyfin,photos,files,backup,monitoring,homepage,dozzle,webhook
Each of those services correspond to a folder in the homelab repo containing a docker-compose.yml file which defines the service.
The setup scripts are permanent and idempotent. They should be re-run any time configuration changes. The rest of the migrate.sh script finishes off the one-time migration operations.
Next, the migration script fixes file ownership. TrueNAS uses its own UID numbering starting at 3000 while my config followed Linux standards of starting at 1001. The files in ZFS still had the old TrueNAS UIDs baked into their metadata. So the script does a one-time recursive chown on each user’s data to remap from the old UIDs to the new ones. Until this is done, SMB users will not have proper access to any existing data.
Next the migration script stops all docker services and restores the volumes that were backed up earlier. It calls the restore-volumes.sh script, which essentially does this on every backed up volume:
docker run --rm \
  -v VOLUME_NAME:/target \
  -v /path/to/backup:/backup:ro \
  alpine sh -c "find /target -mindepth 1 -delete && tar xzf /backup/VOLUME_NAME.tar.gz -C /target"
It then re-deploys all docker services.
Finally, there are a couple of manual steps to finish off the migration. The first one is to restore SMB passwords for all users. This requires typing in the password so needs to be done manually for each user. You do this by SSH’ing into the NAS LXC and running smbpasswd -a <user> (or just using pct exec from the Proxmox SSH session, eg pct exec <lxc-id> -- smbpasswd -a <user>) for each user.
To restore Home Assistant, navigate to http://<ip>:8123 and upload the backup you saved earlier. This is why we saved the backup to the machine we’re using to orchestrate the migration.
After that, the migration is finally complete! Test everything out and ensure it’s all working as expected. Once validated, you can do some post-migration cleanup to reclaim some space, such as deleting the TrueNAS system datasets (~35 GB in my case).
So far I’ve found Proxmox much easier to manage day-to-day as everything is scriptable and declarative. I have full control and I can easily repave from scratch if needed. I’ve already made some additional post-migration changes like moving named volumes to ZFS bind mounts (for persistence) and setting up CI/CD deployments, both of which were much easier with the new system. Next up I’d like to beef up monitoring and improve my backup and recovery strategy.