
How to rip Blu-rays and watch on Jellyfin
Previously I wrote about building a NAS and Media Server for under $500 which explains how to set up a NAS and configure a Jellyfin server (although I’ve since moved away from the TrueNAS “App” in favor of a docker container). This post is a complete guide for how to populate your media library by ripping your Blu-ray discs onto your NAS so that you can watch on Jellyfin.
Table of Contents:
- Why?
- Where to get Blu-rays
- Optical Drive
- MakeMKV
- Re-encoding
- Library Organization
- Parental Controls
- Legal Disclaimer and Ethics
Why?
The first question I usually get is: why? Why rip your Blu-ray discs in the first place? Why not just stream? I have two primary reasons: ownership and quality.
For my point on ownership, if you’ve heard the phrase “You’ll own nothing and be happy”, you know what I mean. Essentially when you stream, you don’t own any of the movies or shows. The streaming platform may choose at their discretion to remove anything they want, or more likely their contracts expire. Owning physical media means that you, well, own it. No one can take it away from you and you can watch it whenever you want. There are some fringe benefits to this as well, such as avoiding data usage (for those with data caps), avoiding buffering, and being able to watch media when you don’t have internet, either via an outage or for example when on a roadtrip, although the latter requires some extra steps. I would also argue that this saves cost over time by not paying streaming subscriptions, and at risk of sounding like a privacy nut, it also shields you from the tracking of the media you consume.
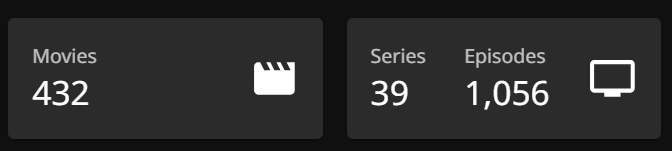
My personal library that I’ve built up over the last 2 years has over 400 movies and over 1000 episodes of TV. At that size, there is plenty of variety and I never find myself without something to watch. In fact, I’ve only actually watched around one-third of the movies I currently have. I have a lot to catch up on!
In terms of quality, Blu-ray discs and especially UHD Blu-ray, are much higher quality. It mostly comes down to bitrate as the streaming services try to keep costs down by compressing the video and/or using a lower bitrate to avoid having to send tens of gigabytes over the internet just for one user watching one movie. For reference, most Blu-ray movies are around 40 GB and most UHD Blu-ray movies are around 70 GB. It’s totally infeasible to stream that much data, so there clearly must be compromises on quality. Additionally if you have a surround sound setup for your home theater, the audio quality is significantly better with physical media.
Where to get Blu-rays
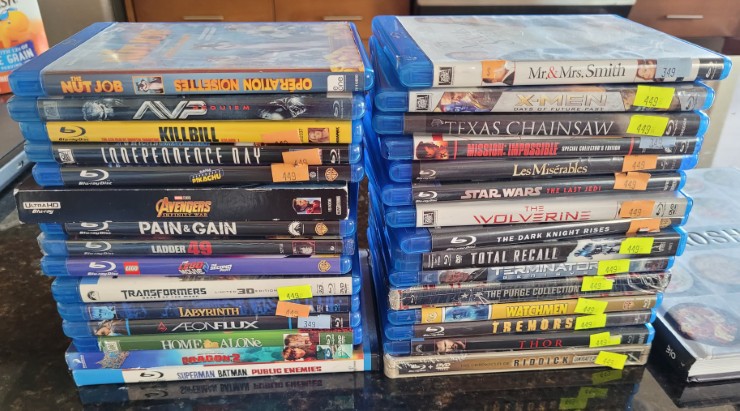
I find the best place to get cheap Blu-rays is from thrift stores like Goodwill or Value Village. I’ve had even better luck at local thrift stores. I can typically get Blu-rays for around $3 each, but I do find that pricing varies wildly from store to store so your mileage may vary. Obviously selection is another problem, but in my opinion the hunt is part of the fun. My wife and I seek out nearby thrift stores whenever we’re in a different area of town, and we check back periodically at places we’ve already been to see if there are some new gems.
Anecdotally, the stars aligned one day for me at a local thrift store which had a half-off sale combined with a seemingly huge drop of Blu-rays they got, so I walked out with 30 Blu-rays for around $70. One was even a 4k Blu-ray! I’m still chasing that high to this day.
One thing to watch out for when thrifting though is that you will want to check the condition of the disc before purchasing. Sometimes there will be smudges which can simply be cleaned, but other times the disc may be quite scratched or even missing entirely.
If you’re not into thrifting or you really want a specific piece of media you haven’t been able to find elsewhere, Blu-ray.com is a good source, as well as Amazon of course. Paying retail prices can be justified if you don’t have streaming services. Just put the money you’d typically spend on subscriptions towards buying physical media instead, and over time you can build up quite the library.
Here are some of my favorites which are relatively cheap, at least at the time of writing:
- The Lord of the Rings Trilogy
- Harry Potter Collection
- Dark Knight Trilogy
- Interstellar
- The Matrix
- Edge of Tomorrow
- Jurassic Park
- Oppenheimer
- Terminator 2
- Saving Private Ryan
- 1917
- Pulp Fiction
- Inglourious Basterds
Optical Drive
To rip Blu-ray discs you need an optical drive for your computer. For regular Blu-ray discs, or DVDs for that matter, any old optical drive that can read those discs will do. However, for UHD Blu-ray AKA 4k Blu-ray you need special firmware flashed to the drive. While there is a detailed flashing guide, personally I recommend buying a pre-flashed drive for the peace of mind and convenience. I got a Pioneer BDR-212 from Billycar11 and can attest to his legitimacy, professionalism, and promptness.
MakeMKV
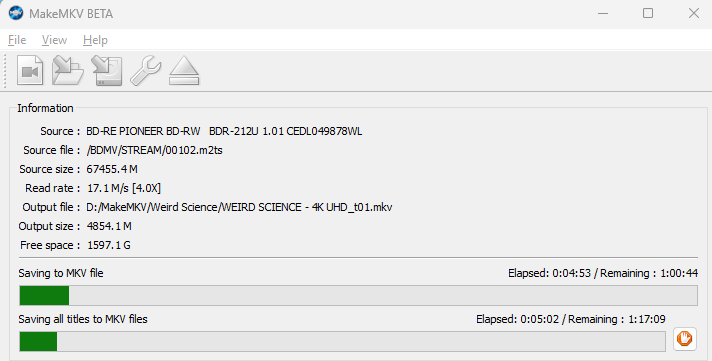
The best software to use for ripping is MakeMKV. It extracts the video files from the disc and remuxes them into mkv files. This file format is widely supported and because it’s a remux as opposed to re-encoding, the video files are the exact same quality as on the disc.
Once you have a few rips under your belt, I highly recommend buying MakeMKV. It’s not strictly necessary, but it’s a lifetime license as opposed to a subscription, and I think it’s important to support the software you use and enjoy to ensure that it continues to receive updates and support.
Basics of Ripping
First you need to open the disc in MakeMKV and select the video files you want. For some background, Blu-ray discs contain smaller video segments and then playlists of those segments which represent one semantic video file. This allows for deduplication of content for video files with identical parts. For example, a disc containing both theatrical and extended versions doesn’t need two complete copies of the film, which wouldn’t fit at full quality anyway, because most of the content is shared and only certain scenes differ between versions.
The reason why this matters when ripping is that many of the files you can select from in MakeMKV are irrelevant or not useful, so you should only select what you want. Some people may want just the movie, but personally I also rip the special features. This does make selection slightly more involved, but I’ll go into that more in a later section.

In some cases studios try to deter ripping by creating several or even sometimes hundreds of playlists with different segment maps. The bad playlists end up with an incomplete and/or out-of-order video. Sometimes you can figure out the correct one from comparing the movie’s runtime to the playlist duration, but most of the time it’s easier to just do an online search as the community has already figured out the correct one. Usually a search for the movie name with “MakeMKV” at the end is sufficient to find what you need. Anecdotally, I’ve also noticed that for some discs which have only a couple of options (presumably not intentionally maliciously spamming playlists) if one of those options is 00800.mpls and the other option is similar to 00801.mpls, the 800 one is the correct one.
If you only want the movie, then selecting the correct single file is all you need to do and then you can start the rip! A short while later you will have the video file(s) ready to copy to your NAS. A Blu-ray takes around 45 minutes to rip, while a 4k Blu-ray can take up to an hour and a half, but these times can vary based on drive speed.
Extras and Special Features
If you’re like me and want to also rip and organize the special features, then selection becomes a bit more involved, and you’ll need to identify what each video file actually is.
When selecting what to rip, there are many useless video files on the disc that you will want to filter out. Blank segments, videos related to the Blu-ray menus, piracy warnings, and production logos are all worth filtering out. However, because you can’t see the videos as part of the selection, usually I just filter out very short video (less than 10 seconds) and alternate versions of the movie, and just sort them out after the rip. MakeMKV has a setting which can help filter out short videos, and you may want to even set it to up to a minute.
Once the rip is complete and you have a superset of the video files you want, you can use a combination of two approaches to identify what the various files are. The first step is to simply play the video on your computer with VLC or another player that supports MKV files. Many of the junk files will be immediately obvious and can be deleted.
Once most of the junk is filtered out, you can use DVDCompare to help identify the special features. You can search for a movie and then it will show the special feature titles and lengths which you can then match with the durations on the video files you have and rename your files to match the name of the special feature. It’s not always perfect and may take some manual scrubbing of the videos to figure out which is which, but with some experience it shouldn’t take more than a few minutes to sort through.
Re-encoding
I prefer to store the full quality videos, however that can take up quite a bit of storage. My current library of around 400 movies takes about 15 TB. One option to save on storage costs would be to re-encode the videos into another format, e.g. HEVC, using a tool like HandBrake.
As I prefer the highest possible quality, I do not re-encode and so I won’t go into more detail for that.
Library Organization
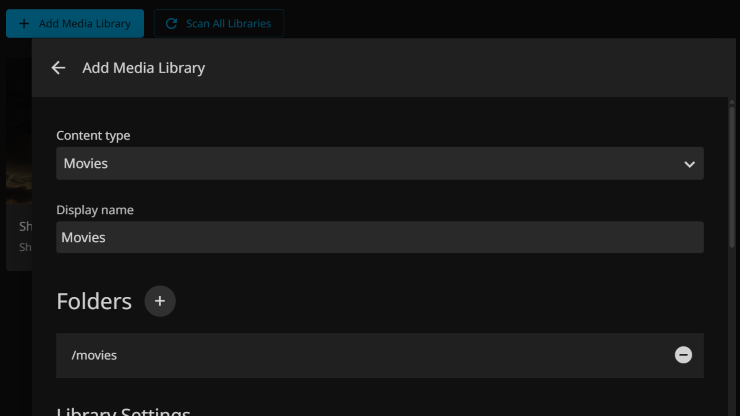
I have a root media share on my NAS with 2 subdirectories, Movies and TV. I have these mapped into the Jellyfin docker container as separate folders, /movies and /shows, and each is added as its own library in Jellyfin with the associated content type.
Jellyfin does have good documentation for file organization within a library, but here’s the gist.
For movies, I have a folder for each with the name of the movie and the year of its release, eg “Willy Wonka and the Chocolate Factory (1971)”. This naming is human-readable while still being enough information for Jellyfin to find the metadata for it. Inside the folder I have the video file for the movie itself with the same name as the folder. If I have multiple versions of a movie, for example a 1080p version and a 2160p (4k) version, I’ll add a suffix to the name, so for example “Willy Wonka and the Chocolate Factory (1971) - 2160p.mkv”. I then put the special features in subdirectories which correspond to the type that they are. I find classifying special features to be of a judgement call in many cases, and ultimately whatever organization works for you is best.
A complete example for how I organize a complete title is as follows:
movies/
└── Willy Wonka and the Chocolate Factory (1971)/
    ├── Willy Wonka and the Chocolate Factory (1971) - 1080p.mkv
    ├── Willy Wonka and the Chocolate Factory (1971) - 2160p.mkv
    ├── behind the scenes/
    │   ├── Pure Imagination - The Story of Willy Wonka & the Chocolate Factory.mkv
    │   └── Tasty Vintage.mkv
    ├── extras/
    │   └── 4 Scrumptious sing-along songs.mkv
    └── trailers/
        └── Theatrical Trailer.mkv
For TV Shows, I have a folder for each show with the show name, then season subfolders containing episodes named with the standard ShowName_S##E##_EpisodeName format. Show-level extras go in an extras folder at the show level, while season-specific extras can go in an extras folder within each season folder.
shows/
└── Batman - The Animated Series/
    ├── extras/
    │   ├── Arkham Asylum.mkv
    │   ├── Batman - The Legacy Continues.mkv
    │   ├── Concepting Harley Quinn.mkv
    │   ├── The Heart of Batman.mkv
    │   └── ...
    ├── Season 1/
    │   ├── Batman - The Animated Series_S01E01_On Leather Wings.mkv
    │   ├── Batman - The Animated Series_S01E02_Christmas with the Joker.mkv
    │   ├── Batman - The Animated Series_S01E03_Nothing to Fear.mkv
    │   ├── ...
    │   └── extras/
    │       ├── A Conversation with the Director - On Leather Wings.mkv
    │       ├── A Conversation with the Director - Christmas with the Joker.mkv
    │       └── ...
    ├── Season 2/
    │   ├── Batman - The Animated Series_S02E01_Sideshow.mkv
    │   ├── Batman - The Animated Series_S02E02_A Bullet for Bullock.mkv
    │   └── ...
    └── Season 3/
        ├── Batman - The Animated Series_S03E01_Holiday Knights.mkv
        ├── Batman - The Animated Series_S03E02_Sins of the Father.mkv
        └── ...
Parental Controls
I have small children and not all content in my media library is appropriate for them. No one wants their kids getting nightmares from accidentally stumbling across Saving Private Ryan.
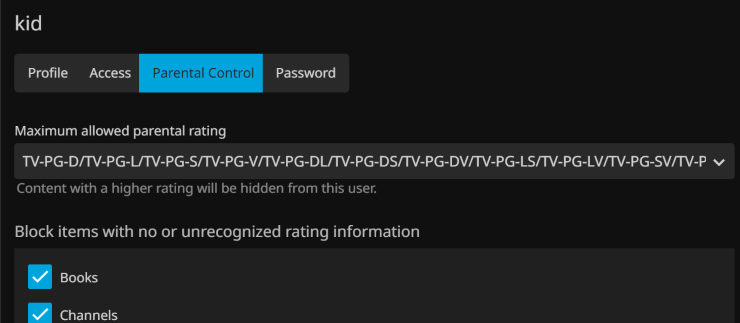
Luckily it’s very easy to set up parental controls in Jellyfin. When editing the settings for their user, there is a Parental Controls tab which allows you to select from different sets of ratings.
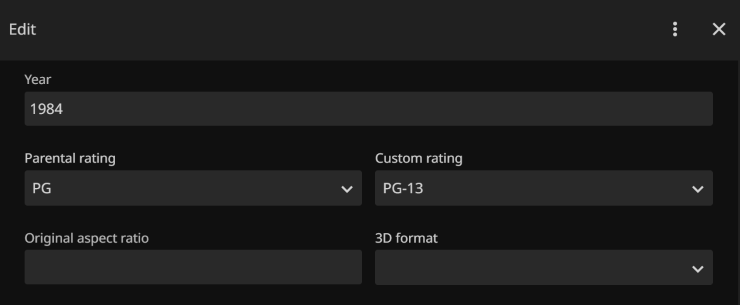
You can also fine-tune by overriding the ratings for specific content. For example, the PG-13 rating did not exist until the 80’s so some movies were rated PG at the time but would be rated PG-13 now. To do this, you navigate to the movie, click the three dots, and select “edit metadata”. You can then set a custom rating.
You can even take this to the extreme and use the “Approved” custom rating to manually curate every piece of media you want to make available. Personally I find that approach to be overkill though and trust the MPA for the most part, as well as just generally supervise my kids when they’re watching TV.
Legal Disclaimer and Ethics
Skip or ignore this section if you don’t care about or disagree with my opinion on this subject. It is, after all, just my opinion.
I am not a lawyer so cannot comment on the legality of ripping Blu-ray discs where you live. Even in terms of ethics, I do not claim to be the arbiter of what is right or wrong nor can I judge others for their choices or what they believe to be ethical. I can, however, explain how I personally operate within my own ethics.
I have two primary rules for myself. First, I am fine with making a digital copy of physical media that I own for personal use within my own home. I make sure that I do in fact own a disc for every movie I have on my NAS. I also choose not to make my Jellyfin server accessible to anyone outside my household; only myself and my immediate family members access these copies. These rules meet my personal bar for what is ethical, but again it is a personal choice and I am not one to judge others for having a different opinion.
Conclusion
That’s it! With this setup, you’ll have your own personal streaming service with content you truly own, at quality that rivals or exceeds any streaming platform. Happy ripping!
Disclosure: As an Amazon Associate, I earn from qualifying purchases. This adds no extra cost to you, but helps me in a small way if you choose to purchase a product linked in this post.