Setting up a Security System with Home Assistant
Update Jun 3, 2020: Adjusted for breaking changes in version 0.110.
I’ve been dabbling with home automation for a while, and one thing that bugged me was that my home security system didn’t integrate with it at all. Doors and windows being opened seemed like something I would want to be available to me in Home Assistant, but the ADT system I had was completely closed despite being wireless. Instead of duplicating the sensors, I decided to ditch ADT and just completely do it myself. As a bonus, it’s saving me $50/month (although to be fair they offered a substantial discount to entice me to stay upon cancelling).
Devices
Admittedly, there was a bit of an up front cost in buying all the devices to replace my existing ones, especially since I decided to go with Z-Wave devices for my home, which are a little more expensive than Zigbee ones. However, this can be mitigated by prioritizing the important sensors first and adding on over time. Also, for me at least it more than made up for the cost in just a few months after cancelling my monthly bill with ADT.
My original security system was pretty basic, so I just ended up mimicking it. The devices I bought were:
- Aeotec Door/Window Sensors - At the time I bought the Gen5 ones which no longer seem available, and the Gen6 ones looks pretty bulky and expensive. Any basic window/door sensor would do here though.
- GoControl Glass Break Detector - The living room and kitchen are connected and have quite a few windows, so my old system had a glass break sensor which I used this to replace. Honestly I’m not sure how well this works, and in general I had a hard time finding a Z-Wave glass break detector. Looking back it may have been better to bite the bullet and just buy a few extra window sensors instead of this.
- Aeotec Siren - This thing works great. It’s quite loud and has a battery backup so you can’t just unplug it from the wall to get it to stop. It’s configurable enough too in terms of loudness and the tones it uses. I originally was hoping to use it as a door/window chime for when the alarm was not set, but it doesn’t quite work for that and I went with a different solution instead.
Some relevant devices I already had before this project are:
- Raspberry Pi 3 B+ - Runs Home Assistant
- Aeotec Z-Stick - Hub for my Z-Wave devices, plugged into the Pi
- Schlage Z-Wave Connect Locks - These work great. They’re battery powered but last at least a year. Made by a company specializing in locks and they feel solid and secure.
- Alexa Echo Dot - Used with the alexa_media_player custom component for voice notifications.
Home Assistant configuration
Home Assistant has a built-in Manual Alarm Control Panel which allows you to display a keypad in the lovelace UI as well as use automations to arms and disarm the alarm.
The basics
The alarm configuration is a little complicated, but basically it’s just a state machine. At any given time, the alarm can be disarmed, arming, armed_home, armed_away, pending, or triggered. The difference between armed_away and armed_home is that armed_away gives you some time to leave the house and also some time to disarm when you come back. I chose to give a 2 minute delay when leaving the house and a 1 minute delay when coming home. The arming and pending states are what it’s in during these delays. disarmed and triggered should be obvious; they’re when the alarm is turned off and “the alarm is sounding”, respectively.
You can use my alarm_control_panel configuration as a starting point, which looks like this:
alarm_control_panel:
  - platform: manual
    name: Alarm
    code: !secret alarm_control_panel_code
    # Don't require the code to arm the alarm
    code_arm_required: false
    # Arm again after triggering
    disarm_after_trigger: false
    # Delay from arming and becoming armed, eg. to leave the house.
    arming_time: 120
    # Allow time to disarm the alarm before it triggers, eg. when arriving home
    delay_time: 60
    # Amount of time the alarm is triggered for
    trigger_time: 600
    disarmed:
      # Ensure the alarm can never be directly triggered when disarmed
      trigger_time: 0
    armed_home:
      # Leave no delay between arming -> armed
      arming_time: 0
      # Leave no delay between pending -> triggered
      delay_time: 0
Now that you have the alarm configuration, you need to set up some automations to actually handle transitioning between the states. For example, if the alarm is armed and a door opens, you want to trigger the alarm. Also one the alarm triggers, you want to set off sirens, send notifications, call the police, etc.
Note that you do not want to directly start sending notifications and turning on sirens when the alarm is armed and a door is opened. You may be in armed_away state and should give some time to disarm the alarm. Thus is best to separate the automation to trigger the alarm and the automation to take actions when the alarm is triggered.
Here are some basic automations to get you started. Note that I use a separate automations.yaml file, so your tabbing may be off and you need the automation: header if you have it directly in your configuration.yaml.
- alias: "Alarm - Trigger when sensors go off"
  trigger:
    - platform: state
      entity_id: binary_sensor.front_door
      to: "on"
    - platform: state
      entity_id: binary_sensor.garage_entry
      to: "on"
    # Add more triggers here for other doors/windows
  condition:
    # Only trigger the alarm if it's armed
    condition: or
    conditions:
      - condition: state
        entity_id: alarm_control_panel.alarm
        state: armed_home
      - condition: state
        entity_id: alarm_control_panel.alarm
        state: armed_away
  action:
    service: alarm_control_panel.alarm_trigger
    entity_id: alarm_control_panel.alarm

- alias: "Alarm - Triggered"
  trigger:
    - platform: state
      entity_id: alarm_control_panel.alarm
      to: "triggered"
  action:
    - service: homeassistant.turn_on
      entity_id: switch.siren

- alias: "Alarm - Disarmed"
  trigger:
    - platform: state
      entity_id: alarm_control_panel.alarm
      to: "disarmed"
  action:
    # Turn off the siren once the alarm is disarmed
    - service: homeassistant.turn_off
      entity_id: switch.siren
Personally, I don’t have the Z-Wave locks auto-arm/disarm the alarm, although you could do that if you wish.
Finally, just add an Alarm Panel card to your Lovelace which points to your alarm_control_panel.
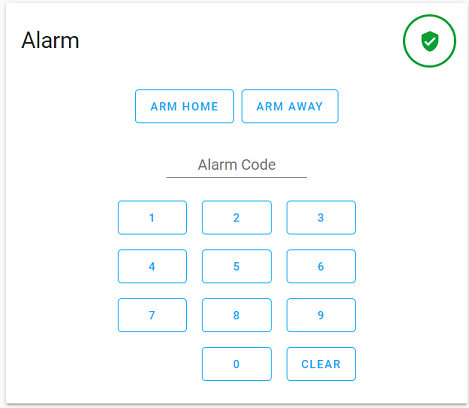
And that’s it! At least for the basics. A few more pieces were needed to fully replace my old system and pass the “wife test”.
Monitoring with Noonlight
One of the primary advantages to paying a security company is that if your alarm goes off, there’s a real human being who will notice and call you to make sure everything is OK, and call the police if it’s not.
Luckily, there’s a company out there called Noonlight which will do that for free! I’ve tested the system many times, usually accidentally, and they’re incredibly quick (sometimes TOO quick for my many false alarms…) to call to make sure everything is OK. I honestly don’t know how they make money.
To configure this, you’ll first need to add Noonlight to your IFTTT account, and enable the IFTTT integration in Home Assistant for sending events. For the latter, the configuration should look like:
ifttt:
  key: !secret ifttt_key
Then, to set up the IFTTT applet, you’ll want to use Webhooks “Receive a web request” as the trigger, and Noonlight’s “Trigger alarm with address” as the action. Be sure to note the Webhooks event name you use. Im my case, I use “alarm_triggered”.
Now you simply need to add this IFTTT trigger action with the correct event name to your alarm trigger automation. Adding to the example used earlier, it looks like this:
- alias: "Alarm - Triggered"
  trigger:
    - platform: state
      entity_id: alarm_control_panel.alarm
      to: "triggered"
  action:
    - service: homeassistant.turn_on
      entity_id: switch.siren
    # Trigger IFTTT applet to notify Noonlight
    - service: ifttt.trigger
      data_template:
        event: "alarm_triggered"
Voice warnings
My old alarm system would emit an audible tone when we came home to warn us that the alarm would be triggering within a minute or two. Originally when I replaced this with the solution described above, my wife and I would forget about it sometimes and then suddenly the siren would go off.
To help remind us, I implemented a warning system when we come home which announces through our Alexa Dot.
To get Alexa voice announcements, I use the alexa_media_player custom component.
I decided to get a little fancier with the automation and it warns multiple times during the delay period. To do this I added a timer. I also have an automation to announce when doors and windows open, so I had to add some delays in the warning so that those other automations would run first and not cause Alexa to get interrupted.
Basically when the alarm goes from armed_away to pending, I delay for 5 seconds (for the other announce automation not shown here), announce that the alarm needs to be disarmed, then start a timer. That timer is set for 10 seconds and when it triggers it repeats the warning a bit more forcefully and will continue to repeat every 10 seconds until the alarm is disarmed.
Here’s what my revised automations from above look like with these additions.
- alias: "Alarm - Pending"
  trigger:
    - platform: state
      entity_id: alarm_control_panel.alarm
      from: "armed_away" # No need for armed_home, there's no pending delay there.
      to: "pending"
  action:
    - delay: 00:00:05 # Small delay for "Announce" automation to run.
    - service: notify.alexa_media
      data:
        target:
          - media_player.kitchen
        data:
          type: announce
        message: "Please disarm the alarm"
    # Start a timer to repeat the warning
    - service: timer.start
      entity_id: timer.alarm_pending

- alias: "Alarm - Pending Repeat"
  trigger:
    - platform: event
      event_type: timer.finished
      event_data:
        entity_id: timer.alarm_pending
  condition:
    condition: state
    entity_id: alarm_control_panel.alarm
    state: pending
  action:
    - service: notify.alexa_media
      data:
        target:
          - media_player.kitchen
        data:
          type: announce
        message: "Disarm the alarm now!"
    # Restart the timer
    - service: timer.start
      entity_id: timer.alarm_pending

- alias: "Alarm - Disarmed"
  trigger:
    - platform: state
      entity_id: alarm_control_panel.alarm
      to: "disarmed"
  action:
    # Turn off the siren once the alarm is disarmed
    - service: homeassistant.turn_off
      entity_id: switch.siren
    # Stop the warning repeat timer
    - service: timer.cancel
      entity_id: timer.alarm_pending
The timer looks like this (directly in configuration.yaml).
timer:
  # Used to repeat notifications that the alarm needs to be disarmed
  alarm_pending:
    duration: "00:00:10"
Mounted alarm panel
The final step in this project was to set up a wall panel so that we didn’t have to use our phones to disarm the alarm.
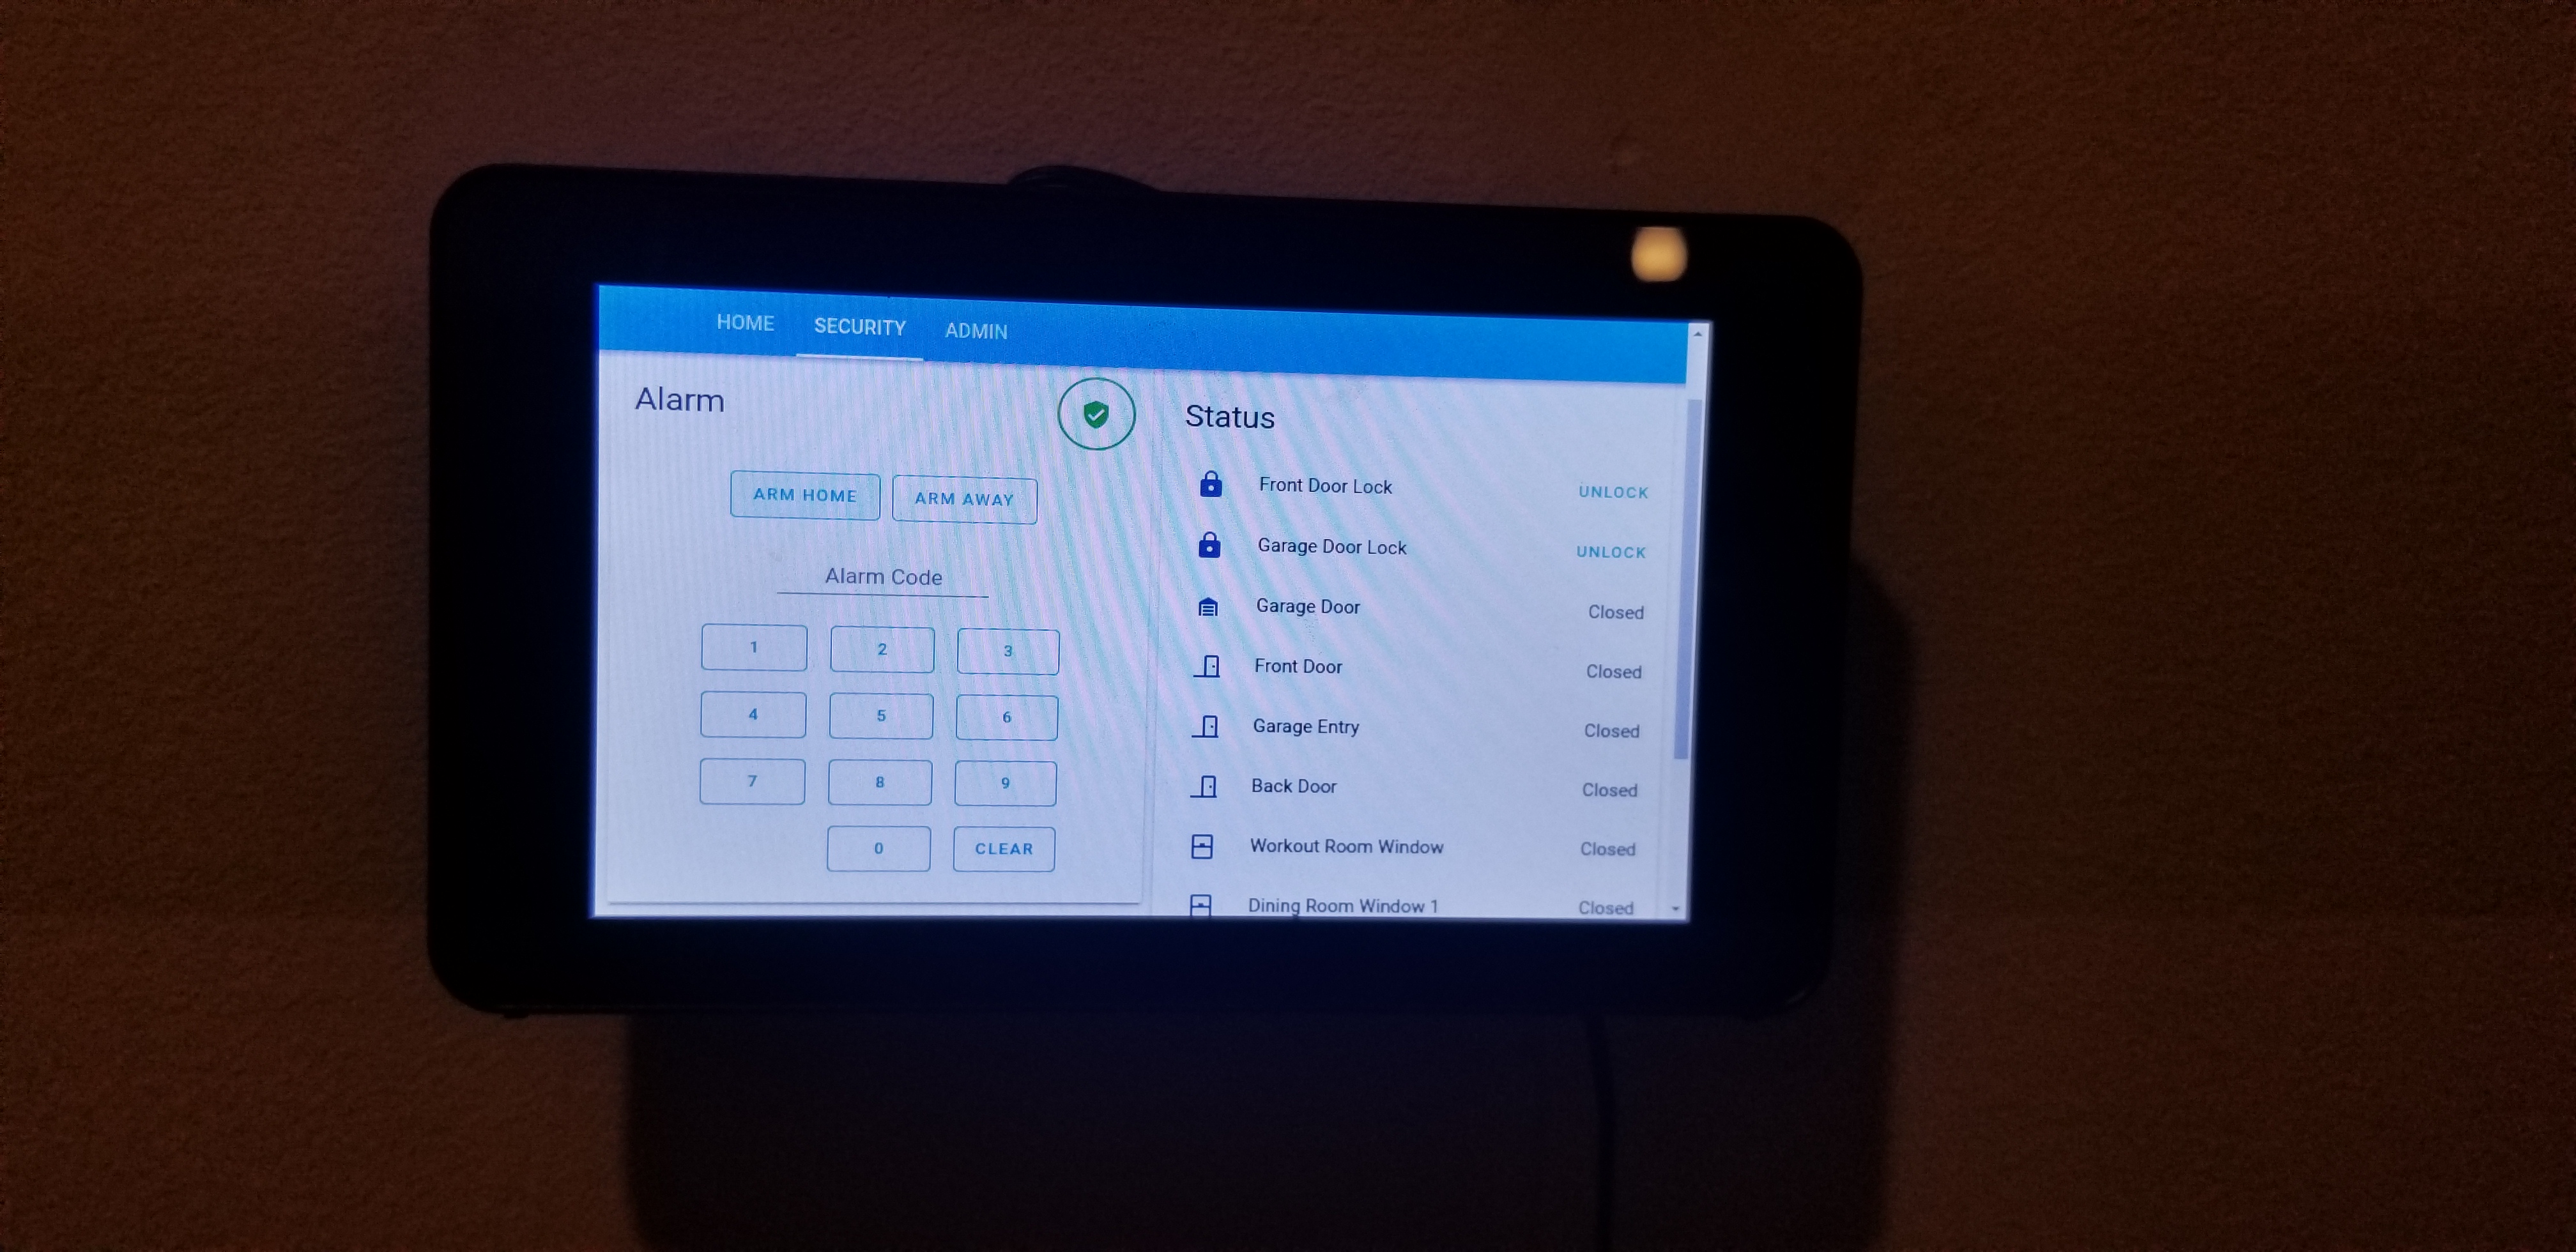
For this, I bought another Raspberry Pi 3 B+, as well as a touch screen Display and touch screen Case. Mounting a tablet probably would have been just as easy and cheaper if I already had an old one lying around, but I didn’t.
There are plenty of guides out there for setting up a Raspberry Pi in kiosk mode, and I honestly wouldn’t consider myself an expert in this area, but the gist is that I installed Raspbian Lite, setup ssh for easy remoting, installed chromium-browser, and added the following to ~/.config/lxsession/LXDE/autostart:
# Prevent screen blanking
@xset s off
@xset -dpms
@xset s noblank

# Ensure chromium thinks it shut down cleanly, even if it didn't to prevent tab restore warnings.
@sed -i 's/"exited_cleanly": false/"exited_cleanly": true/' ~/.config/chromium/Default/Preferences
@sed -i 's/"exit_type":"Crashed"/"exit_type":"Normal"/' ~/.config/chromium/Default/Preferences

# Launch the web browser in kiosk mode
@chromium-browser --kiosk --disable-translate --noerrdialogs --disable-pinch https://<url-to-my-home-assistant>/lovelace/1
Note the url used when launching chromium. I used my external hostname so that chromium doesn’t complain about the SSL cert, but I use a Pi-hole to redirect that host to the local IP anyway so it’s not actually calling externally. There might have been an easier way to bypass the cert error and use the local IP directly, but this worked for me. Also note that the /lovelace/1 path is so that it shows my 2nd Lovelace tab, which is the one I have the alarm panel card on.
Upon first boot you’ll have to log in, so be sure to attach a keyboard and mouse before mounting. I set up a separate user in Home Assistant to log into the alarm panel so that it didn’t run as my user, an Administrator (although Home Assistant doesn’t have very granular permissions; maybe in the future). And although I haven’t set it up yet, now that Home Assistant has multiple Lovelace dashboards, I could easily add a specific dashboard for this scenario.
Disclosure: As an Amazon Associate, I earn from qualifying purchases. This adds no extra cost to you, but helps me in a small way if you choose to purchase a product linked in this post.